Stereo Surround Trim and Visor
thingiverse
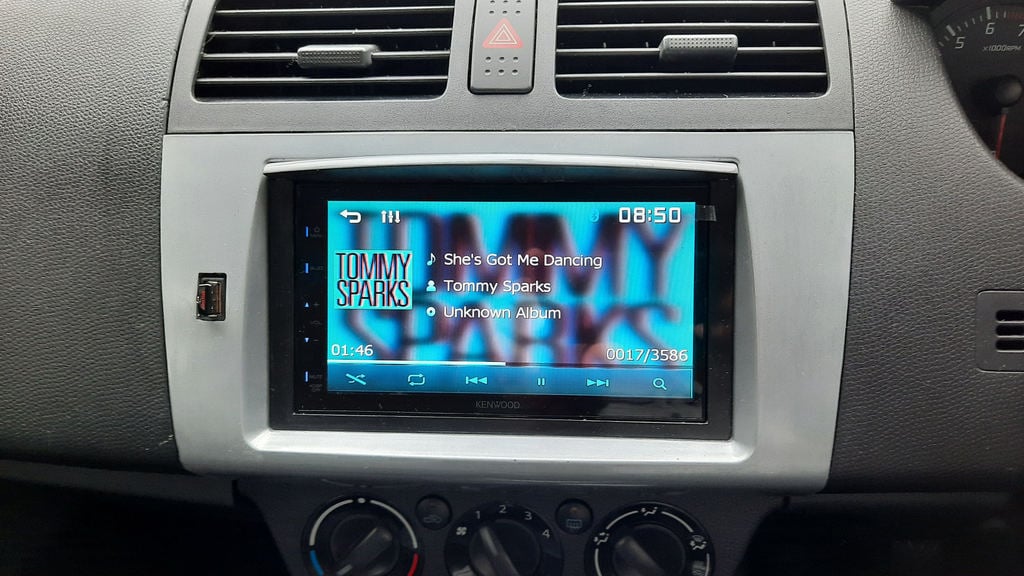
I recently equipped my car with a slightly more modern touch screen head unit. But, once again, my 2009 Suzuki Swift turned out to be a little more complicated than just whacking it in and wiring it up. Modern dashboard design trends integrate the head unit into the dash in a way that it is an integral part of the design. Apart from looking better than the stereos of yore, it's created a healthy market for a whole range of car-specific fascia adaptors, designed so that a standard aftermarket unit can properly fill the unique shape of the original manufacturer's audio equipment. But in the case of my Swift, the fascia adaptor takes an unusual turn: The head unit bolts directly to the fascia trim, instead of using the metal cage customarily used to install a head unit. Indeed, the hole in the fascia trim is slightly (a millimetre or two) too short to allow a cage to be installed in the mounting hole anyway. Why it's done this way is open to all sorts of speculation. But the net result is that the trim bezel supplied with most aftermarket head units won't fit into the well for the stereo. So the head unit would have to be fitted proud of the dash in order to accommodate it. Whilst this doesn't affect function, it means that the stereo would look stuck on as an afterthought despite the custom fascia plate on which you've just spent your hard earned dosh. It's perfectly possible to mount the head unit deeper into the well that accommodates the double-DIN aperture. You just have to make a custom bezel trim to fit the non-standard opening... And (smug-mode engaged) as the possessor of a 3D printer, this is no trouble at all! On my previous cheapo Chinese head unit I printed a plain and simple rectangular trim that dropped into place, and filled the hole nicely. But, with my new stereo, I decided to be a little more adventurous and added a visor to the trim. Not only would this add to the "original equipment" feel, but it was also a practical solution to a problem I'd encountered on the previous Chinese head unit: Namely that stray sunlight often created irritating reflections on the screen - inevitably whenever the reversing camera was in use! Adding a visor would definitely reduce the opportunities for this to happen. I originally designed the bezel and trim as a one-piece unit. But this created print support complications. So I revised the design to separate it into two parts. These were intended to be glued before installation but, as is often the case; glue proved unnecessary. As this was an item that was going to be a high visibility feature of the dash, I took a little time and trouble to get the finish right before fitting. I sanded the visible faces to get them as smooth as possible, finishing up with a Scotchbrite and then some abrasive brass polish (Brasso in the UK). I then gently keyed it with a fine wet and dry, before thoroughly cleaning and degreasing with white spirits followed by isopropyl alcohol (IPA). I bought a silver spray paint that was purported to be suitable for use on plastic. The spraying worked out well. But on handling it the next day, I found my fingerprints would mark the surface, and wouldn't wipe off. I got the IPA out again, thinking this would remove the paint entirely. But, in one of those fortuitous accidents, it only took away a thin surface layer! This took care of the fingerprints nicely, yet exposed a far more solid paint base beneath. A gentle polish with common or garden Pledge, and it was back to being shiny shiny, but now with a fingerprint resistant surface. Now all that was necessary was to whack the trim into place. I was gratified (and not a little smug) to find it went straight in, first time, with no fettling needed. So there we are. I have a head unit install that doesn't stand out, has a practical visor, and ties in beautifully with the overall aesthetic of the dashboard. Niiiice! Some of you may have noticed the rather handy USB port to the left of the head unit. The full story on this is detailed here: https://www.thingiverse.com/thing:4545018 Happy printing, folks!
With this file you will be able to print Stereo Surround Trim and Visor with your 3D printer. Click on the button and save the file on your computer to work, edit or customize your design. You can also find more 3D designs for printers on Stereo Surround Trim and Visor .