STERLING MAIN SPRING FORMING TOOL
prusaprinters
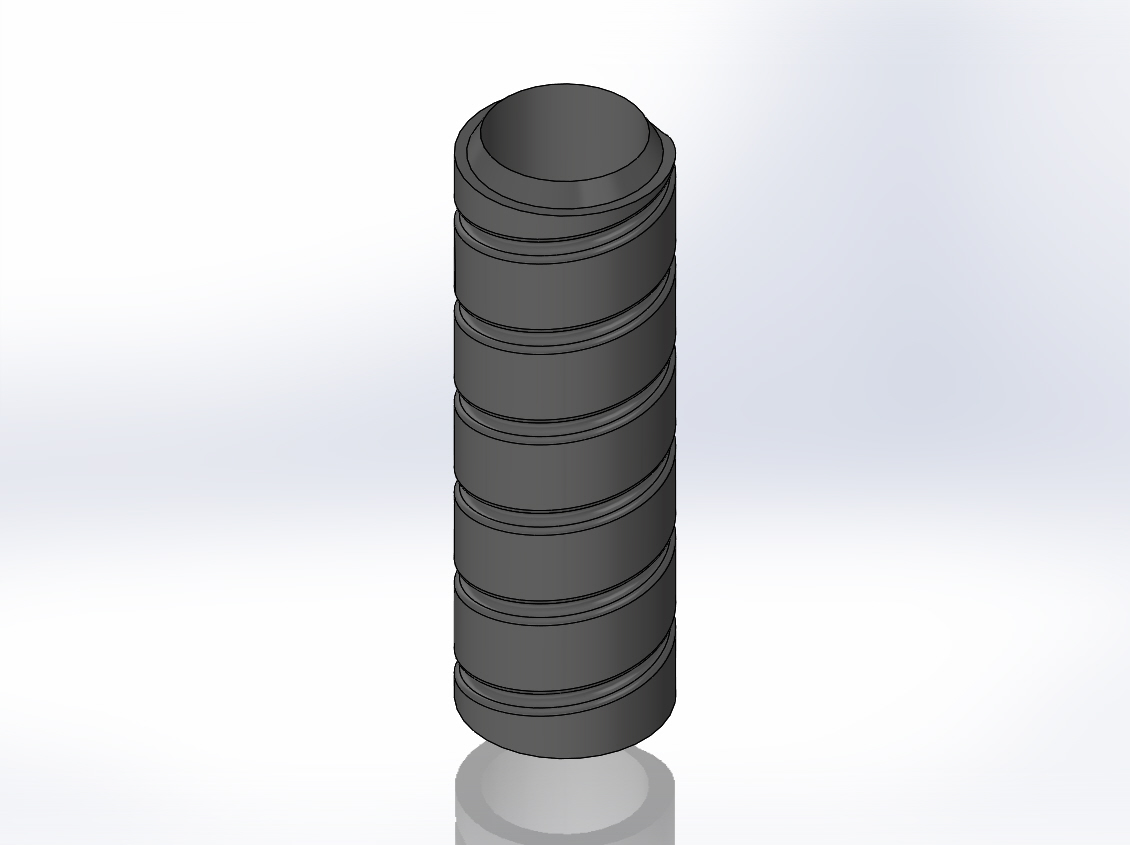
<p>My Sterling model included a printed spring. While the model is accurate, printing and post-processing a printed spring is difficult. Many who have built my model have foregone the printed spring in favor of a formed steel wire replica. The challenges here are (1) getting the inside diameter correct so that it mates properly with the bolt, and (2) getting the pitch between the coils uniform. Unless you have some fancy equipment, you will never get the 1" [25,4mm] inside diameter right by hand wrapping around a 1" dowel. When released, the wire will spring back to a slightly larger diameter. If through trial and error, you can find a dowel or pipe with a slightly smaller diameter that gives you the correct formed dimensions, you still have the issue of setting the pitch and angle of the coils. Even the best attempts can still look a little wonky.</p><p>Most people will use something like coat hanger wire (13 gauge) or twist wire from a big box store. Neither of these is hardened steel, suitable for forming functional springs, but that's OK. We're not creating a real Sterling. It should be noted, however, that if you treat a soft steel spring like the real thing and rack the bolt fully to the rear, it will most certainly deform. A real sterling spring measures about 1,7mm or 0.07" diameter. The coat hanger measures 0.09" [2,3mm]. 14 gauge steel wire from the big box store measures 0.08" [2,0mm], 15 gauge measures 0.07" [1,7mm] , and 16 gauge measures 0.06 [1,5mm] ". So, 15 gauge, right? Unfortunately, the big box stores do not stock odd numbered wire gauges. I selected 14 gauge, as it will be less likely to deform with time and use than 16 gauge.</p><p>My idea was to take a haphazardly formed helix of slightly smaller inside diameter, and stretch it to the correct diameter while simultaneously making the helix pitch and angle uniform. I give you the 3D printed Sterling main spring forming tool...</p><p><a href="https://i.imgur.com/j04a7Tb.jpg">https://i.imgur.com/j04a7Tb.jpg</a></p><p>It is simply a grooved shaft set to the correct diameter and pitch of a Sterling main spring. The shaft is hollow, allowing you to slip it over a section of schedule 40 1/2" PVC pipe and glue in place, to give you more gripping surface and leverage. The pipe is also used to form the initial helix that will become the finished spring. Here is a photo of the assembled tool and pipe. The tapered end is on the right.</p><p><a href="https://i.imgur.com/BKRcKwH.jpg">https://i.imgur.com/BKRcKwH.jpg</a></p><p>I drilled a 1/8" diameter hole through the pipe near the end. Exact distance is not important, but make sure you have at least 7 or so inches between the hole and the forming tool. Notice I have drawn an arrow on the pipe indicating the direction of wrap. The Sterling spring is a RH helix. If you hold the spring horizontally in your hand, the part of the helix in front slants like this \ \ \ \ \ \ \ \ \ \ \ \ \ \ \ \ . </p><p><a href="https://i.imgur.com/oKUDLV6.jpg">https://i.imgur.com/oKUDLV6.jpg</a></p><p>Cut 60" of 14 gauge steel wire. This is a little more than you will need, but we will trim the ends. Straighten the wire to a reasonable degree, but it doesn't have to be perfectly straight. Thread the wire through the hole in the shaft. Allow 1/4" or so to protrude from the other side. Sharply bend the wire in the direction of the arrow and begin to wrap the wire around the pipe. Grasp the wire firmly close to the pipe and rotate the shaft, keeping tension on it until the entire wire has been wrapped. At this point, the pitch is not important. What is important is that you get a good tight wrap. There will be a small length at the end you won't be able to press against the shaft. That's OK. You may notice when you release the helix, the inside diameter is slightly larger than the pipe. Schedule 40 1/2" PVC pipe has an outside diameter of 0.84". The formed helix will measure in the neighborhood of 0.87" if you get a good tight wrap.</p><p><a href="https://i.imgur.com/zf9As6g.jpg">https://i.imgur.com/zf9As6g.jpg</a></p><p>Take a pair of needle nose pliers and grasp the straight end of the helix, bending 1/4"-3/8" of it 90 degrees. Press the pliers against the pipe while doing this to avoid distorting as much of the helix as possible. This will be the back end of the spring.</p><p><a href="https://i.imgur.com/paZl8Zg.jpg">https://i.imgur.com/paZl8Zg.jpg</a></p><p>Use wire cutters to clip the opposite end free from the pipe. Take your needle nose pliers and bend about 1/8" of the clipped end slightly upward. This will be the lead end of the spring.</p><p><a href="https://i.imgur.com/RUeSdFF.jpg">https://i.imgur.com/RUeSdFF.jpg</a></p><p>Remove the spring from the pipe and re-seat it with the lead end toward the forming tool. Seat the lead end in the groove and twist the shaft until the helix begins to follow the groove. Do this slowly, as the groove diameter is slightly larger than the helix and we are stretching the inside diameter to the correct 1" dimension.</p><p><a href="https://i.imgur.com/mw7RVrm.jpg">https://i.imgur.com/mw7RVrm.jpg</a></p><p>Grasp the helix, allowing part of your hand to rest against the 90 degree bend on the end, and push toward the forming tool as you twist the shaft with the opposite hand. Here, you can see how the helix is being stretched and formed around the tool.</p><p><a href="https://i.imgur.com/ARrZyCD.jpg">https://i.imgur.com/ARrZyCD.jpg</a></p><p>Keep twisting with your hand around the helix until the entire length has been threaded around the tool. Use the 90 degree bend for leverage to push the last section that can't be gripped with your hand. Be careful not to apply too much pressure and distort the back end.</p><p><a href="https://i.imgur.com/C0M4aDW.jpg">https://i.imgur.com/C0M4aDW.jpg</a></p><p>Clip any distorted part of the spring from the ends. You have a little extra length for that purpose. When done, you should be able to count about 17 coils.</p><p><a href="https://i.imgur.com/yK5eGY9.jpg">https://i.imgur.com/yK5eGY9.jpg</a></p><p>There you have it, a perfectly (for our purposes) formed Sterling main spring that mates beautifully with the bolt.</p>
With this file you will be able to print STERLING MAIN SPRING FORMING TOOL with your 3D printer. Click on the button and save the file on your computer to work, edit or customize your design. You can also find more 3D designs for printers on STERLING MAIN SPRING FORMING TOOL.