Sticky Note Spin Art Machine
thingiverse
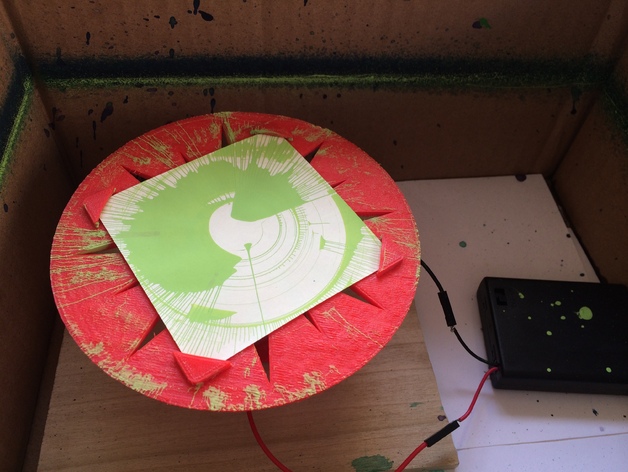
This is a rebuild of a project I built together with hot glue, bottle caps, and cardboard back in high school. I used to take it babysitting and kids would go wild. To get started, just stick a post-it note on the top plate, tuck the corners in, attach the motor leads to a power source and switch, and you're ready to paint. To build this, you need to print one of the spinner tops, a motor shaft coupling, and a motor mount. Check out Instructions for more details (part list, dimensions). Instructions All parts can be printed without support. Here are my print settings: FlashForge Creator Pro ABS, 230C Heated bed, Blue Tape Electronic Parts List DC Motor (found in a box in the shop, but couldn't find part number online) Batteries Switch Battery Holder (sometimes comes with switch) Wires My Build: Nichibo 232022 DC Motor 4 AAA battery holder with switch (Radio Shack) 4 AAA batteries 2 jumper wires 6 x 6" board to attach motor mount 4 wood screws Cardboard box to contain flying paint Motor Mount Dimensions: ID: 1.13" Height of motor holding section: 1.4" Shaft Coupling Dimensions: ID: .13" Assembly: Using Top_002, press the shaft coupling into the mating hole on the back of the spinning top piece. Add a drop of superglue if it's not a snug fit. Next, attach jumpers to the two leads of the DC motor, thread through the holes in the motor mount, and insert motor into motor mount housing. If there is significant clearance, wrap electrical tape around the motor until it fits securely. Extra vibration can make the assembly noisy. If you're going to mount the motor mount to something (recommended), do so now. You can use tape on the bottom of a box or screws/bolts/zip ties - whatever works best for you. Again, less vibration will result in less noise during use. Once the motor is secure, press the shaft coupling onto the DC motor shaft. This should be a snug fit, as you want the coupling to move with the shaft. Now that the spinner assembly is complete, run the wires out to your power and switch. Make sure this is far enough away from the spinner that you can turn it off without putting your hand in its path. If you're containing the whole assembly in a box, put the switch outside of the box for easy access. If everything is secure, load a post-it note into the top plate and turn it on! The spinner should run smoothly without excessive vibration or noise.
With this file you will be able to print Sticky Note Spin Art Machine with your 3D printer. Click on the button and save the file on your computer to work, edit or customize your design. You can also find more 3D designs for printers on Sticky Note Spin Art Machine.