Stock Ender 3 - FILAMENT FEEDER GUIDE - Dramatic Improvement In Print Quality + Speed
thingiverse
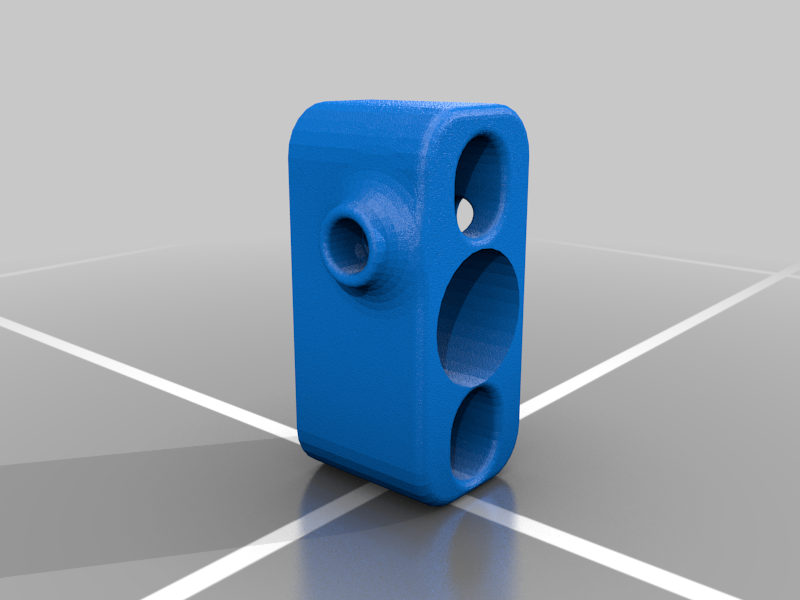
I have been experiencing MAJOR issues with underextrusion due to the SHARP angle which the filament has to cut through in order to get into the feeder assembly. Additionally, the friction against the top of the feeder guide assembly has etched a groove and ALSO permanently etched a channel in my feeder motor, causing me to need to replace it. Now that I have a new motor I decided I never wanted to deal with that again so I set about building a better feed assembly. This should be printable and installable straight from an Ender 3. This mounts directly before the feeder assembly using the two little screws which attach the X-Axis to the vertical screw rail. I simply removed the screws which attach the X-Axis to the rail, placed the printed part over the screw holes, and then re-screwed it together. There's plenty enough thread that you don't need to change your screws or anything. I then took a small (roughly 4cm) length of the stock Boden tube and stuck it in the feeder hole. After that I just threaded the filament just as before and INSTANTLY went from a struggling feeder motor to being able to print at 200% speed with absolutely ZERO loss of quality or underextrusion. The results were DRAMATIC. I have been able to print over 300% speed in some cases. TIPS : Push the Boden tube in as far as you can. It should only go about half a cm before it hits a little barrier I put in. It is important to not try to feed the Boden tube all the way through the part because the Z-axis worm screw WILL interfere. This is a design flaw of the Ender 3 itself. There is NO REASON for the Z-axis screw to be so close to the filament ... but whatever. ANOTHER TIP : There are two little washers where the screws meet the printer. They are not needed if you have this part in place, and in fact I recommend not using them. FINAL TIP : If you try to use Crazy Glue to hold your Boden tube in place you are asking for trouble. If you use the stock .4mm Boden tube that came with the printer it should fit VERY tight - no need for glue, but if you use a different Boden tube you might need to modify the print. A FRICTION fit is important. I also recommend printing at 100% infill, .16mm for maximum quality vs. strength vs. print speed.
With this file you will be able to print Stock Ender 3 - FILAMENT FEEDER GUIDE - Dramatic Improvement In Print Quality + Speed with your 3D printer. Click on the button and save the file on your computer to work, edit or customize your design. You can also find more 3D designs for printers on Stock Ender 3 - FILAMENT FEEDER GUIDE - Dramatic Improvement In Print Quality + Speed.