Stone Texture
thingiverse
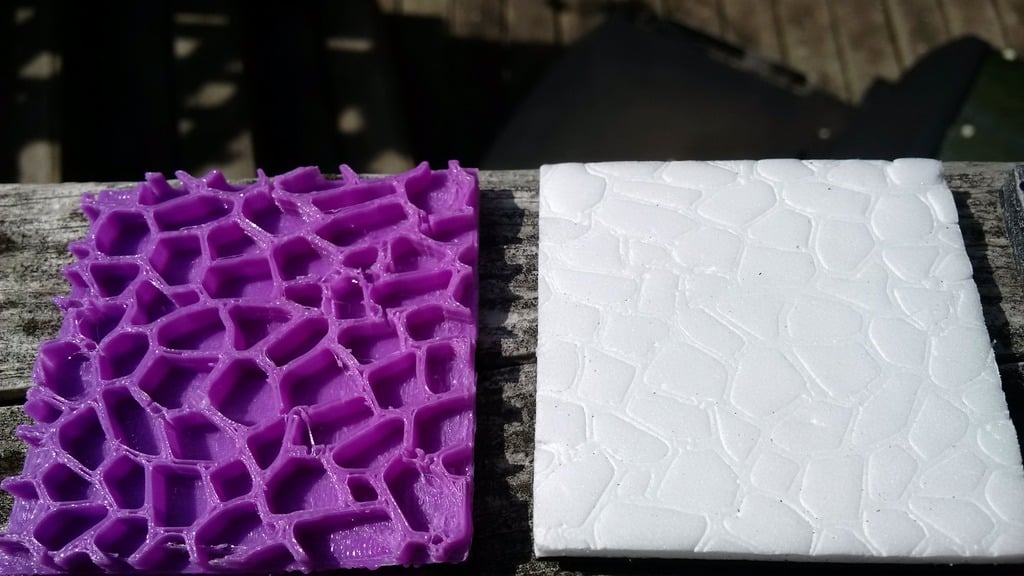
**Update 20180521** The library scaled the model down to 2 1/2" x 2 1/2", which was exactly the size of my tiles. It's time for a good old-fashioned dungeon crawl. Tile Construction: * Use a table saw to cut out 2 1/2" x 2 1/2" squares from 1/8" hardboard. * Cut Dollar Tree foam board pieces to fit and white glue them to the hardboard tiles. * When dry, flip the tile over and trim off any overhanging foam board. * Flip it over again, remove the paper, and press the texture into the surface. * Prime with ModPodge, black acrylic paint, and water mixture. * Use a sponge to apply various greys alternated with black wash applications. * Top coat with Minwax Polyurethane Satin. Dollar Tree foam board is made by Adams Plastics in the United States. The paper can be easily removed from this board, and more importantly, the inner foam is very smooth and soft, making it perfect for imprinting with a textured pattern. Another foam board (Elmer's) I bought at Dollarama has a very porous inner foam that barely shows the imprint after application. **Update 20180511** The latest model came out almost completely flat. I've rejigged it to have a 1/4" deep texture. **Update 20180505** After analyzing the model with the free version of the SuSolid plugin, I found that it had a ton of problems. I ended up buying the full version of the plugin, recreating the model (without bend), and using the tool to automatically fix the tens of thousands of errors that the model had. I'm sending off a new print to the library today. **Update 20180504** I'm getting closer. I printed the second version of the design, and it's coming out well except for the pattern inverting 1/3 through the piece. I've got an email out to the library to ask if this was a model issue or a print issue. **Update 20180503** The first iteration didn't print well. If you look at the pictures, it's the yellow 3D print. The walls were too high and too thin. The printer filled in the gaps to maintain structural integrity. In the photos, you can see my original design. (https://www.thingiverse.com/thing:2415824) It's the black 3D print. I used it to create the impression in the surface of the tile shown in the picture. Works very well but a bit hard on the thumbs when pressing into dozens of tiles. Iteration 2 I still want something with a bit of a curve because the original template is difficult to use for multiple applications. I've recreated the model with the following changes: 1) Expanded total size by 33% to 4"x4" 2) Reduced wall height to 1/16" 3) Reduced thickness of base I'll post pictures once I get the print back. **Original Post** I'm working on a process to convert 2D texture images into curved forms that can be used to apply texture to clay or foam model parts. This stone texture is actually one of the built-in textures that comes with Sketchup Make. My previous stone texture item was flat. It worked really well, but my thumbs got sore pushing it into the foam surfaces. Hoping the slightly curved surface will help make it easier to apply to surfaces. Once I've got the process solid, I'll post a tutorial.
With this file you will be able to print Stone Texture with your 3D printer. Click on the button and save the file on your computer to work, edit or customize your design. You can also find more 3D designs for printers on Stone Texture.