StrongPrint - The DIY Metal 3D Printer
thingiverse
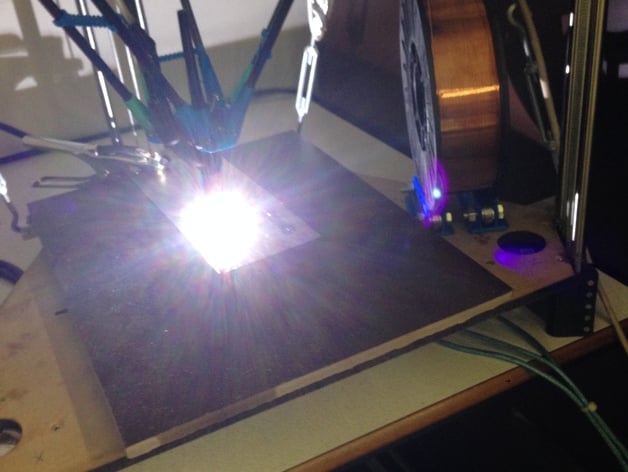
Design & Built with the support of the Artilect Fablab in Toulouse France Affordable DIY metal 3d Printer based on TIG process For more details in English: http://reprap.org/wiki/StrongPrint Pour plus de details en Francais: http://reprap.org/wiki/StrongPrint/fr Article on 3Dprint.com: http://3dprint.com/4787/3d-metal-printer-600-euros/ For the french speakers there is an article on 3D Natives:http://www.3dnatives.com/strong-print-3d-metal/ Videos: Lift arc ignition test: https://www.youtube.com/watch?v=HJQUvF1kOV0 3 Layers line test: http://youtu.be/ro6W5TgIXXA It consists of the Enlarged Rostock modified with a magnetic effector & coupes to a cheap 160Amps inverter MMA power source. Spool Holder available from Iron_Momo: http://www.thingiverse.com/thing:335662/#files Wire feed was one of the most difficult item to get right (and at the time being is not fully stabilized). What seems to work the best is to rapidly extrude & retract the metal wire to make sure it only melt where you want it to melt Wire is 0.6mm steel. for MIG. This machine is still very experimental & will evolve. Setup & test phase activities: Done: Arc ignition, process to reliably ignite the arc with the lift arc technique Done: Arc Power & speed control to identify adequate settings to perform surface fusion of the baseplate Done: initial metal deposition identify wire nozzle angle & position Done: initial metal deposition identify speed wire feed quantity. Done: Initial metal deposition identify preferencial directions Done: initial few Layers stack-up test On Going: identify adequate speed & power profile for layers stack-up On Going: manage layer height On Going: large number of layers stack-up test Printer design & make: Working: Printer movement mechanism, cinematics from Enlarged Rostock with added magnetic bearings. (a slightly larger magnet size could be beneficial) Working: Fixed torch & nozzle holder Working: Wire feed motor (Extruder) Working: Wire nozzle holder & positioning device Working: Tig torch modification Working: Power source coupled with TIG torch Working: Shielding of all wirerings to prevent electromagnetic interferences Working: Wire roll holder including brake & wire damping mechanism Working: Shilding of the control board Working: Implemented Ignition GCode command & automatic lift arc ignition Working: New 160A power source 80A was clearly to weak Working: Arduino controlled Solenoid valve for argon To Do: Arduino controlled power source To Do: HF ignition system Made in Fablab Artilect: https://artilect.fr/ Design Details to be provided on http://reprap.org/wiki/StrongPrint (Page still in construction) Instructions The Strong print Printer share the same Frame structure as the Enlarged Rostock Assembly of the machine is as simple as an IKEA furniture: For the frame: 1 - Build the three columns: Assemble the Iddler End: http://www.thingiverse.com/thing:143186 with the beraing & the bolts Assemble the Motor End: http://www.thingiverse.com/thing:71687 with the stepper motor & the pulley Assemble the Magnetic Carriage: http://www.thingiverse.com/thing:303637 with two R-15-06-06-N magnets, insert two KB-12-WW Linear Bearings in the housings & tighten the M3 bolts Assemble the Column: Fit the two Z-12-1000A smooth rods on the Motor End Insert the Magnetic Carriage with the magnets facing towards the motor side of the motorend (fix them with Epoxi not hot glue). The linear bearings shood fit smoothly on the roods with no play. Fit the Iddler End with the bearing on the same side as the puley on the Motor End. Ensure everithing is straight & square with no twist & tighten the M3 bolts of the Iddler end & the motor end Fit the T2.5 belt to the tension nut from the carriage, Attach the tehsion nut to the carriage with two long M3 bolts & nuts. pass the belt arount the puley & the bearing and fix the end to the adapted bit on the carriage sith a slight tension, which can then be ajusted with the long M3 nuts. That is it you now have three columns fully equiped. 2 - Frame Structure Bolt the reinforcment bar to the printer Bed & Top: http://www.thingiverse.com/thing:74119 Screw one by one the MotorEnd of the Three columns to the printer Bed Screw the printer top on top of the three columns Fit the tension cable to the reinforcment bars while crossing them (the tension cable are optional it rigidifies the structure which is only needed for fast printing with plastic) Apply moderate tension to the tension cable ensuring no twist or deformation is created in the frame . The structure is now fully assembled
With this file you will be able to print StrongPrint - The DIY Metal 3D Printer with your 3D printer. Click on the button and save the file on your computer to work, edit or customize your design. You can also find more 3D designs for printers on StrongPrint - The DIY Metal 3D Printer.