Switch From Aluminum to Glass... The Easy Way.
thingiverse
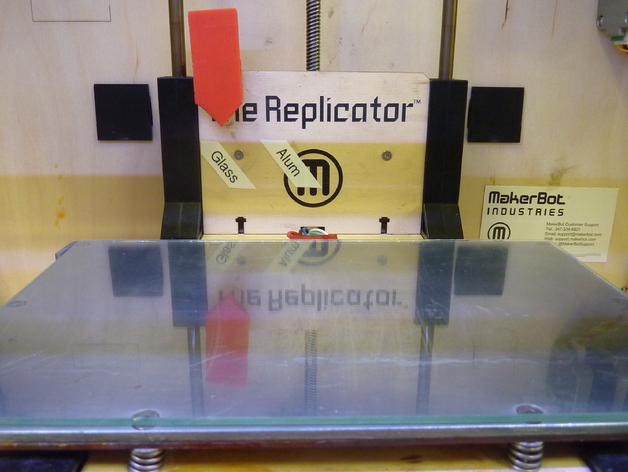
Want to print with PLA on a glass plate? Having trouble getting replicatorG to adjust the Z axis? Haven't a clue about writing code, but just want to get the job done? Read on... Instructions This is a mechanical means to change your MakerBot Replicator over to a glass plate that sits on top of the aluminum plate, and back again. The only way to currently do this, is to change the code. Very time consuming and not at all user friendly for the non-code savvy majority... Which I am one. This device works immediately and accurately. You won't need to make any modifications to your printer, so if you don't like it, you can take this out and everything will be back the way it was. I use a plastic guide that I made from a sheet of styrene which isn't included. I'll draw it up and add it to the file. The guide isn't necessary, but it helps make the slide move smoothly and holds it in place. The bad news is, the wall behind the build plate has to be removed. Getting it off is easy... The other way, not so much. The good news is, I've made fixes that make it just as easy to put together again. I'll add those files as well. The pictures show how it works: • Picture 1 is of the arrow slide in the "Glass" position (Sorry I covered up your logo there, MakerBot) • Picture 2 is the "Aluminum" position. • Pictures 3 & 4 show how simple it all is. The home position is controlled by the micro switch mounted on the rear wall. When the wood support for the plate's plastic arms (PLEEEZE make them out of aluminum, MakerBot) reaches the switch, it tells the machine the plate has reached it's home position. • Placing a sheet of glass on top of the aluminum plate raises the height of the plate, but the machine doesn't know this. What the slide does, is place a small piece of glass on top of the wood wall as well. The glass sitting on top of the wall raises the height of the wall the same as the glass sitting on top of the aluminum raises the height of the plate. The sensor reaches the switch at the same time the glass reaches the extruder heads. • The switch is printed in 2 pieces and glued together with slurry (acetone mixed with all those ABS scraps lying around - Picture 4 ). • I made the arrow LARGE because I didn't want to absently minded leave the switch in the aluminum position with a piece of glass on top of the build plate. The crash of the heads onto hard glass wouldn't be a pretty sound. That big arrow gets my attention. If you're not as bubble-headed as me, you might want to tone down on the slide size. Installation: Just place the sensor part onto the inner wall behind the build plate on your printer... Ba-Da-Bing. If you want the slide to move smoother and semi-difficult to pull out (snap-in), you can use the snap-in guide (I'll get to it ASAP). The snap-in guide will require taking the wall with the MakerBot Logo off. Pulling the part off is easy. Putting it back together again isn't so pleasant. I'll link to another Thingiverse file that fixes that. The slide isn't absolutely necessary, but it incorporates stand-offs that help with putting everything back together. A Final Warning: There were a couple of issues with the stl files I first put up on this site and there may be others I haven't come across yet. Be careful how you use this. My early versions were hitting the switch mounting, messing up the point where the plate stopped, so every time I used it, the plate moved upward a tiny bit. This one seems to work OK. The arrow is also smaller on the newest version. If your arrow sticks above the frame when your printer is in the home position, that's an early version. Watch how it works before you commit to using it. You may want to ditch the arrow completely and add a lever of your own design. If you're a bubblehead... Use a big arrow.
With this file you will be able to print Switch From Aluminum to Glass... The Easy Way. with your 3D printer. Click on the button and save the file on your computer to work, edit or customize your design. You can also find more 3D designs for printers on Switch From Aluminum to Glass... The Easy Way..