T-Lock Bayonet Joint - updated
thingiverse
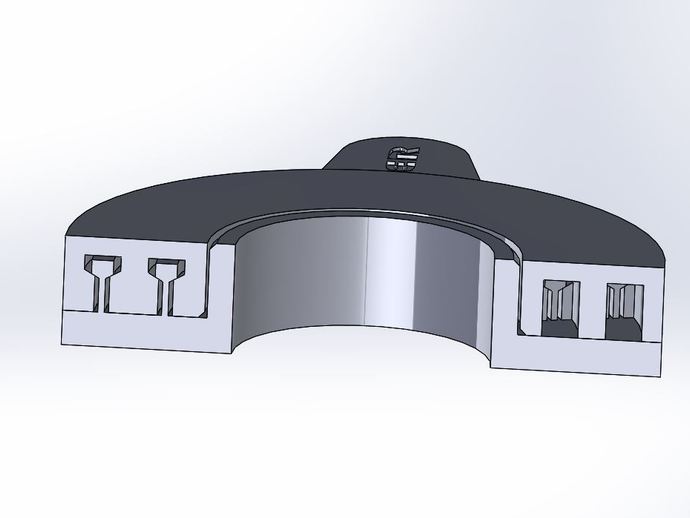
The double row T-lock style bayonet joint is a new way of connecting two complex parts in 3D printing. It's designed to be easier than using nuts and bolts, and can join even the largest objects that exceed build volume. The joint has been added with an access hole for shafts, cables, wire harnesses or even candy! It was created in Solidworks 2013 and instructions on how to create both the male and female T-lock are provided. Adjustments have been made to account for potential issues with various 3D printers. Enjoy this innovative jointing solution and don't forget to watch the video for a demonstration of how it works!
With this file you will be able to print T-Lock Bayonet Joint - updated with your 3D printer. Click on the button and save the file on your computer to work, edit or customize your design. You can also find more 3D designs for printers on T-Lock Bayonet Joint - updated.