T4 Quadcopter Drone
thingiverse
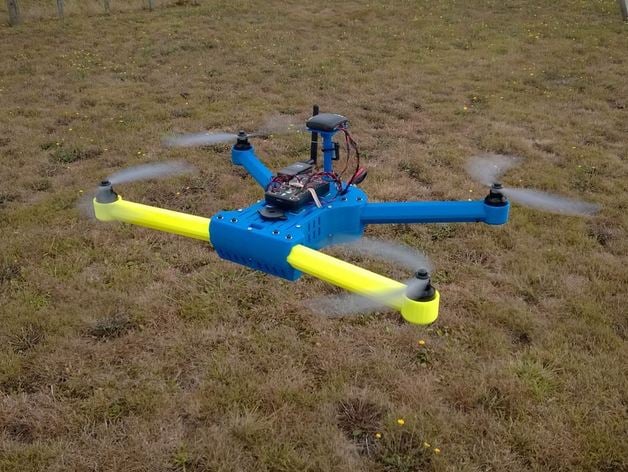
Check out the complete "T" copter family, featuring the TX8 Octocopter, T6 Hexacopter, T4 Quadcopter (10" props), T4 Quadcopter Mini 315 (7-8" props), T4 Quadcopter Mini 250 (5" props), and Tubular Crossfire 2 quadcopter. For more information on these designs, head over to the forums at DIY Drones for discussion and improvement. Features include: - 3D printable design without support - Simple assembly - Single motor arm or optional coaxial arms from T6 X8 - Strong braced tube section arms with ample room for motor wiring concealment - Designed to hold a single 3S or 4S battery in the center of rotation/thrust, with space for up to a 6000mah 3S or 4200mah 4S battery (155 x 50 x 30mm capacity) - Easy cable routing with beveled cable tunnels and cable tie mounts - Ample space to mount ESCs, even a 4-in-1 ESC for optimal cooling - Top plate designed for the new Pixhawk flight controller from 3D Robotics, but also compatible with APM, KK2, and others - Mounting holes on the "nose" that can be used to attach accessories like a GoPro vibration mount - RF "invisible" frame, unlike carbon fiber or aluminum - Total weight of 1.011 grams (excluding battery of your choice - including 3DR 880KV motors, 4-in-1 ESC, Pixhawk with GPS and telemetry) The Sketchup file is available for customization. The design was developed to find a strong "tubular" profile that can be printed reliably. The angled sections are 35 degrees to vertical, presenting only about 11mm of flat surface to minimize obstruction to airflow. Other features include a collection of ideas accumulated over the past year building various quadcopters and Y6 configurations (3D printed, aluminum, and bought frames). Videos are available for flight with Tarot gimbal and GoPro attached, flight with GoPro mounted on top (no gimbal), and tubular arm versus "conventional" arm design. The history of the design includes version updates, battery tests, and component weights and print times in the instructions. To assemble, you will need four arms (40 grams, 2-hour print each*), one body (147 grams, 8.5-hour print*), one top plate (35 grams, 1.75-hour print*), one bottom tray (52 grams, 2.9-hour print*), a battery peg, four legs (optional - long, short, or none), one GPS post and plate (optional), some anti-vibration gel and rubber bands for mounting the flight controller and camera, some foam for padding the battery compartments, double-sided adhesive foam tape for mounting other electronics, cable ties, soldering gear and connectors, four motors**, two normal propellers and two pusher propellers (10 x 4.7 slowfly), four ESC (speed controllers) or a 4-in-1 ESC, one power distribution assembly (if not using a 4-in-1 ESC), one power module or BEC, one 3S (up to 6000mah) or 4S (up to 4200mah) battery, one flight controller (3DR Pixhawk, APM, or other), one radio control receiver (and transmitter), and a GPS/compass (optional). ** The arms can accommodate any motor up to 30mm diameter (typically 28mm) with a pair of 19mm mounting holes. Due to different motor models exiting the motors from different corners, only two bolts are used to mount the motors with Locktite for stability. The default APM parameters for the 3DR Iris should work well for this quadcopter. For more information on these designs, check out the forums at DIY Drones for discussion and improvement.
With this file you will be able to print T4 Quadcopter Drone with your 3D printer. Click on the button and save the file on your computer to work, edit or customize your design. You can also find more 3D designs for printers on T4 Quadcopter Drone.