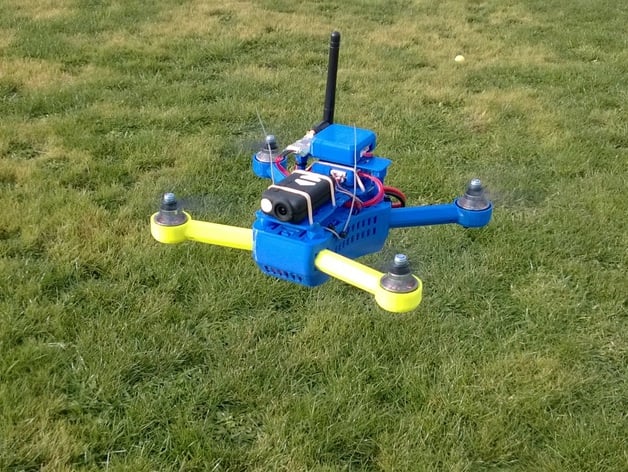
T4 Quadcopter Mini 250 Drone (5 inch props)
thingiverse
This is a mini version of my T4 Quadcopter design. It uses the same concepts but is completely redesigned to fit into the "250" class of mini quadcopters. This design is suitable for 5" props. If you are after something a little bigger there is now also the T4 Quadcopter Mini 315 that supports up to 8" props and a 2200mah battery - or just use the longer arms on this model if you don't need the battery space. Check out the whole "T" copter family: TX8 Octocopter T6 Hexacopter T4 Quadcopter (10" props) T4 Quadcopter Mini 315 (7-8" props) T4 Quadcopter Mini 250 (5" props) Tubular Crossfire 2 quadcopter I've added a post on the forums over at DIY Drones for discussing and improving these designs. Videos FPV flight by Abormor Build video playlist Build video 1: Body assembly Build video 2: Install motors Build video 3: ESCs and power Build video 4: Flight control Frame strength testing Features: completely 3D printable (without support) fully assembled frame weight less than 110 grams! strong, simple assembly with no bolts to save weight! Everything is secured using 2.5mm zip ties. includes three arm options - 24mm, 28mm, and 30mm motor cup (inside diameter). The 30mm cup has slots for 3mm motor bolts (the others are 2mm). strong braced tube section arms with plenty of room to conceal motor wiring designed for a 3S battery (1000 - 1500mah) located right in the centre of rotation/thrust (88 x 38 x 22mm capacity). plenty of space to mount ESCs - concealed but still well ventilated for cooling. top plate has space for a variety of flight controllers and a Mobius style camera. It also features 3mm mounting holes so stand-offs could be used to add an additional deck of components. Alternatively two hex holes are available to add 3D printed posts and rear upper deck. RF "invisible" frame - as opposed to carbon fiber or aluminium Sketchup file included so you can make changes to suit yourself History 2 September 2014Legs for your T4 Mini are now available.12 August 2014Version 1.4 New vibration isolating top plate option. This option is compatible with previous body and all other components. It replaces the top plate with one that has mounting points for 65 gram vibration damping balls that then connect to a new floating plate to hold your flight controller and camera. New files: T4MiniVibrationTopPlate.stl T4MiniVibrationFloatingPlate.stl Also updated Body.stl to slightly raise the arms giving a bit more strength in the arm sockets.20 July 2014 Added T4MiniArm30mm7inch.stl so that "blackdice" can experiment with bigger (7") props. Also added T4MiniArm28mm7inch.stl12 July 2014Version 1.3 Added T4MiniTrayShallow.stl as requested by "p25o1". This low profile bottom tray reduces the available height to 7mm (compared to 14mm original).(no other files have changed)1 June 2014Version 1.2 added T4MiniArm30mm.stl which has a 30mm internal cup to fit motors such as the Lumenier 2206-11. This arm also has slots for 3mm motor bolts (the others are 2mm). T4MiniBatteryPin.stl has also been updated to add a small tab to make it easier to install and remove the battery pin.(no other files have changed)31 May 2014 No changes to the files but I've just replaced my Multistar ESCs with 12amp Afro ESCs (SimonK firmware) and its made a huge improvement. Even the cheapo Multistar 1704 motors sound better. I'm about to fit some Lumenier 2206-11 motors so we'll see how that goes...26 April 2014Version 1.1 improved method for attaching top plate and bottom tray to the body. slightly increased zip tie hole sizes to make them easier to thread through. thicker top plate (2mm) with rearranged rubber band and hex post mounting points at the rear. new posts and plate added to give an additional layer for mounting the receiver or other items. new slots in the rear of the bottom tray so cables can be threaded up the back of the T4 to suit some flight controllers. Instructions Printing I printed all parts in PLA, 0.25mm layers with 40% infill, 2 shells and 3 top/bottom layers. Feel free to experiment. I didn't play around too much with the settings as these gave me a good strong result.Fitting the top plate and bottom tray Both the top plate and bottom tray are designed to slide from front to back (at 45 degrees) as they are being fitted into the body. In particular the top plate needs to be pressed firmly down onto the 8 angled guides as you slide it back. Once in place the top plate will clip onto the smaller bumps near the rear cable tie mount (just above the rear arms). Look closely at the parts and it will all become clear.Calibration test T4MiniTestSocket.stl contains a cut-down socket you can use for testing the fit of your arms before committing to the full Body print.A quick word about scaling According to Wikipedia apparently "there is no scale information [in STL files], and the units are arbitrary". There is often confusion with STL files and metric versus imperial (inches) units. I designed these parts in Sketchup using metric units and they import correctly into my slicer (which is also set to metric). If you have issues, check your application to see if has a way to select metric or alternatively scale down by a factor of 25.4. Also, the Sketchup file contents are scaled up by 1000 (attempt to solve some Sketchup quirks). I scale each component down by 0.001 before exporting the STL so they are in real millimetre sizes. What you'll need 4 arms (9 grams, 0.5 hour print each*) 1 body (40 grams, 2.75 hour print*) 1 top plate (12 grams, 1 hour print*) 1 bottom tray (14 grams, 1 hour print*) 1 battery pin (almost nothing, real fast) 2 posts (optional) 1 post plate (optional) *times were recorded on my Makergear M2 printer which has a 0.35mm nozzle and was printing at 4500mm/min. ...and "hardware"... 2,5mm (wide) zip ties (approx 100mm long) some foam for padding the battery compartments. I ended up using self adhesive window draft-stop tape from my local DIY store. some Kyosho Zeal Gel or similar anti-vibration gel and rubber bands for mounting the flight controller and camera. double sided adhesive foam tape (for mounting other electronics) soldering gear and connectors to suit your electrical bits ...and stuff to make it fly... I pinched most of the gear from one of these ARF kits ...the quality is a bit average but it flies. UPDATE: 12amp Afro ESCs (SimonK firmware) made a big improvement. UPDATE: I'm now running Lumenier 2206-11 motors and Gemfan 5x3 propellers. I added a KK2 flight controller (because I had an old one lying around). There are probably better options but I haven't investigated yet. You'll also need a Radio control receiver (and transmitter) (eg a Taranis) The X8R receiver really is too big for this size model but it was all I had here so that's what I used. If your new to RC copters then the ArduCopter wiki is a great place to find out everything you need know.
With this file you will be able to print T4 Quadcopter Mini 250 Drone (5 inch props) with your 3D printer. Click on the button and save the file on your computer to work, edit or customize your design. You can also find more 3D designs for printers on T4 Quadcopter Mini 250 Drone (5 inch props).