Taller top and bottom corners from Original Prusa i3 MK3 IKEA Lack Enclosure project for Creality Ender 3 (for 500 mm tall plexiglass)
thingiverse
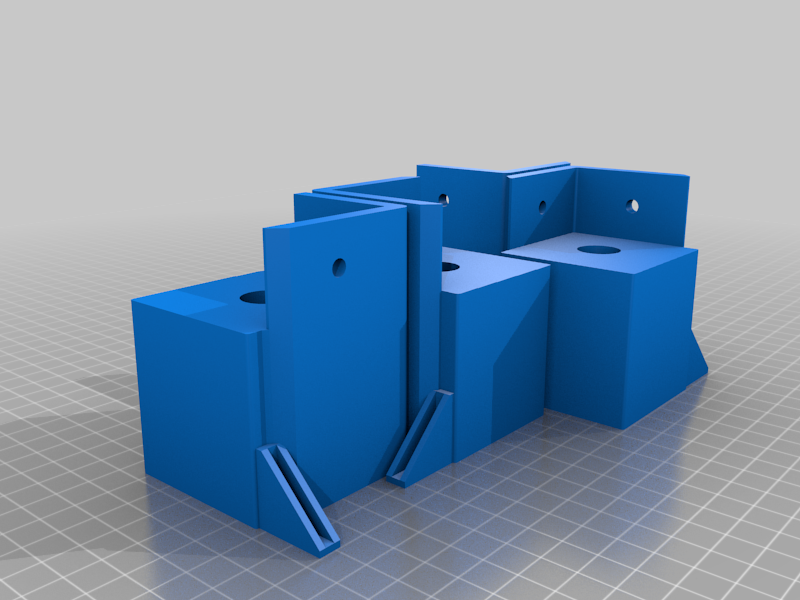
I took the top and bottom corners (for IKEA Lack legs) from [Original Prusa i3 MK3 ENCLOSURE -Ikea Lack table - Prusa Research](https://www.thingiverse.com/thing:2864118) and adapted them to: - Fit 440 x 500 mm (* or 498 mm - please see the note below) glass in order to be usable for my Creality Ender 3. - I changed the bottom corners so that the hole for the power supply cable is on the right side. As far as I know, the other parts do not need any changes for taller plexiglass. I recommend to use these screws: - 12x wood screw 5 x 20 mm (#10 x 3/4" in imperial units) - 8x wood screw 6 x 40-50 mm (#12 x 1. 5/8" - 2" in imperial units) (round heads seem to be a better choice than flat heads) (*) **Note: The difference between the first version and `-v2.stl` files:** TL;DR: `-v2.stl` files keep 2 mm more space for the plexiglass in height because my 500 mm glass did not fit in. Whole story: After printing the first version and trying to fit the 440 x 500 mm plexiglass in, I found that there is a ~2 mm gap between the IKEA Lack leg and the bottom corners (ie. the plexiglass is too tall). I am not sure how it's possible because I basically took the original parts and added 30 mm to both the top and the bottom corners so that it should make 440 + 30 + 30 = 500 mm in total. Maybe my printer did not print the parts accurately or my IKEA Lack legs are a bit shorter or the original parts do not fit 440 mm tall sheet of plexiglass either. When I measure the first version parts in Blender + the actual IKEA Lack leg it gives me: 50.1 + 399.6 + 49.6 = 499.3 mm which is not perfect but should still be OK. I ended up using a piece 2 mm thick linoleum in order to fill the gap. Instead of this, you can print the `-v2.stl` files and they should fit better. There should be ~1.7 mm clearance left for plexiglass. You may end up with some play in the plexiglass but it should still hold in the corners well. Feel free to give me feedback in comments about how the parts fitted together in your case and I may update the model accordingly. **UPDATE:** I added *Prusa_Enclosure_Bottom_Corners-for-440x500mm-plexiglass-v2-flipped.stl* file that has the 4 corner parts flipped upside down so it may be easier to print them without supports. **UPDATE 2:** I added *separate-*.stl* files that contains top and bottom corners as separate objects and also in variants with two hinges for door in case you wanted to have door both in front and on the sides.
With this file you will be able to print Taller top and bottom corners from Original Prusa i3 MK3 IKEA Lack Enclosure project for Creality Ender 3 (for 500 mm tall plexiglass) with your 3D printer. Click on the button and save the file on your computer to work, edit or customize your design. You can also find more 3D designs for printers on Taller top and bottom corners from Original Prusa i3 MK3 IKEA Lack Enclosure project for Creality Ender 3 (for 500 mm tall plexiglass).