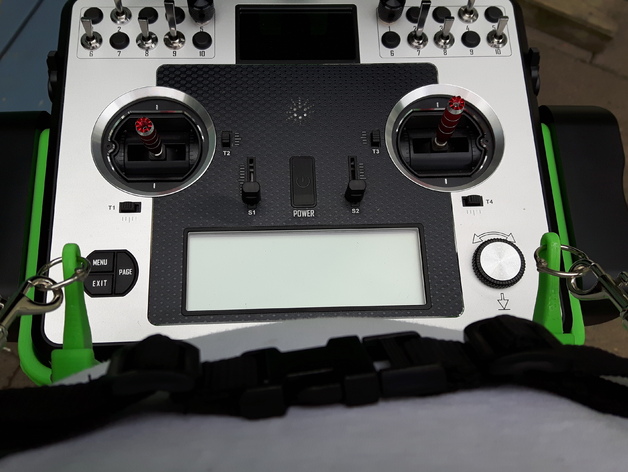
Taranis X9E tray arm system
thingiverse
My Solution for an X9E Arm System That Works Originally, the X9E is equipped with flimsy harness arms that cause the radio to hang forward in an uncomfortable angle, making it nearly unusable with a FPV monitor attached. Another serious drawback is that the factory arms obstruct my hand and arm's natural path when reaching for the sticks. This solution solves these problems and is easily foldable for transport. It takes up more space but will fit inside the case if I re-arrange the velcro cushions inside the case somewhat. In a field test, I had excellent results with this system, even with a weighty FPV monitor attached to the handlebar. The system consists of three parts and is designed for the left side of the radio. Use the mesh mirror utility in most repetier hosts to make parts for the right side. The upper harness arm is symmetrical, so it won't need mirroring. I will need some screws and nuts to complete a working unit: 8 x M3-15mm machine screw, 2 x M3 self-locking nuts, 2 x M4-17mm machine screw, and 2 x M4 self-locking nuts. First, I'll disassemble the plastic side supports (3 x M3 screws each side). These screws cannot be reused as they will be too short. Next, I'll assemble the anchor bar with the lower harness arm by placing the M4x17 screw with its head facing inwards against the radio case. It should be flush with the anchor bars face. Then, I'll apply the M4 nut and tighten so that it will pivot with a slight force applied. Now, the anchor bar can be mounted using the M3 holes for the plastic side supports. Insert an M3x15 screw through the middle hole of the side support and then through the anchor bar, screwing carefully until the screw attaches correctly. Be careful not to misalign the threads and damage the fixation point. Repeat with the other screws. Next, I'll tighten all three screws firmly. The anchor bar should now be sturdily fixed to the radio's side face. Now, I'll mount the upper harness arm. It will fit inside the upper part of the lower harness arm. If needed, I may need to sand off some of the side faces of the upper arm to make it fit inside. Fasten the two arms together with a M3x15 screw and an M3 self-locking nut. Adjust the tightness so that a light force will make it pivot. Finally, mount the steel rings that come with the Taranis harness to the upper harness arms. I should now be ready for action. Printer Settings Printer: Velleman Vertex Rafts: Doesn't Matter Supports: Yes Resolution: 0.2 mm Infill: 30% Notes: If you orient the meshes properly, supports are only needed when printing the Lower harness arm.
With this file you will be able to print Taranis X9E tray arm system with your 3D printer. Click on the button and save the file on your computer to work, edit or customize your design. You can also find more 3D designs for printers on Taranis X9E tray arm system.
