Tarot 250 frame V2
thingiverse
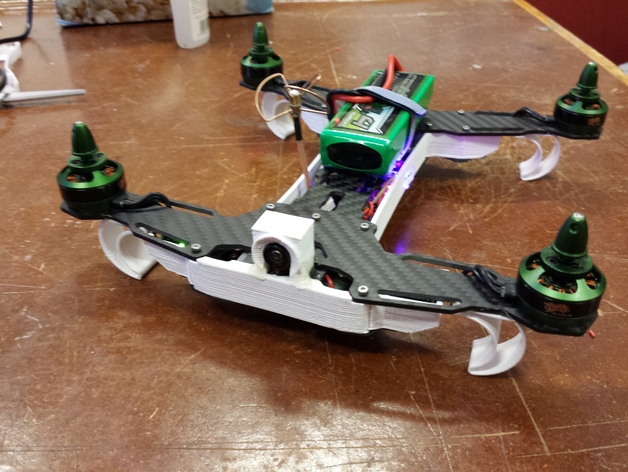
This is a mod of the tarot 250 frame. my setup:Naze32OrangeRx DSMX 3Ch S.BUS 2.4Ghz Rx (twin long antenna version)Gemfan 5040 Multirotor PropellersMultistar Elite 2204-2300KVAfro ESC 12Amp OPTO Ultra Lite Multi-rotor Motor Speed Controller (SimonK Firmware) Version 3Turnigy nano-tech 1300mAh 4S 45~90C Lipo PackPZ-2 Mini 720p/60fps FPV Camera 120 Degree 3.7-5V WideRCD3060 Mini OSD Dual Voltage Monitoring *Boscam FPV TX5823 5.8G 200mW Wireless Audio Video About: This frame will replace all the metal parts included with the tarot 250. The original distance between pdb and carbon arms were 6mm, in this design that height is increased to 12 mm to make it spacious enough to fit all the gear inside. With that said, it should be noted that this is a very tight build that require more work than normal to squeeze everything in, for comparison it's about 1/3rd the volume compared to the zmr 250. what you get is a very thing build that take crashes and have low air-drag. Preparation: It's designed so it will fit exactly after grinding a little at some spots on the 3d printed parts around the Afro's. The shrink-wrap needs to be removed on the Afro's and I remove all unnecessary cable lengths, don't use pin arrays for the servo leads on the naze32, just solder directly to the pads. Remove the plastic case for the sbus RX and unsolder all necessary pins( everything except the bat/bind), see my article about how to use sbus with naze32 for minimum wiring. http://www.mikaeltulldahl.se/guides/setting-up-sbus-to-work-with-naze32cleanflight-dsmx-turnigy-9xr/ Printing: Printed entirely in ABS, but PLA should work too. The orientation on the printer bed should be 90deg rotation around Y on all the parts. You need to print two distancers. Mounting: I recommend using 23 pcs M2 screws with torx head and 6mm. screw into the plastic from top and bottom. The Naze, OSD and VTX is held in place by double sided tape. After fitting everything once, you can glue the distancers to the PDB for added strength. After mounting the skirt and front distancer, i glue them together with CA. The added height allow for adding ws2812 led strips in the front and rear. If you have any questions or opinions, don't hesitate to comment! please tell me if you made this frame!
With this file you will be able to print Tarot 250 frame V2 with your 3D printer. Click on the button and save the file on your computer to work, edit or customize your design. You can also find more 3D designs for printers on Tarot 250 frame V2.