Tarot T-2D compact base (for QAV-R / TC-R220)
prusaprinters
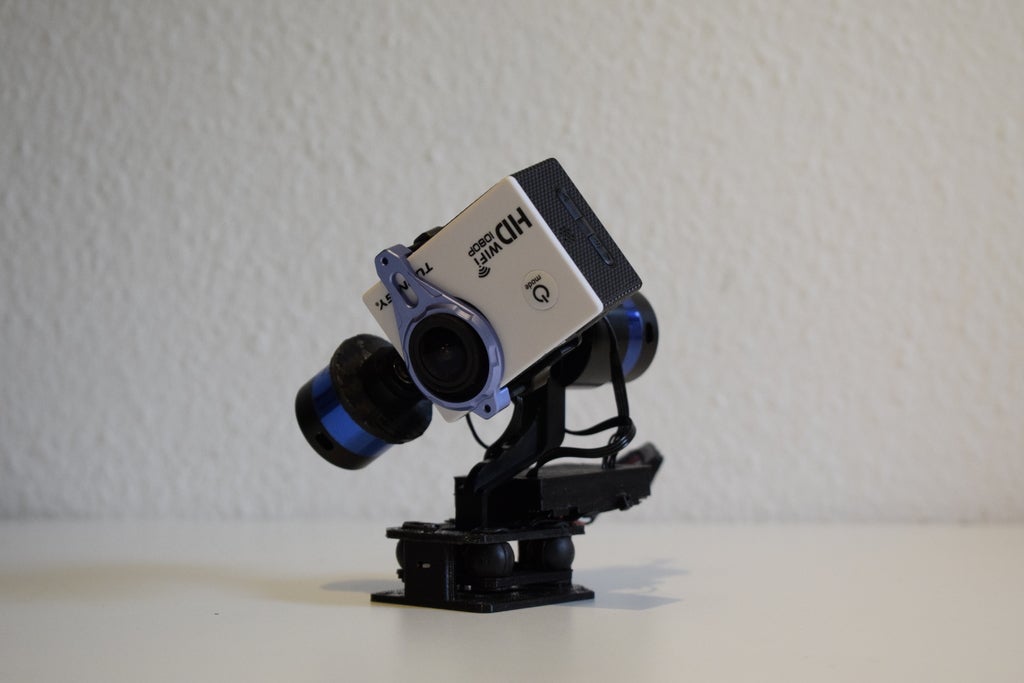
<p>A compact base for the Tarot T-2D Gimbal to moint it to a TC-R 220 or a QAV-R.</p><p>There is no place to mount the controller yet, so you have to find a way how to mount yours.<br>I screwed a small plate to the top plate to which I zip tied the board. Afterwards I put on this nice cover <a href="https://www.thingiverse.com/thing:619014">https://www.thingiverse.com/thing:619014</a> from Holger Stilke (ILse51 )to protect it.</p><p><strong>Hardware required:</strong></p><ul><li>4 x rubber dampers (I use the stock ones, on the softer side)</li><li>2 x m2.5 x 8 screws (stock) & washers</li><li>2 x m2 x 10 screws</li></ul><p>2 x m2 x nuts & washers</p><p><strong>Mounting holes:</strong></p><p>front holes 35mm apart</p><ul><li>rear holes 31.5mm apart</li><li>rear holes 42mm behind the front holes</li></ul><h3> </h3><p><strong>Assembly</strong></p><p>Compare to the last picture, to check for correct assembly.</p><p>1) Mount the rubber dampers to the TOP plate, then "connect" the TOP and MID plate by mounting the MID plate to the other end of the dampers.</p><p>2) Screw the gimbal with the stock (or other) M2.5 screws to the MID plate, use some washers between screw head and the plate.<br><strong>Keep in mind: the chamfered side of the upper plate is the back side.</strong></p><p>3) Insert M2 nuts in each of the slots (if required drill out the holes in the two posts of the base with a 2mm drill ). <strong>The rear facing side is chamfered aswell.</strong></p><p>4) Take the gimbal assembly (consisting of the gimbal with TOP and MID plate) and place it onto the base, insert a m2x10 screw in the holes aligning with the ones of the base. Tighten the screws, they should reach down into the nuts.</p><p><strong>Tip: You might have to stop the nuts from spinning with a screwdriver whilst you screw in the screw.</strong></p><p><strong>Mounting off the gimbal controller</strong></p><p>This is how I mounted the board:</p><p>1) Cut out a plate, roughly the size of the board.</p><p>2) Drill a 2mm hole into the center.</p><p>3) Unscrew the rear screw that hold the upper plate to the base, put it through the plate you just cut out and screw it back in with. The plate should not touch the metal post of the gimbal (comp. to the picture).</p><p>4) Zip-tie, screw or stick (doublesided tape) the gimbal controller to your plate.</p><p><strong>be careful that the m2 screw in the middle of the plate doesn't short out the controller!</strong></p><p>5) If you want print out this nice cover: <a href="https://www.thingiverse.com/thing:619014">https://www.thingiverse.com/thing:619014</a> , you might have to shave the cover out on some places if you e.g. zip tied the controller to the plate, so that it can sit securely.</p><p><strong>I had to shave out a bit of the upper front edge of the cover so that it wouldn't touch the gimbal.</strong></p>
With this file you will be able to print Tarot T-2D compact base (for QAV-R / TC-R220) with your 3D printer. Click on the button and save the file on your computer to work, edit or customize your design. You can also find more 3D designs for printers on Tarot T-2D compact base (for QAV-R / TC-R220).