Taz6 X Axis Belt Tensioner
thingiverse
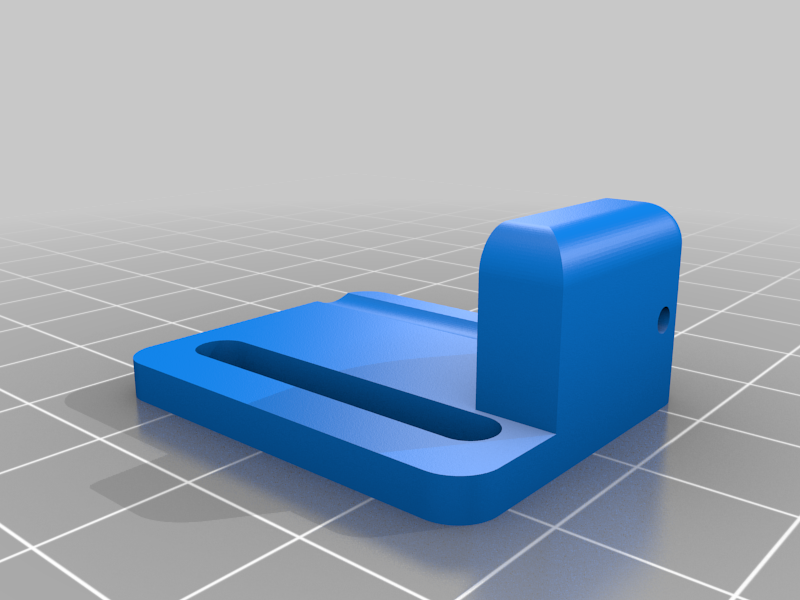
I've seen other X Axis Belt Tensioner designs that require you to reprint a whole new carriage. This design: i. fits between the IGUS slides and carriage rails ii. uses 6mm GT2 belts iii. enables use of a single 5mm cap head screw to evenly tension the belt on both ends iv. fits almost exactly where the stock belt is Print 2 of the 2mm brackets and 1 each of the bases (80% infill, ABS recommended) Drill a 5mm hole using the printed pilot hole Insert the 5mm screw in so you can position the bracket parts as shown with enough clearance. You'll need to superglue the belt holder to the base. To install, you'll use the existing M3 inserts on the original Taz6 carriage, but screw in from the top instead of the bottom.
With this file you will be able to print Taz6 X Axis Belt Tensioner with your 3D printer. Click on the button and save the file on your computer to work, edit or customize your design. You can also find more 3D designs for printers on Taz6 X Axis Belt Tensioner.