Teach Engineering by Making a 3D Printer!

Teach Engineering by Making a 3D Printer!

thingiverse

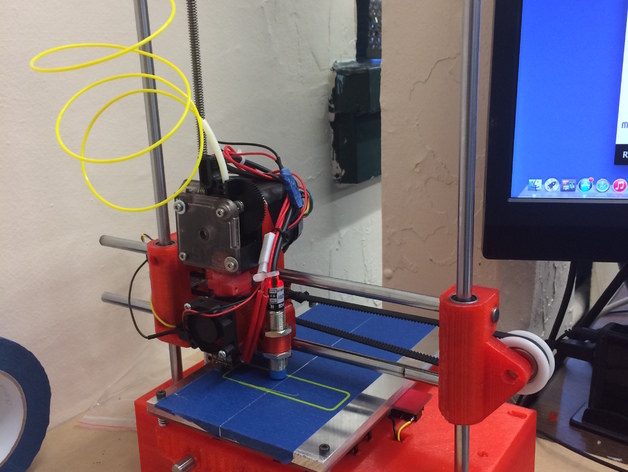
This is a Print It Forward Project from Printrbot that is a great way to teach engineering and basic 3D printing mechanics. Students will learn what BOM means and go through the process of building a 3D printer from scratch. Update: I uploaded a V2 of the base. I made it a bit more stable and deep enough to allow for normal size nema motors as opposed to the small motors. Its much more stable. Print Settings Printer Brand: Printrbot Printer: Printrbot Plus Rafts: Yes Supports: Yes Resolution: 0.2 Infill: 50% Notes: I used a 50% infill for PLA to test out this build. I will use the new NylonX in the next build to test different materials. Overview and Background Students will learn a great deal during this project. Between using metric tools to soldering, some wiring and the concept of rods, bearings, belts, and pulleys. Objectives Student will learn basic engineering concepts by building a 3D printer. Audience High School for a more project based approach. If you want to do lower grades I would make it more of a guided project. Subjects This projects touches most of the STEM subjects. Skills Learned (Standards) Standard 5: Technology Students will apply technological knowledge and skills to design, construct, use, and evaluate products and systems to satisfy human and environmental needs. Lesson Plan and Activity Since this is a project it's more of a hands on lesson/activity. The instructions are pretty detailed but they'll be plenty of opportunity for student to mix things up. The instructions are attached below. Print It Forward:http://learn.printrbot.com/2016/05/19/print-it-forward/ https://sites.google.com/a/mrwatt.ca/print-it-forward/ BOM:https://docs.google.com/spreadsheets/d/1E4-5YRB7CEhIu44jCj7UVpg7lP5AqpuCChWOlPe01q4/pubhtml All the files for printing can be found here: https://www.youmagine.com/designs/printrbot-labs-kit Quick video of my actual build Materials Needed This list will be long so I'll try to make it easy. Tools: Torx Screwdriver Set https://www.amazon.com/TEKTON-2830-Everybit-Precision-Electronic/dp/B009MKGRQA/ref=sr_1_5?s=hi&ie=UTF8&qid=1472423266&sr=1-5&keywords=torx+screwdriver+set A fully functional 3D printer with at least a 6" inch build plate. Materials: I will list this in two ways. 1st- The kit is available from printrbot. Here it is: https://printrbot.com/shop/printrbot-starter-kit/ 2nd- The items are listed from different places. This is how I did it because I had a lot of these and didn't want to buy the kit. Belts and pulleys: https://www.amazon.com/gp/product/B00WW256TY/ref=oh_aui_detailpage_o04_s00?ie=UTF8&psc=1 8MM Rod Bearings:https://www.amazon.com/gp/product/B00X9H22SO/ref=oh_aui_detailpage_o07_s00?ie=UTF8&psc=1 8MM Rods: You'll need 6. 4 of these:https://www.amazon.com/Diameter-8-Hardened-Linear-Motion-Printer/dp/B00WJFR872/ref=sr_1_2?ie=UTF8&qid=1472423462&sr=8-2&keywords=8mm+rods#customerReviews 2 of these:https://www.amazon.com/Linear-Motion-Length-Chrome-Hardened/dp/B0045DUX5A/ref=sr_1_1?ie=UTF8&qid=1472423462&sr=8-1&keywords=8mm+rods Acme Rod:https://printrbot.com/shop/threaded-rod/ Belts and Pulleys:https://www.amazon.com/gp/product/B00WW256TY/ref=oh_aui_detailpage_o04_s00?ie=UTF8&psc=1 Bearing Pulleys:http://www.ebay.com/itm/2pcs-Embedded-608ZZ-U-groove-encapsulated-plastic-nylon-Ball-Bearing-8x30x10mm-/131589578531?hash=item1ea3599f23:g:lmEAAOSw3ydV3oOi Printerboard:https://printrbot.com/shop/printrboard-rev-f6/ Z-Coupler:https://printrbot.com/shop/z-coupler/ Extruder:https://printrbot.com/shop/plastic-extruder/ Hotend:https://printrbot.com/shop/ubis-13-s-hot-end/ Z-Probe:https://www.amazon.com/gp/product/B008FZC8F2/ref=oh_aui_detailpage_o00_s00?ie=UTF8&psc=1 Extruder Motor:https://www.amazon.com/gp/product/B00PNEQ79Q/ref=oh_aui_detailpage_o07_s00?ie=UTF8&psc=1 Axis Motors: You'll need 3 and the connector for it. Both links are below. https://www.amazon.com/Stepping-Motor-26Ncm-36-8oz-Printer/dp/B00PNEQ9T4/ref=sr_1_fkmr1_1?ie=UTF8&qid=1472424404&sr=8-1-fkmr1&keywords=Nema+17+medium https://www.amazon.com/gp/product/B012EOO9Q0/ref=oh_aui_detailpage_o01_s00?ie=UTF8&psc=1 Nuts and Bolts: https://www.amazon.com/GOCHANGE-160Pcs-Metric-Stand-off-Screws/dp/B01C9Q9WEW/ref=pd_sim_sbs_60_7?ie=UTF8&psc=1&refRID=W718TAVXPP2YJ4NTV334 Fan Extension Cable: https://printrbot.com/shop/fan-extension/ Hotend Extension Cable:https://printrbot.com/shop/hot-end-power-cable/ Hotend Thermistor Cable:https://printrbot.com/shop/hot-end-thermistor-cable/ Endstops: You'll need 2https://printrbot.com/shop/18-end-stop/ This is most of the items you'll need I may have missed one. There are plenty of ways to get things cheaper or the solder some of the extension wires yourself. I recommend it but leave it to you since you know your students. Duration of Lesson This project should take a few class periods to build. The overall process should be about 4-5 classes. Project Teach Engineering by Making a 3D Printer! This project is a great way to teach students the pride of building something. They'll build a working printer and by doing so understand it's basic mechanics and how to repair it.

Download Model from thingiverse

With this file you will be able to print Teach Engineering by Making a 3D Printer! with your 3D printer. Click on the button and save the file on your computer to work, edit or customize your design. You can also find more 3D designs for printers on Teach Engineering by Making a 3D Printer!.