Teach Measurement by Making a Ruler: Part Two
thingiverse
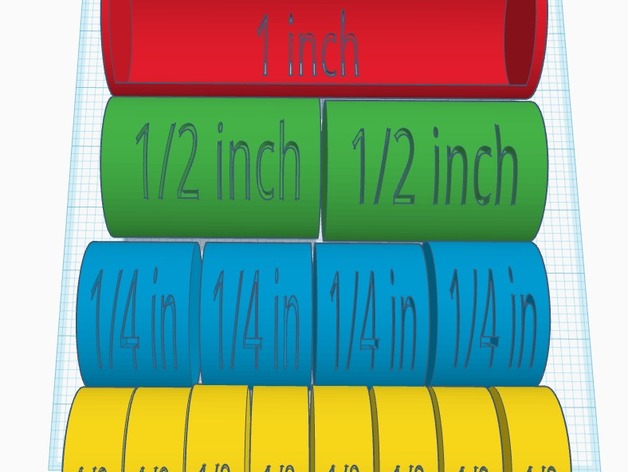
In Part two of this lesson can be found here:\nhttp://www.thingiverse.com/thing:1733354\nThis, part two, lesson is designed to have students demonstrate the concepts of the parts of an inch by creating a representative model that showcases their understanding of measurement data. The student's task is not to scale their ruler accurately, but rather to represent the concept of measuring lengths using rulers marked with halves and fourths of an inch. This lesson lends itself well to reviewing the concept of scale and its relationship to measurement. Print Settings Printer Brand: MakerBot Printer: MakerBot Replicator (5th Generation) Rafts: Yes Supports: Yes Resolution: 0.30 Infill: 10% Notes: I would print this model on the top or bottom except the inch so you don't use so much filament for support. Future print settings will depend on the shapes that students use to represent the parts of an inch. The download files will be there for the entire model and for each of the parts broken down for easier printing. Standards CCSS Overview and Background Students will make a model representing the parts of an inch and their relationship to each other. After completing part one of this lesson, where students become familiar with the parts of an inch and how they fit into each other, we'll have them create their own model to demonstrate what they've learned. Previously Tinkercad.com experience is important. Students should have at least completed all the tutorial lessons found here:https://www.tinkercad.com/quests/ Objectives Students will be able to demonstrate their knowledge of the parts of an inch by making a representative model that showcases their understanding of measurement data. StandardsCCSS.MATH.CONTENT.3.MD.B.4 Generate measurement data by measuring lengths using rulers marked with halves and fourths of an inch. Show the data by making a line plot, where the horizontal scale is marked off in appropriate units— whole numbers, halves, or quarters. Lesson Plan and Activity Having students design their own model can be very challenging. While giving them the freedom to be creative, there are certain restrictions that are important. The model should represent the parts of an inch using the same shape just in different sizes. The relationship should match the characteristics of measurement. For example, the 1/4 inch piece should be half the size of the 1/2 inch piece. With this in mind, making a model using a diamond will be much harder than using a rectangle, cylinder, or hexagonal prism. All the pieces in the model that make up an inch in any combination should fit inside the inch piece. For example, the two 1/2 inch pieces should fit just as well as one 1/2 inch piece and two 1/4 inch pieces. Once they understand this, everything becomes easy. Materials Needed Buy lots of filament Have handouts or models from part one of this available for reference Make sure student reviews the basic tinkercad tutorials Duration of Lesson 3 classes
With this file you will be able to print Teach Measurement by Making a Ruler: Part Two with your 3D printer. Click on the button and save the file on your computer to work, edit or customize your design. You can also find more 3D designs for printers on Teach Measurement by Making a Ruler: Part Two.