Teensy 4.1 Game Boy Cartridge Case
prusaprinters
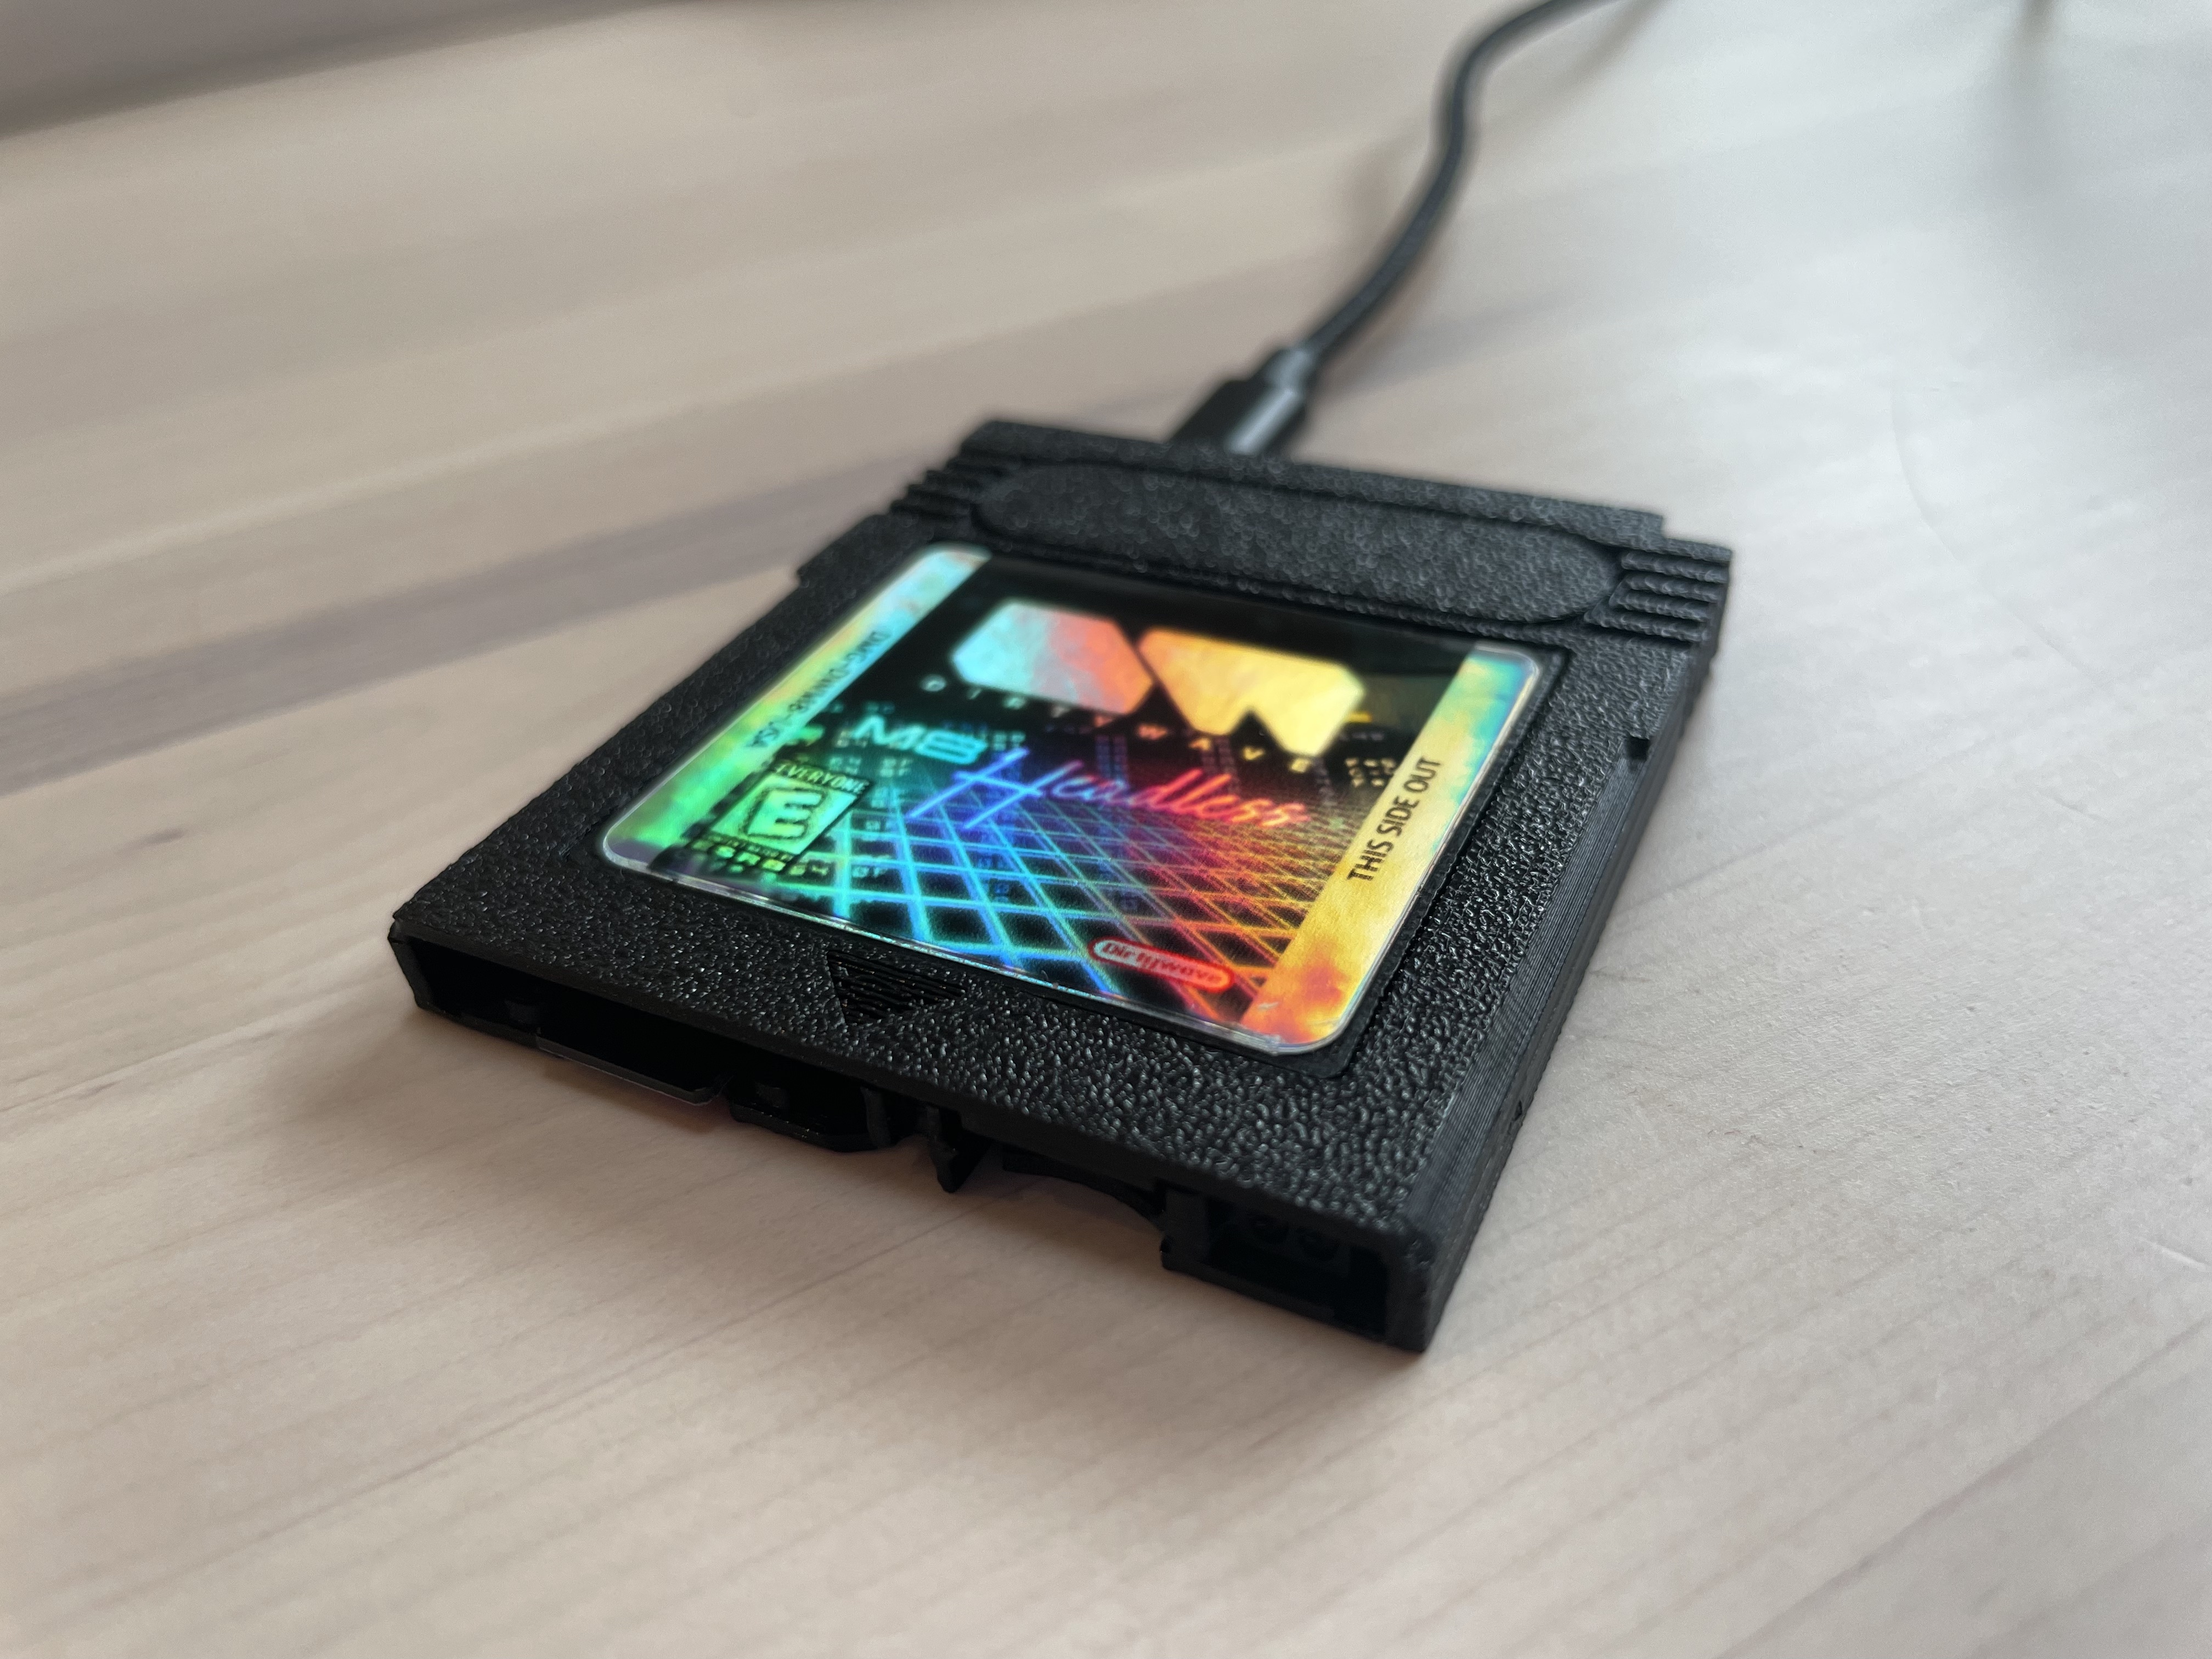
<p>Remix of <a href="https://www.thingiverse.com/thing:4268067">https://www.thingiverse.com/thing:4268067</a> which is not currently available on Printables. Modified to hold a Teensy 4.1, two spare microSD cards, and with an added label recess that can be revealed by prying off the front plate . This was designed with a Dirtywave M8 Headless installation in mind. See:</p><ul><li><a href="https://dirtywave.com/">Dirtywave M8 Tracker</a></li><li><a href="https://github.com/DirtyWave/M8HeadlessFirmware">Dirtywave M8 Headless</a></li></ul><figure class="media"><oembed url="https://youtu.be/5_642b0ibro"></oembed></figure><p><br>If you find the M8 as inspiring as I do please be inspired to support Trash80, and the M8's continued development, <a href="https://www.patreon.com/trash80">on Patreon</a>.<br> </p><h4><br>Overview</h4><p>A case in the shape of a Game Boy cartridge for the Teensy 4.1:</p><ul><li>Cutout for the Micro-USB connector</li><li>Cutout to access the MicroSD card</li><li>Flexure button built into case to enable pressing of the programming button on the Teensy</li><li>Cutout + flexure arm to insert and remove from the case up to two extra microSD cards</li><li>Passive exhaust cutout for the microcontroller</li></ul><p> </p><h4>Printing</h4><p>The case in the photos is printed at 0.1mm resolution. I have not tried it at a coarser granularity, and due to some of the details involved I do not think it would successfully print at lower resolutions.</p><p>— </p><p><strong>The Teensy gets very hot during operation. So hot, in fact, that </strong><code><strong>PLA warps and is unusable</strong></code><strong>. As such, you must use a more temperature-resistant material. I have only tested with </strong><code><strong>PETG, which works,</strong></code><strong> but other materials with equal or greater thermal resistance should suffice.</strong></p><p>— </p><p>That being said, I have found that PETG has the appropriate amount of flexibility for the arm that holds the spare microSD cards in place. Other materials may be too rigid and brittle.</p><p>The two halves should be printed as-is. If you intend to affix a label to the cartridge, you will need to also print the label insert.</p><h4>Assembly</h4><h5>Case</h5><ol><li>There is a print-in-place support foot that is attached to the tab/lever on the flexure arm that holds the additional microSD cards is place. This should be extremely easy to break off.</li></ol><figure class="image image-style-align-center image_resized" style="width:44.7%;"><img src="https://media.printables.com/media/prints/192979/rich_content/77d9f0b8-d477-4c86-b105-106559d4e2e4/img_6367.jpeg#%7B%22uuid%22%3A%225c07b758-c9c9-4b94-b82b-9191a0b77801%22%2C%22w%22%3A628%2C%22h%22%3A456%7D"></figure><figure class="image image-style-align-center image_resized" style="width:42.98%;"><img src="https://media.printables.com/media/prints/192979/rich_content/e639278d-00a0-4eb9-8640-009ab4d5dec4/print_in_place_arm_support.jpg#%7B%22uuid%22%3A%223bb9958c-e02a-40ff-a325-12863ce43edc%22%2C%22w%22%3A1326%2C%22h%22%3A998%7D"></figure><ol><li>The Teensy should be inserted from above, and at an angle, into the back shell, micro-USB-connector-first.</li><li>Once the Micro-USB connector is inside the cutout in the wall of the shell, the Teensy should be able to be snapped down into place.</li><li>Similarly, the front shell has two tabs at the top, and should be inserted from above, and at an angle, into the recesses in the top of the back shell, and then snapped down into place.</li></ol><h5>Label Preparation</h5><p>If you wish to apply a label to the case, some assembly is required:<img class="image-style-align-right image_resized" style="width:37.2%;" src="https://media.printables.com/media/prints/192979/rich_content/0d9e09b4-b395-4a87-bdce-7033afafd59d/img_6370.jpeg#%7B%22uuid%22%3A%22a65082ca-e1c4-422c-9516-e048b9e874c2%22%2C%22w%22%3A4032%2C%22h%22%3A3024%7D"></p><ol><li>Using fine tweezers or a similarly thin but strong instrument, begin prying around the plate sitting in the label recess. Work your way around the edge and then spiral inwards. You can additionally try running your tweezers up the channels between the ribs holding the plate to the case front.<img class="image_resized" style="width:75%;" src="https://media.printables.com/media/prints/192979/rich_content/d2b66315-e098-4e5c-8ade-b254e2758a5f/img_6366.jpeg#%7B%22uuid%22%3A%22685e6657-fcdc-4a3e-8527-dcd8b39ba2be%22%2C%22w%22%3A4032%2C%22h%22%3A3024%7D"></li><li>Once the plate is removed, apply adhesive of your choice (I used CA glue) to the back of the label insert, making sure to evenly cover the entire surface, but especially the edges and corners. Place the label insert into the label recess of the case front. You can put the just-removed plate on top of the insert, allowing you to stack a heavy object on top to apply pressure while the glue dries. <img src="https://media.printables.com/media/prints/192979/rich_content/4acf075f-05d6-4252-8831-a123b9a58471/img_6369.jpeg#%7B%22uuid%22%3A%228ae8e232-d55a-4439-a2e1-e170a5e8c37b%22%2C%22w%22%3A4032%2C%22h%22%3A3024%7D">You should now have a smooth, flat surface to which a label can be applied.</li><li>Apply the label.<img src="https://media.printables.com/media/prints/192979/rich_content/c97a12c4-b618-4eca-8fed-8ac820f0bc14/img_6376.jpeg#%7B%22uuid%22%3A%22ff1cd89d-32ff-45b4-8131-4587e8841bab%22%2C%22w%22%3A4032%2C%22h%22%3A3024%7D"></li></ol><p> </p>
With this file you will be able to print Teensy 4.1 Game Boy Cartridge Case with your 3D printer. Click on the button and save the file on your computer to work, edit or customize your design. You can also find more 3D designs for printers on Teensy 4.1 Game Boy Cartridge Case.