Tell-the-Time Glueless Remix
thingiverse
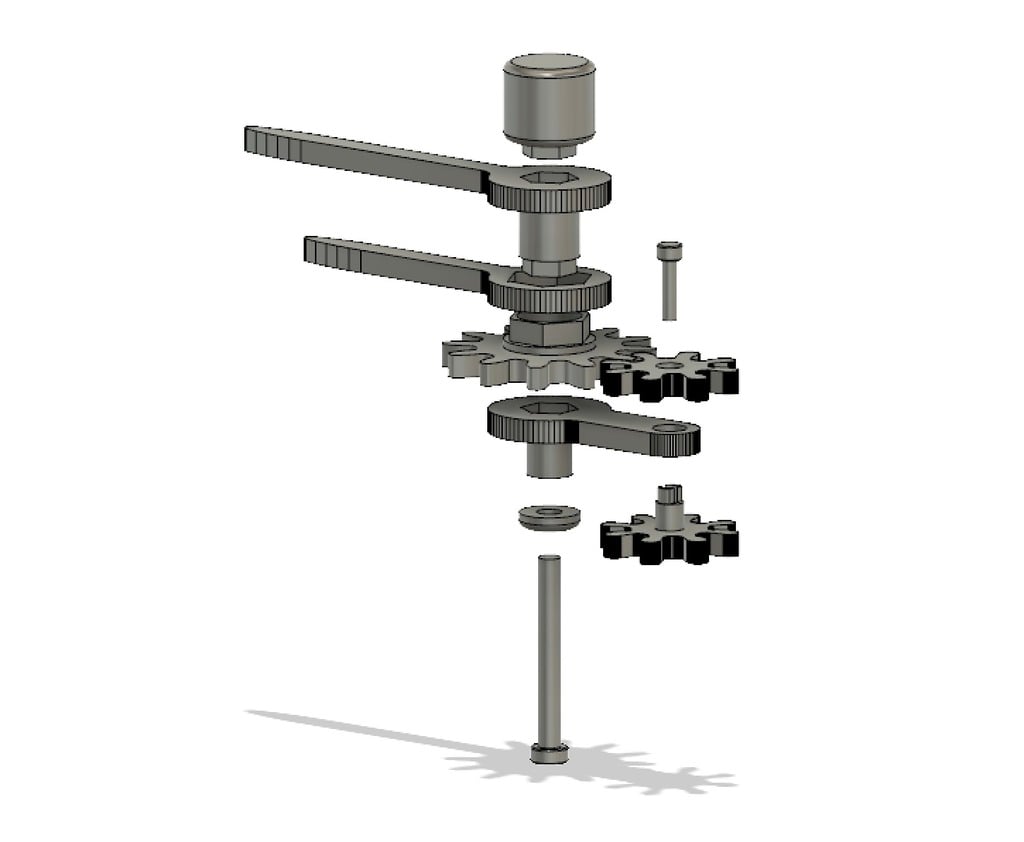
Remix of the original assembly so glue is not used, but instead uses M3x25mm and M2x8mm bolts. Reference the exploded view to see how the parts fit together. Each of the parts is oriented the way they are in the final assembly, not how they should be printed. Position them as shown in the build plate picture, no supports are needed. Two of the parts have built-in bridge supports, which will be drilled out later. The parts are hex keyed so they will snap together instead of using glue. Fit all the parts together as shown in the exploded view (except for the handle) and drill out the main shaft with a 1/8" drill bit, so that the M3 bolt slides through the assembly freely. The M3 bolt will thread into the handle part to hold the assembly together. The M2 bolt will thread into the smaller cog. Remove the M3 bolt and plug and place the assembly into the original base and dial. Then secure in place with the plug and M3 bolt through the back, screwed into the handle as shown in the cross section view. Turn the handle to change the time. If it's too tight, loosen the M3 bolt a little until the hands move easily.
With this file you will be able to print Tell-the-Time Glueless Remix with your 3D printer. Click on the button and save the file on your computer to work, edit or customize your design. You can also find more 3D designs for printers on Tell-the-Time Glueless Remix.