Temp Tower PLA, PETG, ABS/ASA for Prusa MINI+, MK3S+ and MMU2S
prusaprinters
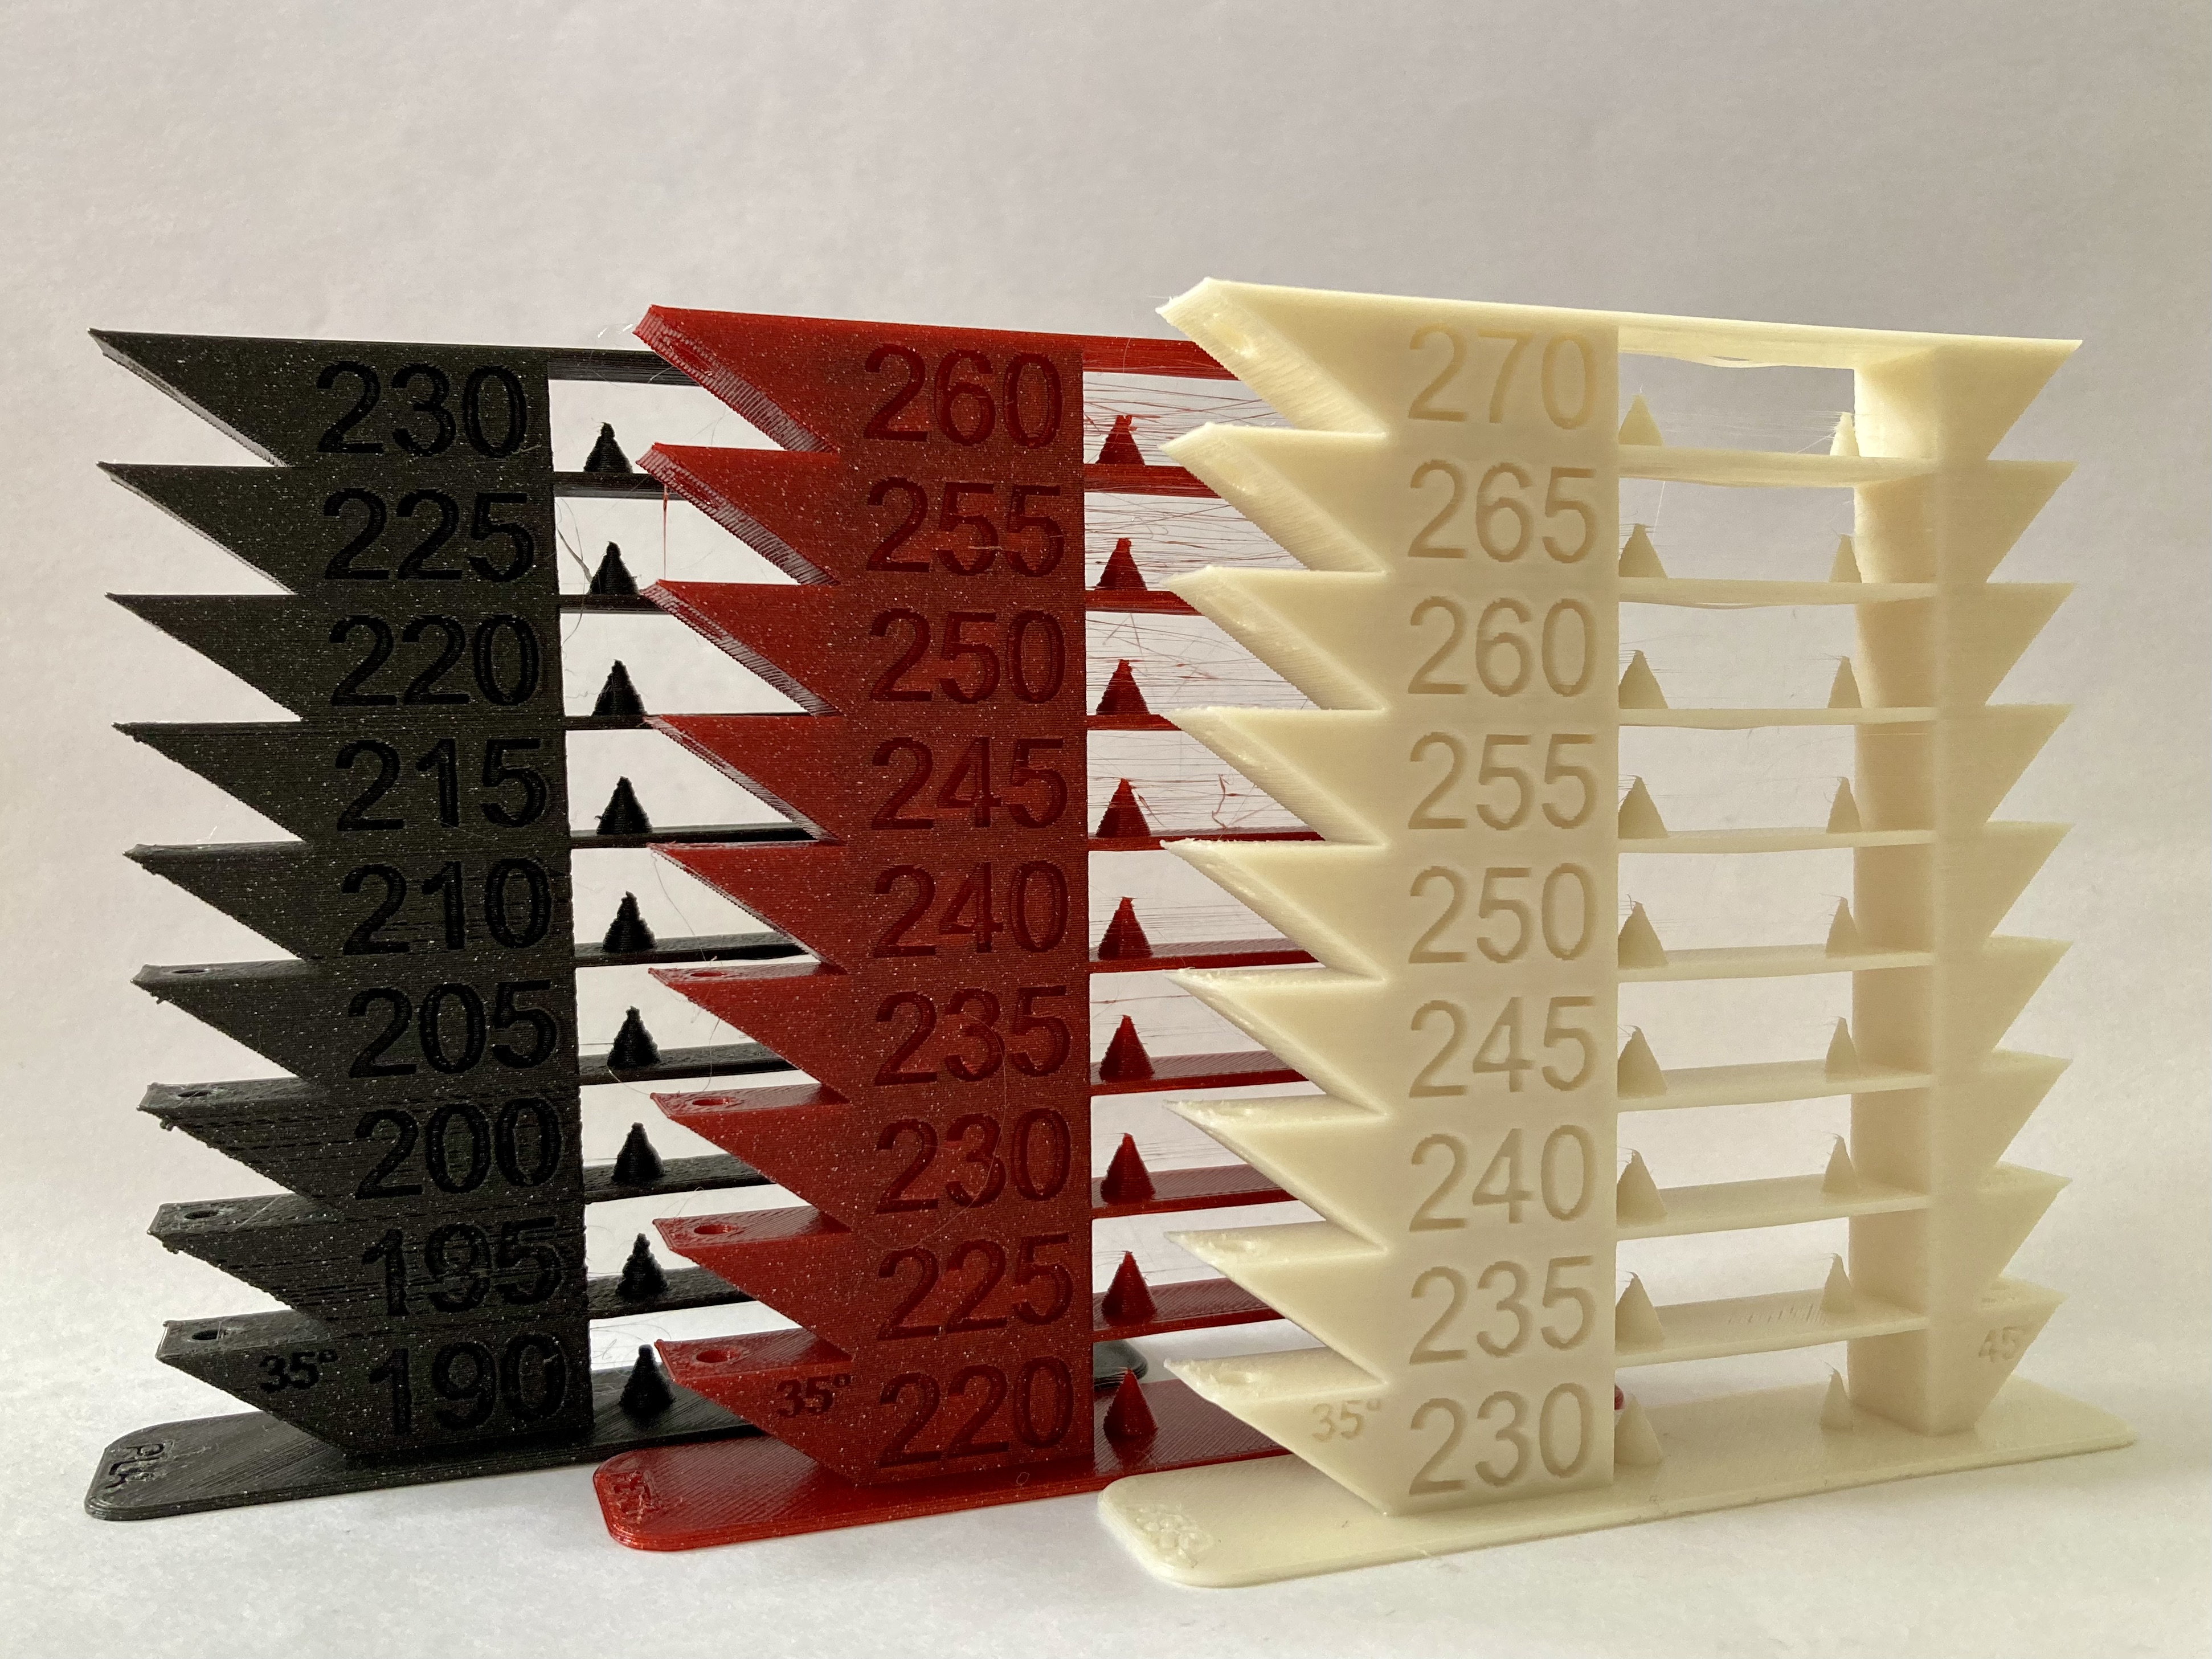
<h3>Download, load and print!</h3><p>Every filament and every printer is different. To get the best out of your printer you need specific settings and that means a specific nozzle temperature. That is the time, when Temperature Tower comes in handy. </p><p>Every level of this tower is printed with different nozzle temperature. There are several tricky parts on each level, where you can see differences between temperatures, such as overhangs, stringing... By comparing levels, you can find your optimal printing temperature.</p><p>To make it work, you need modified G-codes. There are G-codes ready to be printed with <strong>MK3S+</strong>, <strong>MK3S+MMU2S</strong> and <strong>MINI+</strong>. It should also work on the non-plus printers. I have also included <strong>.stl</strong> and <strong>.3mf</strong> files, so you can slice it on your own (more on that below). </p><p>For each printer, there is model for<strong> PLA</strong>, <strong>PETG</strong>, and <strong>ABS/ASA</strong>. You can use them with other types of filament too. I have also included <strong>blank tower</strong>, so you can add your values. Ranges for presliced materials:</p><p><strong>PLA - 190 - 230°C</strong></p><p><strong>PETG - 220 - 260°C</strong></p><p><strong>ABS/ASA - 230 - 270°C</strong></p><figure class="image"><img src="https://media.printables.com/media/prints/20652/rich_content/11a76b16-28ef-4990-a8d2-69b5f4587816/image.png#%7B%22uuid%22%3A%22431f2f8a-15af-4e9c-a514-072ad6d58798%22%2C%22w%22%3A1072%2C%22h%22%3A830%7D"></figure><p> </p><h3>Slicing instruction</h3><p>There are two ways to make your own modified G-code file. One uses the .3mf file, the other classic stl.<strong> There is no warranty, that the custom sliced G-codes will work.</strong></p><p>The simplier way is to use .3mf file. Just open it in PrusaSlicer, make some changes if you want and slice it. Custom commands are already included. Make sure, that when you are opening the file, you need to open it as project, otherwise the custom G-code will be lost. When you are changing printer type, you need to select Transfer changes.</p><p>If you want to slice it on your own without using .3mf file, you will need to add some commands to a custom G-code setting in PrusaSlicer. After you place your stl file into slicer, make sure, that you are in <strong>Expert mode</strong>, so you can see all of the settings. Then go to <strong>Printer settings</strong>, on the left find <strong>Custom G-code</strong> settings and then look for <strong>Before Layer Change</strong>. You will need to replace that text with one of the commands set, that you can find in file <strong>Custom G-code </strong>(PDF, because there is a problem with copying data from .txt file to PrusaSlicer), which you can download here in section <strong>Other Files</strong>. Do not include the name of a filament (PLA:, PETG..). You still need to change filament type as you normally would. It effects temperature while printing the base.</p><p>To make sure you sliced it correctly, in the preview section in PrusaSlicer there is a menu <strong>View </strong>in<strong> </strong>bottom left corner. Just select <strong>Temperature</strong> and you should see Temp Tower similar to the picture above.</p><figure class="image image-style-align-center image_resized" style="width:37.56%;"><img src="https://media.printables.com/media/prints/20652/rich_content/c3b6f486-9ecf-46a4-b450-162b2f145891/image.png#%7B%22uuid%22%3A%22b4654d0e-65d2-438d-bc05-cfdeae9f7152%22%2C%22w%22%3A394%2C%22h%22%3A260%7D"></figure><p> </p><h3>FAQ:</h3><h5>Why is it so big?!</h5><p>As you might have noticed, the test model is about 30g and tooks about 4 hours to print. That is because of its height and complexity. Of course, that the model could be smaller, but there would be less visible differences between each levels. When it comes to scaling it down, you need to keep in mind, that the temperature change depends on Z position. So if you scale it down, you need to rewrite Z levels in the custom code. <strong>However I would suggest spend more time and material and have better and more visible results.</strong></p><h5><strong>Shouldn't the temperatures drop from the highest to the lowest, rather than starting from the lowest temperature?</strong></h5><p>Well, I'm no expert, but the custom code is written so that the base of the tower (before first level) is printed with common temperature for that type of material. For example as you can see from the picture above, the base of PLA Temp Tower is printed with around 210°C, which is somewhat normal value for PLA. It would made sense, if the base was printed with high temperatures rather than low, because of the bed adhesion, but this isn't the case. (If you have some other arguments message me, we can have a chat and you might convince me :D )</p><p> </p><h3>Updates:</h3><h5>14.5.2022</h5><ul><li>Added print files for MK3S and MINI</li><li>Added .3mf file</li><li>Slightly optimized Custom G-code for individual slicing</li><li>New description, more detailed process of individual slicing and FAQ from comments</li></ul><p> </p><p>If you have any questions, problems or suggestions, write them in the comments or message me. I will be happy, if you leave some feedback. And as Jo would say: <strong>Happy printing :D</strong></p>
With this file you will be able to print Temp Tower PLA, PETG, ABS/ASA for Prusa MINI+, MK3S+ and MMU2S with your 3D printer. Click on the button and save the file on your computer to work, edit or customize your design. You can also find more 3D designs for printers on Temp Tower PLA, PETG, ABS/ASA for Prusa MINI+, MK3S+ and MMU2S.