Temperature Calibration Test (Costumizable)
thingiverse
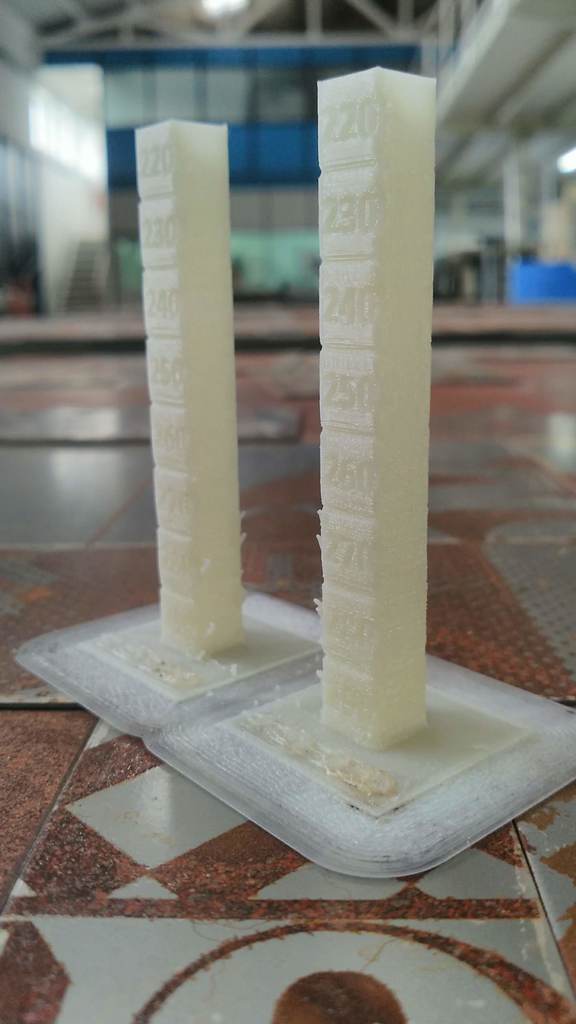
Based on > [Customizable Temp Calibration Tower](https://www.thingiverse.com/thing:915435) by [eibwen](https://www.thingiverse.com/eibwen/about) Adds the ability to remove holes and create a text for your test material USAGE: 1. Check your material recomended temperature range 2. Costumize your temperature tower with thinguivers costumizer adding 2 steps above and below the recomended temperature (If your recomended temperature is 240-270 for example use 220-290 in steps of 10º) 3. Open your tower in cura or your slicer of choice and duplicate the tower with a short distance between them 4. In cura go to extensions > post-processing > modify gcode and add a ChangeAtZ trigger by height changing temperature onwards (For other slicer software you must find yourself how to do this, share back if you do) 5. Print your towers 6. Sacrifice one of the towers by breaking up each section at half the temperature block and look for the first temperature where the layers have a rough break. If the break is clean then the adhesion strenght between layers is not good. If you find that the first layer with good adhesion and better finish has stringging then you must increase your retraction settings and try again now with a smaller tower to speed up the process. After you have tuned your temperature print the kickstarter/autodesk validation model https://github.com/kickstarter/kickstarter-autodesk-3d/tree/master/FDM-protocol
With this file you will be able to print Temperature Calibration Test (Costumizable) with your 3D printer. Click on the button and save the file on your computer to work, edit or customize your design. You can also find more 3D designs for printers on Temperature Calibration Test (Costumizable).