Tenor Saxophone Case Wheels
thingiverse
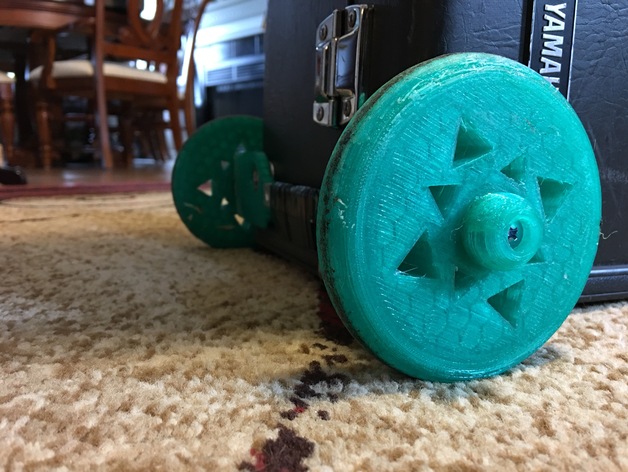
Since I began to grow tired of carrying my heavy tenor saxophone case, I decided to make wheels for the case. It took five tries to get a fully function version. I hope you enjoy! Print Settings Printer: XYZ Printing Da Vinci Jr. 1.0 Rafts: No Supports: Doesn't Matter Resolution: .4 Infill: around 15% could be 20 depending on strength wanted Notes: At first I was printing the wheels at 15% infill, but I recently dropped the wheels and the wheels snapped right down the middle so I recommend using 20%. Post-Printing Gluing and Wheels In order to attach the left and right side of the wheels you will need to glue the two sections together along with a metal bracket in the middle. Just to make it look better I wrapped electrical tape around the bracket as you can do too. After you are done gluing you will need to drill a small hole in the axle to screw in the cap to hold the wheel in place. When you are done with that place the wheel on the axle and find a screw to put in the cap and screw in the axle. When you are done with that you have officially finished putting together the wheels. Custom Section Numbers and Rotation Before you print make sure to rotate the files on you print software to fit the specifications of you printer (rotate so it can print as well as possible). Also print two wheels and two caps for the axles to complete the wheels.
With this file you will be able to print Tenor Saxophone Case Wheels with your 3D printer. Click on the button and save the file on your computer to work, edit or customize your design. You can also find more 3D designs for printers on Tenor Saxophone Case Wheels.