Tentaku Mechanical Calculator Case
prusaprinters
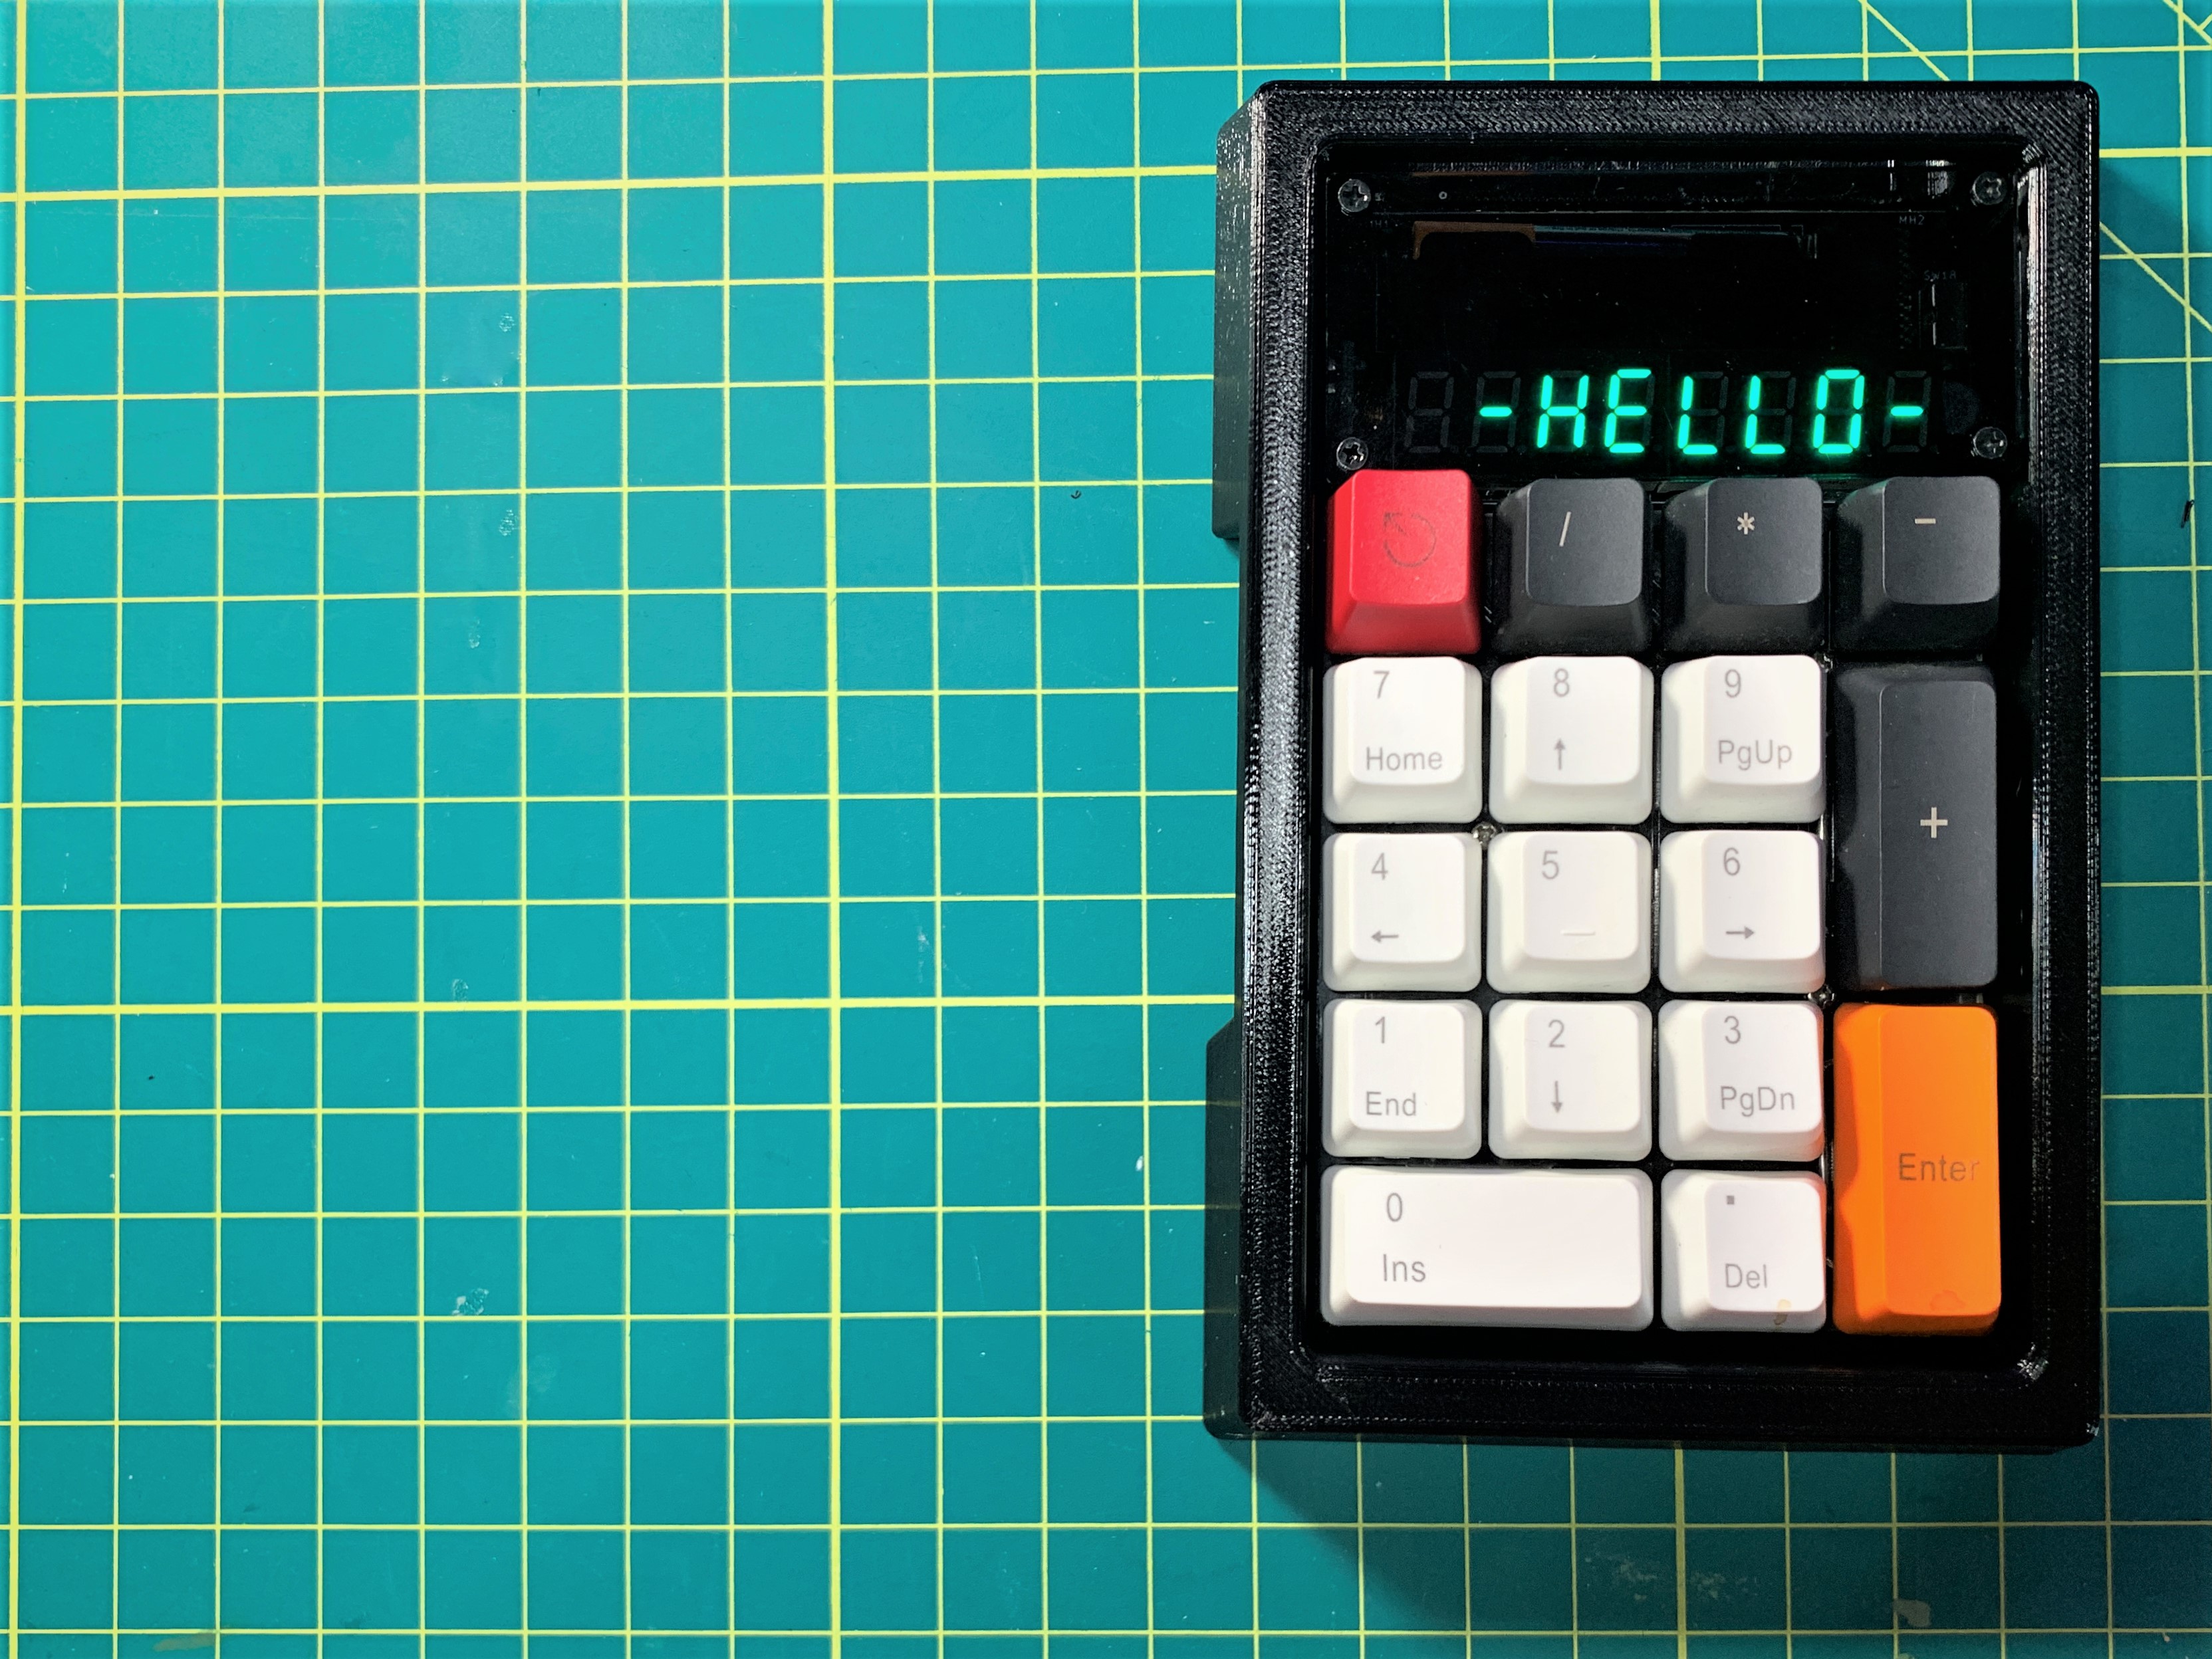
<h3>Tentaku Mechanical Calculator Case</h3><figure class="image"><img src="https://media.prusaprinters.org/media/prints/108646/rich_content/09915e58-b192-459b-bedd-23c32a430a86/tentaku-mechanical-calculator-case.jpg#%7B%22uuid%22%3A%220d1d67f4-c80e-41c7-92a0-5fae40e37c46%22%2C%22w%22%3A3327%2C%22h%22%3A2496%7D"></figure><p> </p><h4>Background:</h4><figure class="image image-style-align-center image_resized" style="width:75%;"><img src="https://media.prusaprinters.org/media/prints/108646/rich_content/bf047594-40c8-43bf-bdc2-4ccbe9de13fc/78d6f46f-f16c-4465-a79f-e8d98c74caa8_base_resized_1000x.jpg#%7B%22uuid%22%3A%224e9253b6-d8ef-4696-806c-3f59dbf1799c%22%2C%22w%22%3A1000%2C%22h%22%3A837%7D"></figure><p>I had a lot of fun building my <a href="https://www.switchkeys.com.au/products/tentaku-mechanical-calculator">Tentaku DIY Mechanical Calculator kit</a>, but the included case was a somewhat flimsy acrylic sheet. </p><figure class="image image_resized" style="width:75%;"><img src="https://media.prusaprinters.org/media/prints/108646/rich_content/2e798e5c-4945-4eee-884d-f4e72d86abb8/stockacrylic.png#%7B%22uuid%22%3A%22a794db7d-4ede-4984-abef-fb4cf52d0ffb%22%2C%22w%22%3A575%2C%22h%22%3A817%7D"></figure><p>I wanted something a bit more bulky to protect and hold my calculator. So I remixed @<a href="https://www.prusaprinters.org/social/3814-adafruit">Adafrui</a>t's <a href="https://www.thingiverse.com/thing:4910369">Macropad RP2040</a> case to work with it.</p><figure class="image image_resized" style="width:75%;"><img src="https://media.prusaprinters.org/media/prints/108646/rich_content/5f2d1022-097b-4016-9394-801db9a680b3/adifruitsmacropdad.png#%7B%22uuid%22%3A%221c47c8d6-0317-4053-9a70-fcacb48ede61%22%2C%22w%22%3A746%2C%22h%22%3A653%7D"></figure><p>My model uses everything from the<a href="https://www.switchkeys.com.au/products/tentaku-mechanical-calculator"> Tentaku Kit</a> except the back acrylic sheet. You should be able to slide your PCB in and attach the screws on the bottom of the case.</p><figure class="image image_resized" style="width:75%;"><img src="https://media.prusaprinters.org/media/prints/108646/rich_content/966c61af-20a5-4fb9-aff6-8fe1ef666564/bottom.png#%7B%22uuid%22%3A%2242d48b59-6f82-4f84-8e6c-34a61c1cf638%22%2C%22w%22%3A481%2C%22h%22%3A762%7D"></figure><p>I will note that the current model is designed so the key caps are a bit recessed. </p><figure class="image image_resized" style="width:75%;"><img src="https://media.prusaprinters.org/media/prints/108646/rich_content/e290bd19-7dfd-4ab2-b858-972d700d81bd/sideview.png#%7B%22uuid%22%3A%22e52c5ab0-26df-48f5-8a88-f4d82bd045c2%22%2C%22w%22%3A1028%2C%22h%22%3A677%7D"></figure><p>I've included a second version with a slightly lower brim so they can stick out more like they do on the Adafruit keypad. The normal version is ideal for short flat keycaps. The narrow version is better for slanted caps (like those pictured).</p><figure class="image image_resized" style="width:75%;"><img src="https://media.prusaprinters.org/media/prints/108646/rich_content/97426a6a-96c2-4f18-8055-a949783d4583/shorter-version.png#%7B%22uuid%22%3A%2222bd508d-0734-427f-88d8-6ab682216068%22%2C%22w%22%3A1282%2C%22h%22%3A966%7D"></figure><p>It was difficult to leave the AAA battery accessible. This was part of the reason the PCB sits so low. I have pretty big hands, but can still change the batter from the slot on the top.</p><figure class="image image_resized" style="width:75%;"><img src="https://media.prusaprinters.org/media/prints/108646/rich_content/f23beb2f-62e0-4933-9976-08ad725a4a7e/topview.png#%7B%22uuid%22%3A%222f9c8054-c26b-4f9c-be82-3bba2b092eae%22%2C%22w%22%3A643%2C%22h%22%3A861%7D"></figure><p>I left a similar cut out to access the switch on the side. You will need to insert the PCB at an angle, since the stock switch sticks out a bit. </p><figure class="image image_resized" style="width:75%;"><img src="https://media.prusaprinters.org/media/prints/108646/rich_content/6b7bc09e-482c-4e0a-b344-7bc496b881d4/switch.png#%7B%22uuid%22%3A%22b54eaaf7-d9a3-4c48-81b0-af513d5d5616%22%2C%22w%22%3A780%2C%22h%22%3A859%7D"></figure><h4>Print Settings:</h4><p><strong>Supports:</strong> Yes, Everywhere </p><p><strong>Material:</strong> I used PETG, but almost any filament would work.</p><p><strong>Infill:</strong> 20% (add more if you want it to have more heft)</p><p><strong>Resolution: </strong>.20</p>
With this file you will be able to print Tentaku Mechanical Calculator Case with your 3D printer. Click on the button and save the file on your computer to work, edit or customize your design. You can also find more 3D designs for printers on Tentaku Mechanical Calculator Case.