Terminator Arm: Top Lighting & Automated Brightness
thingiverse
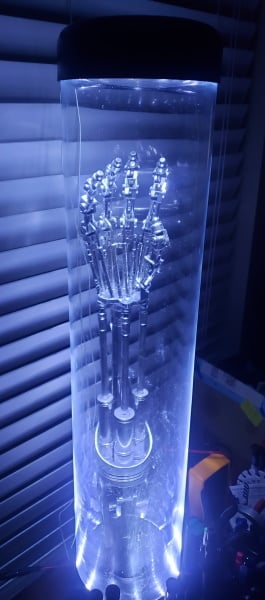
Hey Guys - This remix is somewhat of a 3 in 1 as it instructs for how to add individual LEDs into the base instead of the IKEA string, includes an optional top cap which contains additional LEDs, and finally instructions for being able to control the brightness via Home Assistant (via ESPHome integration). If not interested in the automation part and just want to use standard LEDs, follow the same LED wiring steps then connect the 6 parallel sets (3 if not using top) directly to the 12V input. I printed the top parts using PLA @ 10% infill with an 0.2 layer height & 0.6 nozzle. 0.4 may be used, but used 0.6 to save time. Instructions and all files may be found here: https://github.com/BzowK/TerminatorArmLighting
With this file you will be able to print Terminator Arm: Top Lighting & Automated Brightness with your 3D printer. Click on the button and save the file on your computer to work, edit or customize your design. You can also find more 3D designs for printers on Terminator Arm: Top Lighting & Automated Brightness.