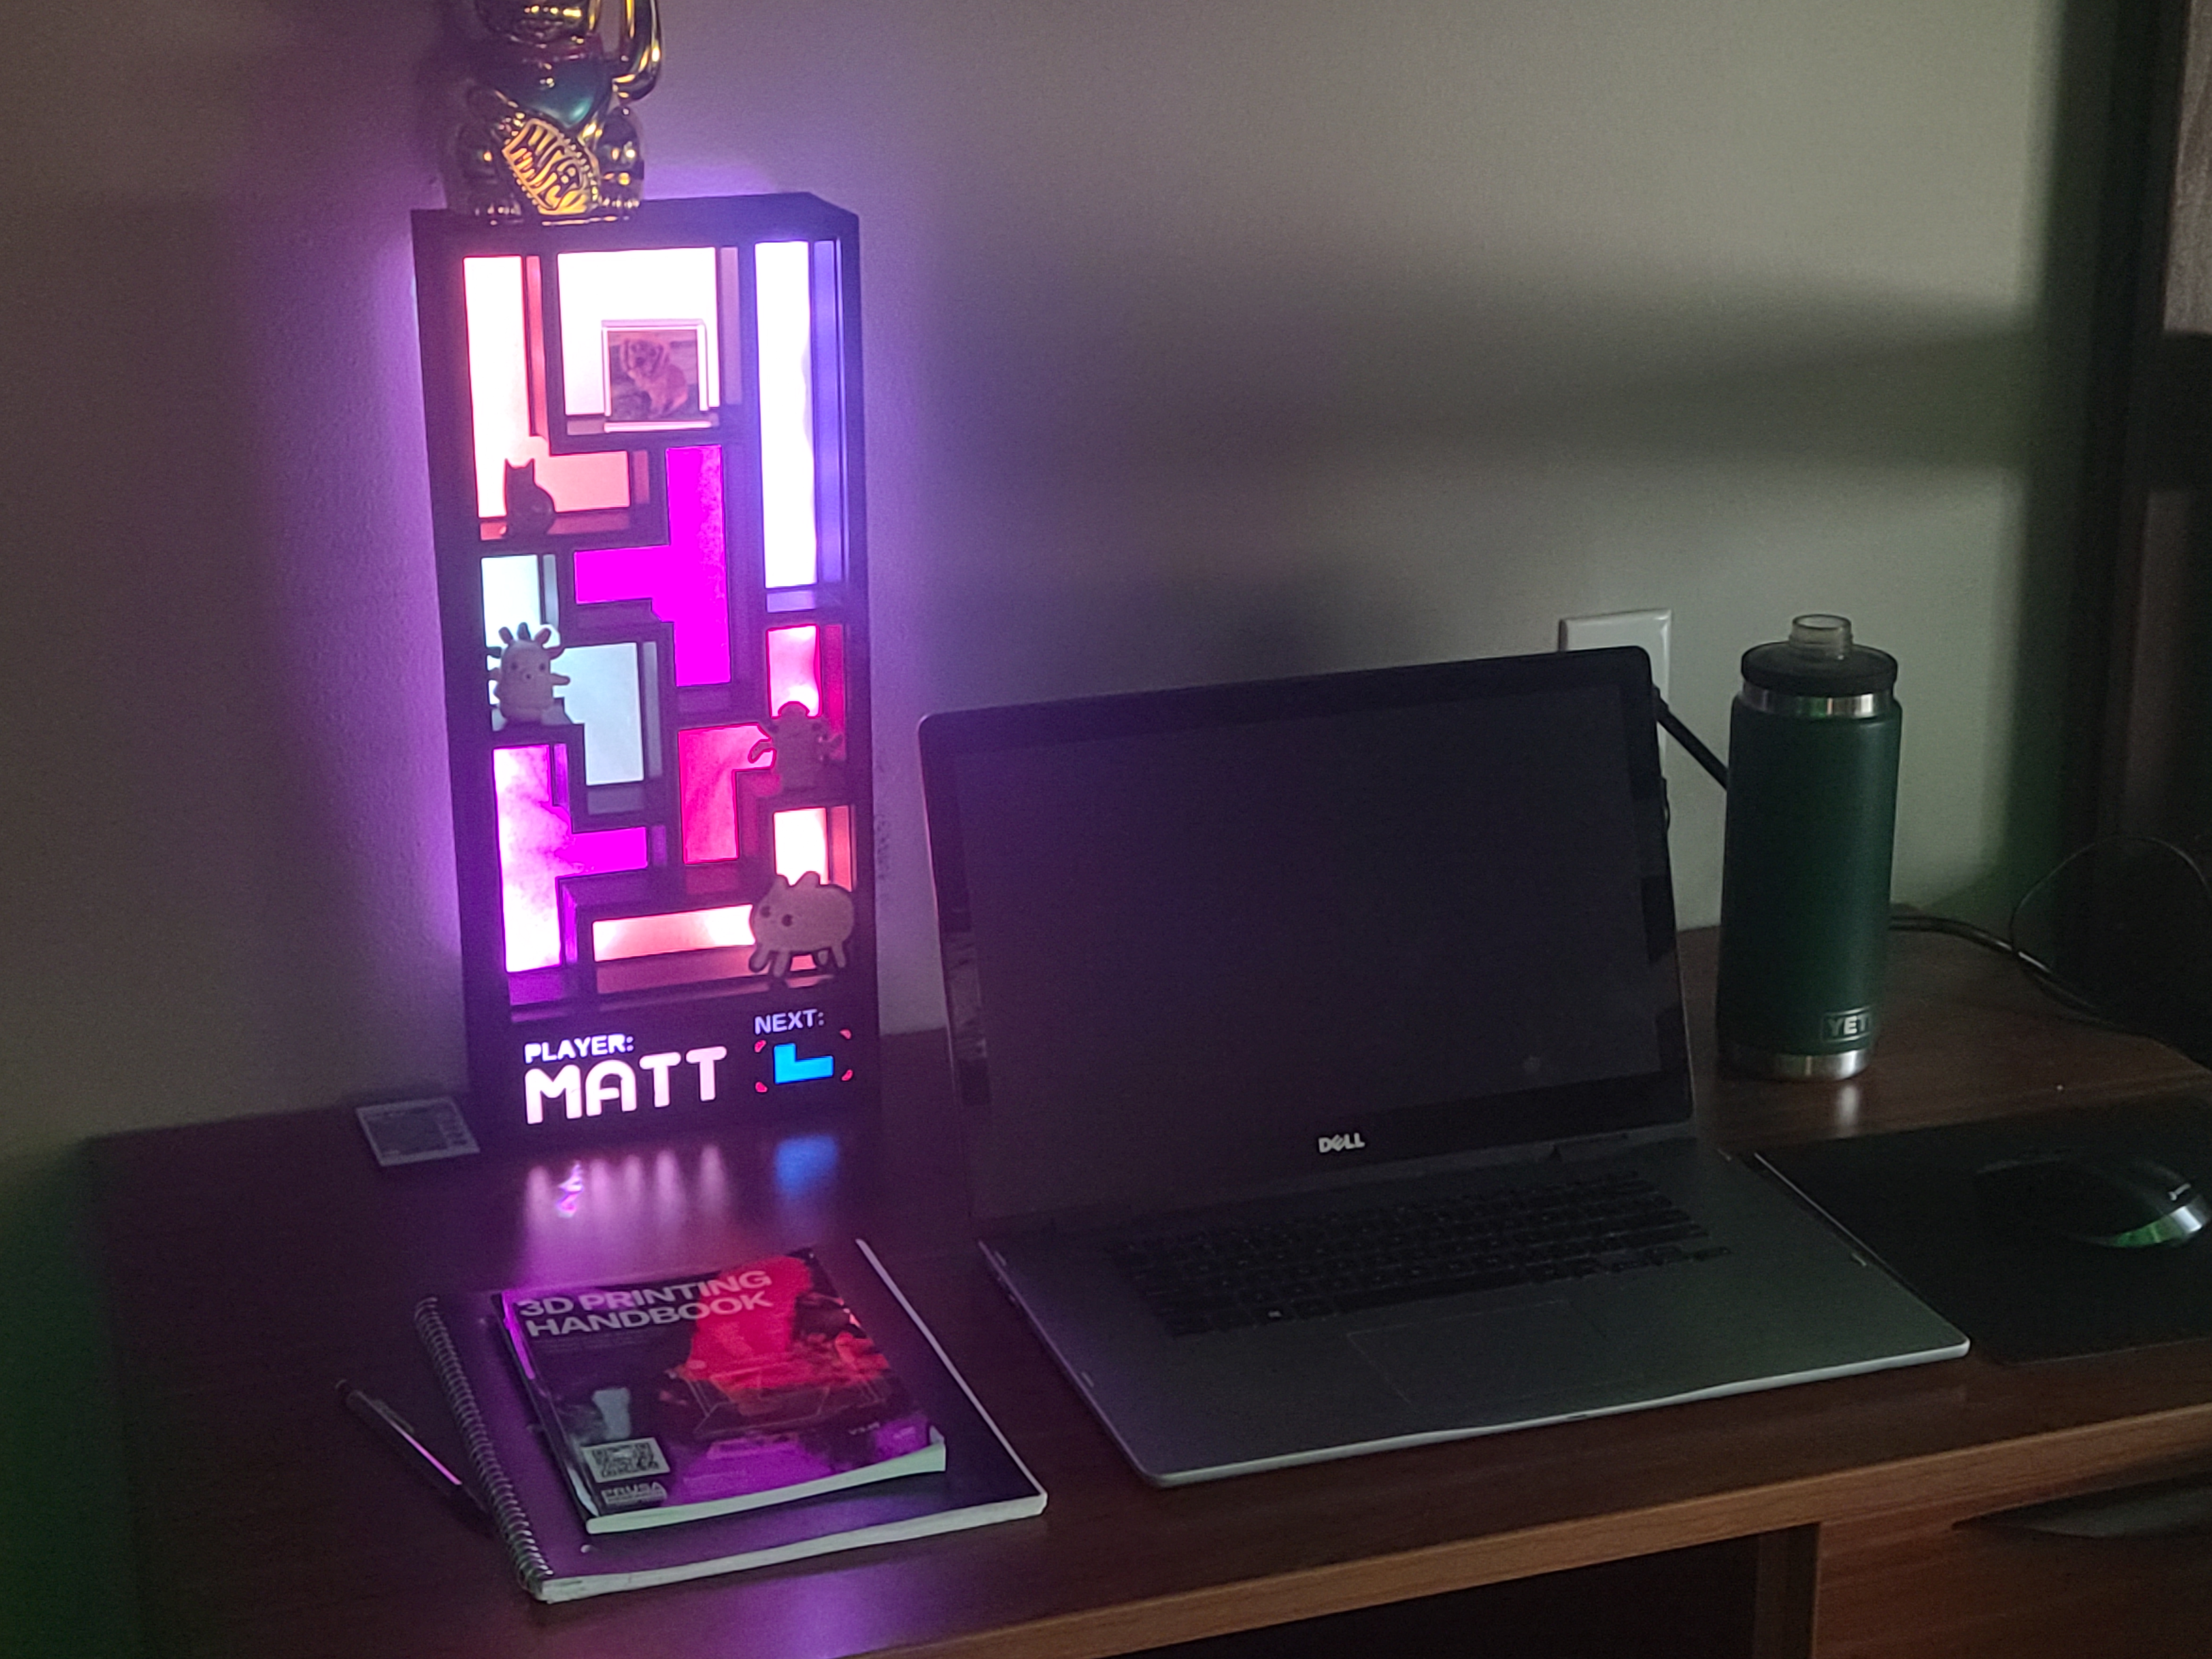
Tetris Shelf "TetriShelf"
prusaprinters
<p>This tetris shelf is made up of many tetris pieces stacked up. Unlike the actual video game “Tetris”, these pieces won't disappear when you complete a line! With an LED light strip wrapped through the interior, the whole frame lights up along with a customizable name plate near the bottom.</p><h3>Things you will need:</h3><p>This is a large print, so you will need quite a bit of PETG filament. However, there are some other items you will need to make this print, such as the lights or tissue paper.</p><ul><li>For the lights, you can essentially use any <strong>LED light strip</strong> that is longer than 45 inches. The light strip I used came with a remote, which I found to be very useful.<ul><li>Some of the light strip and wires will be hidden inside the lower frame, so if you have excess wires or a strip longer than 45 inches, you should be fine</li></ul></li><li>For the colored paper behind each tetromino, I used <strong>colored tissue paper</strong> (commonly found in arts/crafts sections in stores). This tissue paper is also commonly used in gift wrapping.<ul><li>Make sure you get the following colors: Red, Orange, Yellow, Green, Blue, and Purple.</li></ul></li><li><strong>Glue</strong> for attaching colored tissue paper to each tetromino, as well as the light strip to the frame. <ul><li>It may also be beneficial to have sandpaper or a electric sanding device (Dremel) to sand the tetromino surfaces before applying glue. This will make a stronger bond between the tissue paper and plastic. I used Elmer's Stick Glue after using a Dremel to sand the surface of each tetromino.</li></ul></li><li><strong>Four M3 Bolts</strong>. Make sure these metric bolts are 10mm long. These will be inserted into counterbores on the bottom plate to lock the name plate in place.</li></ul><h3>Setup</h3><figure class="image"><img src="https://media.printables.com/media/prints/170520/rich_content/02780e11-c601-4e8a-8158-27d200bcf36a/nameplate.jpg#%7B%22uuid%22%3A%22fe0959e4-c6c8-4408-94db-e050539748b0%22%2C%22w%22%3A3560%2C%22h%22%3A1409%7D"></figure><p>You may have noticed the name plate in the photos. This plate states the player's name as being “Matt”. If your name is not Matt, then there is a template attached in the model files called “Name_Plate_Template”. If you wish to add your own name to this template, open the attached file called <code>Name_Plate_Template.step</code> in a CAD software of your choice. Sketch your name and extrude a cut through the bottom surface of the name plate. See how the “A” in “Matt” has that weird line in the interior? That line ensures that the middle hole of the “A” stays in place, without it that hole would just fall out. Make sure you use similar tactics to ensure your letters stay in place.</p><h3>Printing</h3><p>Printing will take a while, so be patient with this step. You could spend this time figuring out what items you will place in each tetromino. Even better, you could spend this time playing tetris!</p><h3>Assembly</h3><p>Assembly comes in two main parts, the frame and the tetrominoes. You will want to begin by assembling each tetromino. This includes sanding down the back surface (optional) and attaching the colored tissue paper.</p><ol><li>(Optional) Sand the back surface of each tetromino. This “back surface” is the first layer of the print, or whatever layer was in direct contact with the heat bed. There should be no inner flange on this side of the tetromino.</li><li>Cut out a correct section of tissue paper to attach to this tetromino.<ol><li>Using the tetromino as a stencil, lightly sketch the outline of the plastic piece onto the tissue paper with a pencil. Then, cut out this outline with some scissors. It shouldn't need to be super precise, just enough to cover the back surface of the tetromino.</li></ol></li><li>Apply glue to the plastic tetromino.</li><li>Carefully align the tissue paper to the glued surface, and apply pressure for a few seconds.</li></ol><p>After attaching paper to each tetromino, you should be able to stack them on top of the Lower Frame. Each piece has an inlet or cut on the top and an extension or outcrop on the bottom.</p><figure class="image"><img src="https://media.printables.com/media/prints/170520/rich_content/8927c140-a1db-4879-9621-02c6ff840396/stacking.png#%7B%22uuid%22%3A%22cc2f6640-ce16-4af7-916e-0c76a9d62e58%22%2C%22w%22%3A1025%2C%22h%22%3A775%7D"></figure><p>You are now ready to assemble the rest of the frame around these stacked pieces. Insert the square pegs and circle pegs into each slot on the lower frame as follows.</p><figure class="image"><img src="https://media.printables.com/media/prints/170520/rich_content/ee1561bd-4ed7-4217-9ede-8bc1c60691b3/square_and_circle_peg.png#%7B%22uuid%22%3A%22c584c8af-5012-42be-a459-87b0e4080092%22%2C%22w%22%3A1811%2C%22h%22%3A957%7D"></figure><p>There are similar slots in the upper frame. Align the upper frame to these pegs and press together. You are now ready to attach the LED light strip. Ensure that the strip is cut to a length around 45 inches. The strip should fit snugly in a channel that loops around the back of the frames. Start by positioning the end of the strip (Part that has no more wire attached) at the spot marked with a green dot in the following diagram. Then, wrap the wire along the channel (Marked with red in the diagram) until you complete a circle. Pass the remaining light strip through the large slot at the bottom of the lower frame.</p><figure class="image"><img src="https://media.printables.com/media/prints/170520/rich_content/1fadbce9-653c-420e-b9d9-e71a5abbc833/lightstrip.png#%7B%22uuid%22%3A%2212f86779-a54b-4805-8b3e-749ecf757e5e%22%2C%22w%22%3A1195%2C%22h%22%3A727%7D"></figure><figure class="image image_resized" style="width:35.16%;"><img src="https://media.printables.com/media/prints/170520/rich_content/de7bff6b-001c-42c1-aaaf-6f535e41265e/20220413_172858.jpg#%7B%22uuid%22%3A%22dfe74588-bed5-4369-9ff1-22bfb129cfec%22%2C%22w%22%3A3468%2C%22h%22%3A4624%7D"></figure><p>To prepare the name plate, glue colored tissue paper to the back, similarly to the tetrominoes. Then, slide this plate into the lower frame along the rails. Finally, attach the bottom plate with the four M3 bolts. There is a small slot in the bottom plate to pass a power wire for the LED strip.<img src="https://media.printables.com/media/prints/170520/rich_content/8d7df30d-ee19-4511-876d-1cab023d6466/bottom_plates.png#%7B%22uuid%22%3A%224b11acdf-384c-405a-ad3e-7963af616739%22%2C%22w%22%3A1576%2C%22h%22%3A1327%7D"></p><h3>You did it!</h3><p>Congrats! Your tetris shelf should be ready to stack all your small items! If you want a challenge, try remaking this shelf with differently-arranged tetrominoes.</p>
With this file you will be able to print Tetris Shelf "TetriShelf" with your 3D printer. Click on the button and save the file on your computer to work, edit or customize your design. You can also find more 3D designs for printers on Tetris Shelf "TetriShelf".
