Tevo Tarantula Z axis belt drive
thingiverse
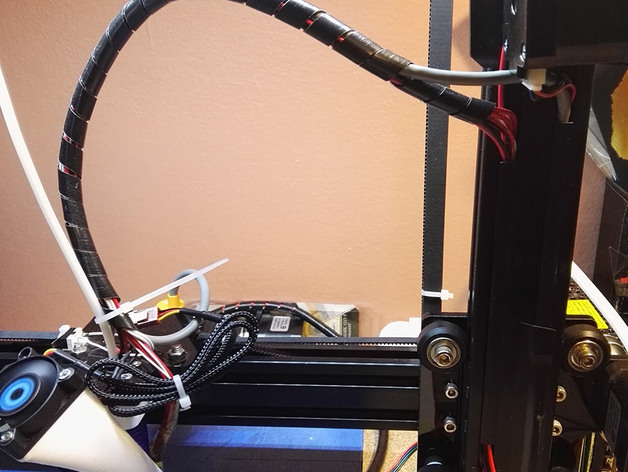
Z Axis Belt drive for Tevo Tarantula! Say goodbye to Z wobble :) Very simple and sturdy design. PLEASE MAKE SURE YOUR FRAME IS BRACED, the tension of the belt will skew it otherwise. CAREFUL: You will lose about 1cm of print volume on the right side because the X-carriage will crash into the belt holder Materials needed: -) 2 GT2 Pulley 16 tooth, 5mm hole, 10mm width -) 1m 10mm GT2 belt -) 1 40mm M5 Bolt -) 1 M5 nut -) 2 F695ZZ flanged bearing (you can use any flanged bearing with 5mm inner hole but you have to adjust the design!!) -) small zip ties -) Mounting materials: 10* M4 T-nuts and M4 8mm screws PLEASE NOTE INSTRUCTIONS BELOW Print Settings Printer: Tevo Tarantula i3 Rafts: No Supports: No Resolution: 0.3 Infill: 40% or more Notes: Needs about 65g of filament and 1.5h print time. NO SUPPORTS Post-Printing After printing Clear out the holes in the belt holder with a screw driver or drill. They are closed so that no supports are needed. Assembling Add flanged bearings from the outside, insert bolt and pulley. Add nut. Don't forget to tighten the pulley. Mounting 1) Mount the motor on the bottom as far right on the edge as possible and tighten the screws. 2) Mount the top idler assembly on the frame but don't tighten completely. 3) Mount belt holder in the x-axis and look from top to align it with the motor pulley but don't tighten completely yet. 4) Insert the belt on the TOP IDLER FIRST and attach it to the belt holder as shown. 5) Pull the loose part of the belt down and let it tighten by the x-axis weight and ALIGN THE BELT holder and top idler until the front and back part of the belt align (look from front). 6) TIGHTEN ALL SCREWS before the next step 7) insert the belt around the motor pulley and attach to the bottom of the belt holder while holding the x-axis and strechting the belt. This is a bit tricky but not impossible alone. MARLIN FIRMWARE and SOFTWARE CHANGES Edit configuration_adv.h file, and replace: CHANGE#define DISABLE_INACTIVE_Z true TO#define DISABLE_INACTIVE_Z false AND CHANGE#define SD_FINISHED_RELEASECOMMAND "M84 X Y Z E" TO (Z removed)#define SD_FINISHED_RELEASECOMMAND "M84 X Y E" Edit configuration.h file and change Z steps/mm to 100 and feedrate for Z motor to 5 (don't change anything else). define DEFAULT_AXIS_STEPS_PER_UNIT {80,80,100,97.0874} define DEFAULT_MAX_FEEDRATE {225, 225, 5, 25} In repetier host and your slicer software: Disable "deactivate motors after end" or similar. If you want you can park your printer after completion with an end script: Example of what to add:G90 ; Absolute position G0 X0 Y200 F6000 ;move to back corner G0 Z0.5 ;rest head on print bed
With this file you will be able to print Tevo Tarantula Z axis belt drive with your 3D printer. Click on the button and save the file on your computer to work, edit or customize your design. You can also find more 3D designs for printers on Tevo Tarantula Z axis belt drive.