Tevo Tornado - Control Box Upgrade
myminifactory
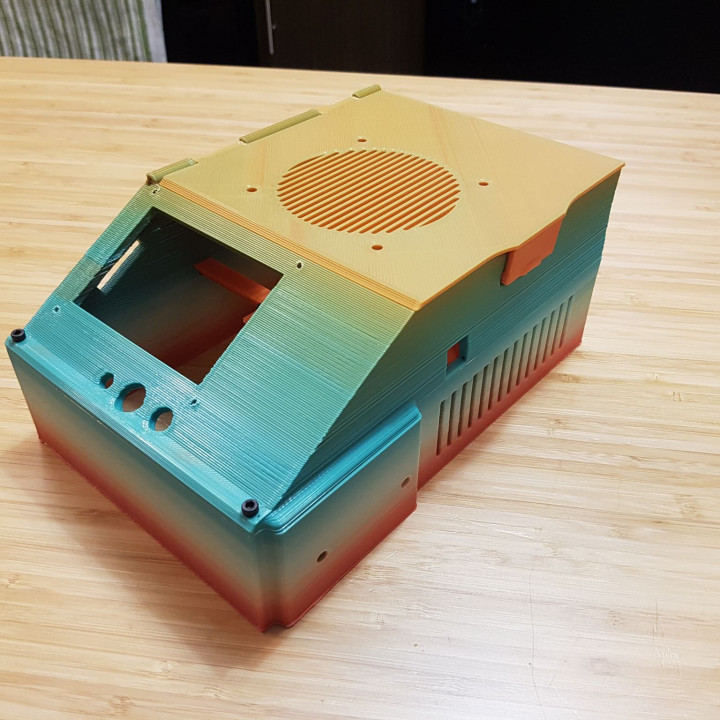
Here it is! This control box upgrade uses the bottom/rear piece of the stock control box to minimize installation time, you don't need to unhook the aviation connectors or power supply for installation. Notes: - You have to drill out or drill&tap most holes for M3 screws - Use filament as the hinge. It should fit 2.85 mm but I used 1.75 mm just fine - The SGen insert probably also works for Gen-L but it hasn't been tested - You only need to print 1 lid and 1 insert - All fans should blow IN to the enclosure - First time I installed this I didn't even need to unplug any wires, but it might help to keep them neat and tidy! - Only "Top Shell" needs support material, and not that much - If you use 1.75 mm filament as the hinge, you will likely need to heat and bend the lid latch so it engages properly - Snip the backs of the Top and Bottom shells so they look like they do in the photo. Those bits are just there to prevent lifting and warping.
With this file you will be able to print Tevo Tornado - Control Box Upgrade with your 3D printer. Click on the button and save the file on your computer to work, edit or customize your design. You can also find more 3D designs for printers on Tevo Tornado - Control Box Upgrade.