The Box - Ender 3v2 Direct Drive Noctura cooler with BLTouch
thingiverse
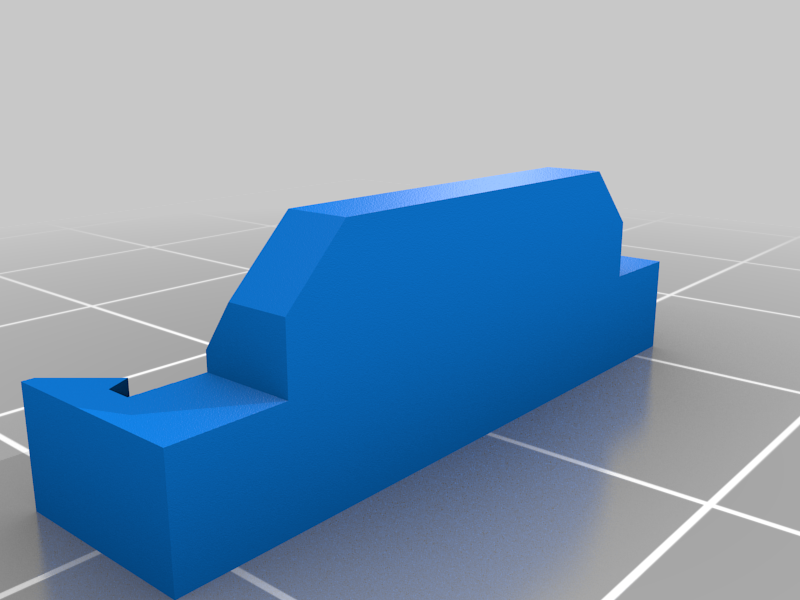
<p>I have looked high and low for a direct drive cooling system for the Ender 3v2 that uses Noctua fans (only because I like how quiet and sturdy they are), but couldn't find anything I liked. So I decided to design my own. </p> <p>NOTES:<br /> • This setup I printed using PETG (but PLA and ABS work fine). <br /> • I printed it at 240C with a bed temp of 85C. <br /> • I used the original extruder stepper motor, but I'm honestly, not crazy about the weight it puts on the whole assembly, so I'll probably be replacing it with this: <a href="https://www.amazon.com/Twotrees-Nema17-Stepper-Bipolar-Printer/dp/B07TGJSNJB?crid=3TV4UI8K6MJXJ&keywords=low%2Bprofile%2Bstepper%2Bmotor&qid=1637616743&qsid=131-2815521-6567751&sprefix=low%2Bprofile%2Bstepper,aps,162&sr=8-3&sres=B07TGJSNJB,B07TY4BFF2,B08LVZKYYV,B06Y5VPSFN,B00PNEQ79Q,B08L3XBCGP,B0721MTJ3P,B01CP18J4A,B094GNFS4R,B075T13T2D,B07RZHWYQ9,B00QEWAL98,B08346RFVZ,B082LSQWZF,B00PNEPW4C,B07SBFZ596&th=1&linkCode=sl1&tag=jstadtlande00-20&linkId=4716dcb3b854b895191aaf19139e2366&language=en_US&ref_=as_li_ss_tl">pancake stepper motor</a></p> <p>When you download this, you'll notice multiple files. There are really only two files that matter with The Box - The Mounting Bracket and the Fan Housing. I've included multiple versions of the fan housing as some people have BLTouches, and some do not. There's also a variation for the Cable Chain which I've also added the link and link cover for. <br /> The mounting bracket is designed to go over the original factory gantry bracket.The sleeves for the wheels go through The Box's mounting bracket.</p> <p>I have printed hundreds of prints with The Box and have had no issues with any plastic type. </p> <p>IMPORTANT NOTICE: I am not responsible for any modifications you make to your printer and I highly recommend you do your research first and carefully make sure you are always insulating your wires and boards and that you solder your connections well. Improperly connecting electronics can result in a fire or damage to people or property. All of these modifications you make at your own risk.</p> <p>PARTS NEEDED:<br /> • 1X Fan housing of your choice (printed)<br /> • 1X Mounting bracket (printed)<br /> • 2X M3 20mm socket head screws with nuts (for bottom holes on fan housing)<br /> • 2X M3 8mm socket head screws with nuts (for side holes on fan housing)<br /> • 2X M2.5 20mm socket head screws with nuts (for BLTouch. Can use longer if that's what you have)<br /> • 1X 12V Noctura 40mm X 20mm fan for hotend: <a href="https://www.amazon.com/Twotrees-Nema17-Stepper-Bipolar-Printer/dp/B07TGJSNJB?crid=3TV4UI8K6MJXJ&keywords=low%2Bprofile%2Bstepper%2Bmotor&qid=1637616743&qsid=131-2815521-6567751&sprefix=low%2Bprofile%2Bstepper,aps,162&sr=8-3&sres=B07TGJSNJB,B07TY4BFF2,B08LVZKYYV,B06Y5VPSFN,B00PNEQ79Q,B08L3XBCGP,B0721MTJ3P,B01CP18J4A,B094GNFS4R,B075T13T2D,B07RZHWYQ9,B00QEWAL98,B08346RFVZ,B082LSQWZF,B00PNEPW4C,B07SBFZ596&th=1&linkCode=sl1&tag=jstadtlande00-20&linkId=4716dcb3b854b895191aaf19139e2366&language=en_US&ref_=as_li_ss_tl">40x20mm fan</a><br /> • 1X 12V Noctura 40mm X 10mm fan for print duct: <a href="https://www.amazon.com/Twotrees-Nema17-Stepper-Bipolar-Printer/dp/B07TGJSNJB?crid=3TV4UI8K6MJXJ&keywords=low%2Bprofile%2Bstepper%2Bmotor&qid=1637616743&qsid=131-2815521-6567751&sprefix=low%2Bprofile%2Bstepper,aps,162&sr=8-3&sres=B07TGJSNJB,B07TY4BFF2,B08LVZKYYV,B06Y5VPSFN,B00PNEQ79Q,B08L3XBCGP,B0721MTJ3P,B01CP18J4A,B094GNFS4R,B075T13T2D,B07RZHWYQ9,B00QEWAL98,B08346RFVZ,B082LSQWZF,B00PNEPW4C,B07SBFZ596&th=1&linkCode=sl1&tag=jstadtlande00-20&linkId=4716dcb3b854b895191aaf19139e2366&language=en_US&ref_=as_li_ss_tl">40x10mm fan</a><br /> • 2X mini buck converters to lower the voltage of your fans from 24V to 12V:<a href="https://www.amazon.com/Twotrees-Nema17-Stepper-Bipolar-Printer/dp/B07TGJSNJB?crid=3TV4UI8K6MJXJ&keywords=low%2Bprofile%2Bstepper%2Bmotor&qid=1637616743&qsid=131-2815521-6567751&sprefix=low%2Bprofile%2Bstepper,aps,162&sr=8-3&sres=B07TGJSNJB,B07TY4BFF2,B08LVZKYYV,B06Y5VPSFN,B00PNEQ79Q,B08L3XBCGP,B0721MTJ3P,B01CP18J4A,B094GNFS4R,B075T13T2D,B07RZHWYQ9,B00QEWAL98,B08346RFVZ,B082LSQWZF,B00PNEPW4C,B07SBFZ596&th=1&linkCode=sl1&tag=jstadtlande00-20&linkId=4716dcb3b854b895191aaf19139e2366&language=en_US&ref_=as_li_ss_tl"> mini buck converter</a><br /> • 2X M4 16mm screws (for side fan)<br /> • Various heat shrink tubes (I used these: <a href="https://www.amazon.com/Twotrees-Nema17-Stepper-Bipolar-Printer/dp/B07TGJSNJB?crid=3TV4UI8K6MJXJ&keywords=low%2Bprofile%2Bstepper%2Bmotor&qid=1637616743&qsid=131-2815521-6567751&sprefix=low%2Bprofile%2Bstepper,aps,162&sr=8-3&sres=B07TGJSNJB,B07TY4BFF2,B08LVZKYYV,B06Y5VPSFN,B00PNEQ79Q,B08L3XBCGP,B0721MTJ3P,B01CP18J4A,B094GNFS4R,B075T13T2D,B07RZHWYQ9,B00QEWAL98,B08346RFVZ,B082LSQWZF,B00PNEPW4C,B07SBFZ596&th=1&linkCode=sl1&tag=jstadtlande00-20&linkId=4716dcb3b854b895191aaf19139e2366&language=en_US&ref_=as_li_ss_tl">shink tubing</a>)</p> <p>INSTRUCTIONS:<br /> 1. Print up the fan housing of your choice and the mounting bracket.<br /> 2. Turn off your printer and unplug it.<br /> 3. Using a multimeter and 24V DC power supply, set your two mini buck converters to 12V. <br /> 4. Remove all of your fan housing and hotend from the mounting bracket on your gantry.<br /> 5. Turn over your printer, open up the CPU area, and splice in the two mini buck converters into your hotend wire and your fan wire respectively. (BE SURE to insulate everything well - I actually put my buck converters inside the largest shrink tubing)<br /> 6. Close everything up and turn your printer upright. <br /> 7. Remove your extruder motor and wire in extensions to extend your stepper motor wire 45cm. (you can buy this if you don't want to splice into the factory wire: <a href="https://www.amazon.com/Twotrees-Nema17-Stepper-Bipolar-Printer/dp/B07TGJSNJB?crid=3TV4UI8K6MJXJ&keywords=low%2Bprofile%2Bstepper%2Bmotor&qid=1637616743&qsid=131-2815521-6567751&sprefix=low%2Bprofile%2Bstepper,aps,162&sr=8-3&sres=B07TGJSNJB,B07TY4BFF2,B08LVZKYYV,B06Y5VPSFN,B00PNEQ79Q,B08L3XBCGP,B0721MTJ3P,B01CP18J4A,B094GNFS4R,B075T13T2D,B07RZHWYQ9,B00QEWAL98,B08346RFVZ,B082LSQWZF,B00PNEPW4C,B07SBFZ596&th=1&linkCode=sl1&tag=jstadtlande00-20&linkId=4716dcb3b854b895191aaf19139e2366&language=en_US&ref_=as_li_ss_tl">stepper motor extension wire</a>)<br /> 8. Mount your extruder motor facing toward the mounting bracket, with the extrusion port down.<br /> 9. Mount the two fans (larger fan goes on the bottom). Be sure that the arrow for airflow is pointing in). Note: I only used two screws for each fan. The factory screws from Noctura for the hotend fan and the two M4 screws for the print cooler.<br /> 10. Mount the mounting bracket to the gantry. The screws for the wheels go through the mounting bracket and the sleeves slide into the holes designed for them. There is also a hole on the front for an M2 screw if you want to secure it further (as I did).<br /> 11. Mount the BLTouch to the fan housing unit. <br /> 12. Attach the fan housing to the mounting bracket using the M3 screws as described above.<br /> 13. Attach wires to the fans, the BLTouch, and the stepper motor. <br /> 14. Test everything out and set your z-index correctly. I use -1.43 for my z-index. <br /> </p> <p></p>
With this file you will be able to print The Box - Ender 3v2 Direct Drive Noctura cooler with BLTouch with your 3D printer. Click on the button and save the file on your computer to work, edit or customize your design. You can also find more 3D designs for printers on The Box - Ender 3v2 Direct Drive Noctura cooler with BLTouch.