The Cup of Science!
thingiverse
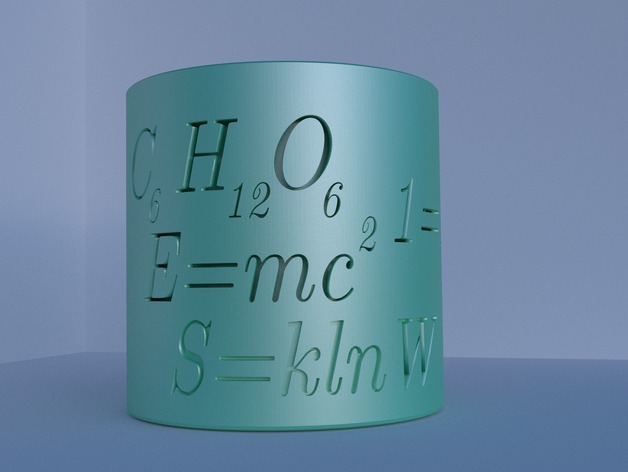
As a high school student, I've witnessed the tremendous growth of the 3D design and printing industry. Nations across the globe have realized the immense potential for such technology and have started to institute classes and write new curriculum as a result. The Cup of Science! project is an excellent way for educators to introduce students to the forefront of the latest technology! MODEL IS CURRENTLY IN THE PRINT PHASEMODEL NEEDS TO BE SCALED IDEALLY TO 3.5inx3.5inx3.5in How I Designed This To design The Cup of Science, I took inspiration from a cup that I got from the Massachusetts Institute of Technology. The aesthetics of the cup were were very appealing to me, and I figured that it would be a very interesting experience to remix. I worked in Blender 3D to construct a 3D model of a cup, which I would later emboss with similar mathematical and scientific equations as those found on the actual cup. To prepare to text for embossing, I created a curve-object that would curve the mesh exactly to the outside of the cup. Next, I converted the equation from a text into a mesh and engraved it into the cup with a Boolean modifier. Project: The Cup of Science! Overview & Background The Cup of Science! project will give excellent engineering exposure to students as they will work and experiment with 3D designing and printing. Objectives In this project, students will go through a comprehensive lesson to learn introductory to intermediate 3D modeling and designing skills, which will prepare them to experiment further on their own in the follow up activity. Audience This project is most suitable for middle school and high school students who have basic computer literacy skills. Also, basic geometry knowledge would also be great to know for this project. Subjects The Cup of Science! incorporates many concepts from mathematics (such as projections and geometry) as well as engineering (3D designing and printing). Lesson/Activity Blender 3D: open source powerhouse Blender 3D is an excellent program for artistic ventures and 3D modeling. I would like to point out that this program is open source, which is a noteworthy feature as teachers can introduce 3D printing and computer design techniques without having to invest hundreds of dollars on expensive software. Being open source, there are countless free add-ons that can significantly expand the scope of the program depending on what the educator wants to teach. Go to blender.org and download the program from their main page. Getting started: opening up a scene Once you have downloaded and installed Blender, open up the program. This should be your scene once you have opened up the program: a cube, a point source light, and a camera. We will not need the cube in the start scene, so right click it and press the delete key. There should be a pop-up saying delete. Press that pop-up. Quick viewing tips in Blender If you are new to Blender 3D, holding the middle mouse button (mmb) will allow you to look around the scene, scrolling the mmb will allow you to zoom in and out, and holding the shift-key and the mmb simultaneously while moving your mouse will allow you to scroll your view from side-to-side. After deleting the cube, press "shift-a" to open up the "add-object menu". Put your mouse pointer to mesh and select the cylinder object. After clicking the cylinder mesh, you should see a cylinder pop up in your scene. Originally, the cylinder had 32 vertices. To make the cylinder more smooth, change the vertices value to 256 (the higher this value is, the smoother the cylinder will be). I have added another cylinder into the scene for a quick comparison. On the left is the original cylinder and the on the right is the edited one. Note that you cannot move the cylinder at all if you wish to change the vertex count. It's time to edit the geometry of the cylinder! To enter edit mode press the "tab" key. Make sure that you're in "face-select" mode. The other two options allow you to select vertices and edges respectively. Go to the top of the cylinder and right click it to select it. After that, press the delete key and select faces. To give the cup a thickness, click the solidify modifier in the "object-modifier" menu. All object modifers can be found in the tab that has a light-blue wrench on the right side of the screen. Set the thickness to .15 in the thickness option. As you can see, the cup as an evident thickness. Let's add some life to this cup, create a loop cut by pressing "ctrl-r". Bring it near to the bottom of the cup. Do another loop-cut between the previous cut and bottom of the cup. Select the bottom face of the cup and press the "s" key. Slide the mouse so that it slightly sizes down the bottom face of the cup. In the end, you should have a curving bottom on the cup. You could repeat this with more loop-cuts to make the curve even smoother. Press "tab" to go back into object mode. To add a bevel to the rim of the cup, go to the object-modifier tab and select the bevel option. Hit apply for both the solidify and bevel modifiers. The body of the cup is now complete! Embossing: detailing the cup Now that the cup itself is complete, it's time to move on to embossing the sides! It is a very important skill to have a clean and efficient work flow while working on 3D design projects. Once we start incorporating text, our scene will become quite messy if we are not careful. Luckily, Blender has an option to divide one big scene into tiny smaller scenes. The cup will remain in the first scene box. In the new scene (click the adjacent scene box), press "shift-a" and insert a "text-object" into the scene. To edit the text itself (not the geometry), press the tab key and type whatever you want to emboss. In this case, I decided to do the physics equation for force: F = ma. In the "text-properties" option, which is denoted by a capital f, go to the extrude option and type in .1 . This will give our text some width. Go to the scene menu and make a third scene. Press "shift-a" and insert a circle-curve into the scene (not a circle mesh). Go back to the scene with the text. Go to the object-modifiers tab and select curve. In the object setting of the curve modifier, click "circle". Going to the scene tab, make sure that both the scene with the cup and text are visible. The text will seem out of place and not projected snuggly around the cylinder. To fix this issue, right click the text, change the curvature properties from x to -x. Deselect the text, select the circle-curve, press the "r" key, and type "180" to rotate the text to the proper angle. It is possible to alter the font of the text. Simply search for a .ttf file that you have previously downloaded. In my case, I will be using cmti.10 to give my text a more formal font. (I have included the files for cmti.10 which is a mathematical font and mathematical-pi, which is a font for math symbols in the download page). You might have noticed that the text was too compacted. To fix this, right click the circle, press the "s" key, press 2, and then press enter. To adjust to this scaling, scale the cup up by a similar factor (2x) to make the text fit correctly around the cup. To emboss, we need to convert the text into a mesh. To do so, right click the text, press "alt-c", and then press the "mesh from curve option". Next, deselect the text, select the cup, go to the object-modifiers menu, and select the boolean-modifer option. To finish the embossing phase, select the "difference option" and set the object as the text. One the modifier has been applied, the cup has been embossed! You can add more text by repeating the previous steps. Finishing up the modeling phase To position the text on a different part of the cup, you can grab the text by pressing the “g” key. You can “lock” the movement of the text to a certain axis by pressing the x, y , or z keys. Normally, these would have corresponded to an axis in 3D space, but setting the text to the curve provides us with some interesting transformations. Dragging across the x-axis spins the text across the perimeter of the cylinder and dragging across the y-axis will pull the text up or down. The z-axis scales the text, but it will not conform to the perimeter of the cup. Also, to reduce unnecessary repetition, press “shift-d” of your text while it is not a mesh if you wish to add text to the cup. To change the text, simply go into edit mode. This will save a lot of time as you will not have to make text from scratch and again modify it to conform with a circular curve. Completed "The Cup of Science!" model. To better visualize you model at anytime, press the "F12" key to render the scene. Embossed equations/concepts used in the project E=mc^2 (Einstein's equation) S=kln(2) (Boltzmann equation) C6H12O6 (chemical formula for glucose molecule) 1=1 (simplest identity) Ax=b e^(i*pi)+1=0 (Euler's equation) if/else statements (coding loops) F=ma (force equation) PV=nRT (ideal gas law) Educators, it's your turn! After your students are comfortable working with the programs, here are a few ideas for future assignments! A name-tag that has the student embossing his/her name on a thin rectangular prism. An open container that has the name of the desired content/s embossed on it (lid can be printed separately or omitted). A small key-chain tag with lost/found information on it. Duration This project can be done within 40-45 minutes, which is perfect for getting the project done within one class period (excluding printing time). Preparation For educators, Blender a 3D slicing program should be pre-installed on the computers that students will be working on. Also, students should have access to a 3D printer (you can check your local library for a printer). Finally, educators should be aware of the steps needed to scale and print the model. References The following links are a great source for learning more about 3D printing and designing:https://en.wikipedia.org/wiki/3D_printinghttp://www.businessinsider.com/why-does-3d-printing-matter-2013-1http://www.fontpalace.com/font-details/Mathematical+Pi+1/http://www.tug.dk/FontCatalogue/about.html Here is some documentation for specific aspects of Blender 3D *https://www.blender.org/manual/ Rubric/Assesment The grading process is up to the educator. None-the-less, here are some aspects that the educator could grade: Quality of student's model - Did the student devote adequate effort and time? [1-10] Creativity - What original features did the student incorporate? (skip this for 100% new students) [1-10] Final score: __ / 20 Conclusion As a student myself, I've learned a lot of my skills and techniques through the web. About four years ago when I started dabbling with 3D modeling programs, I had almost no idea where to start. Should I get a book? Should I pay $300 for a professional course? Luckily for all of us, there is a massive community of people that share amazing tutorials and skills. By participating in this competition, it's been a great experience to finally giving back to those who have helped me when I first started and to help those who wish to learn/teach about the latest technologies!
With this file you will be able to print The Cup of Science! with your 3D printer. Click on the button and save the file on your computer to work, edit or customize your design. You can also find more 3D designs for printers on The Cup of Science!.