"The Earth in Time" Clock + Night Light
prusaprinters
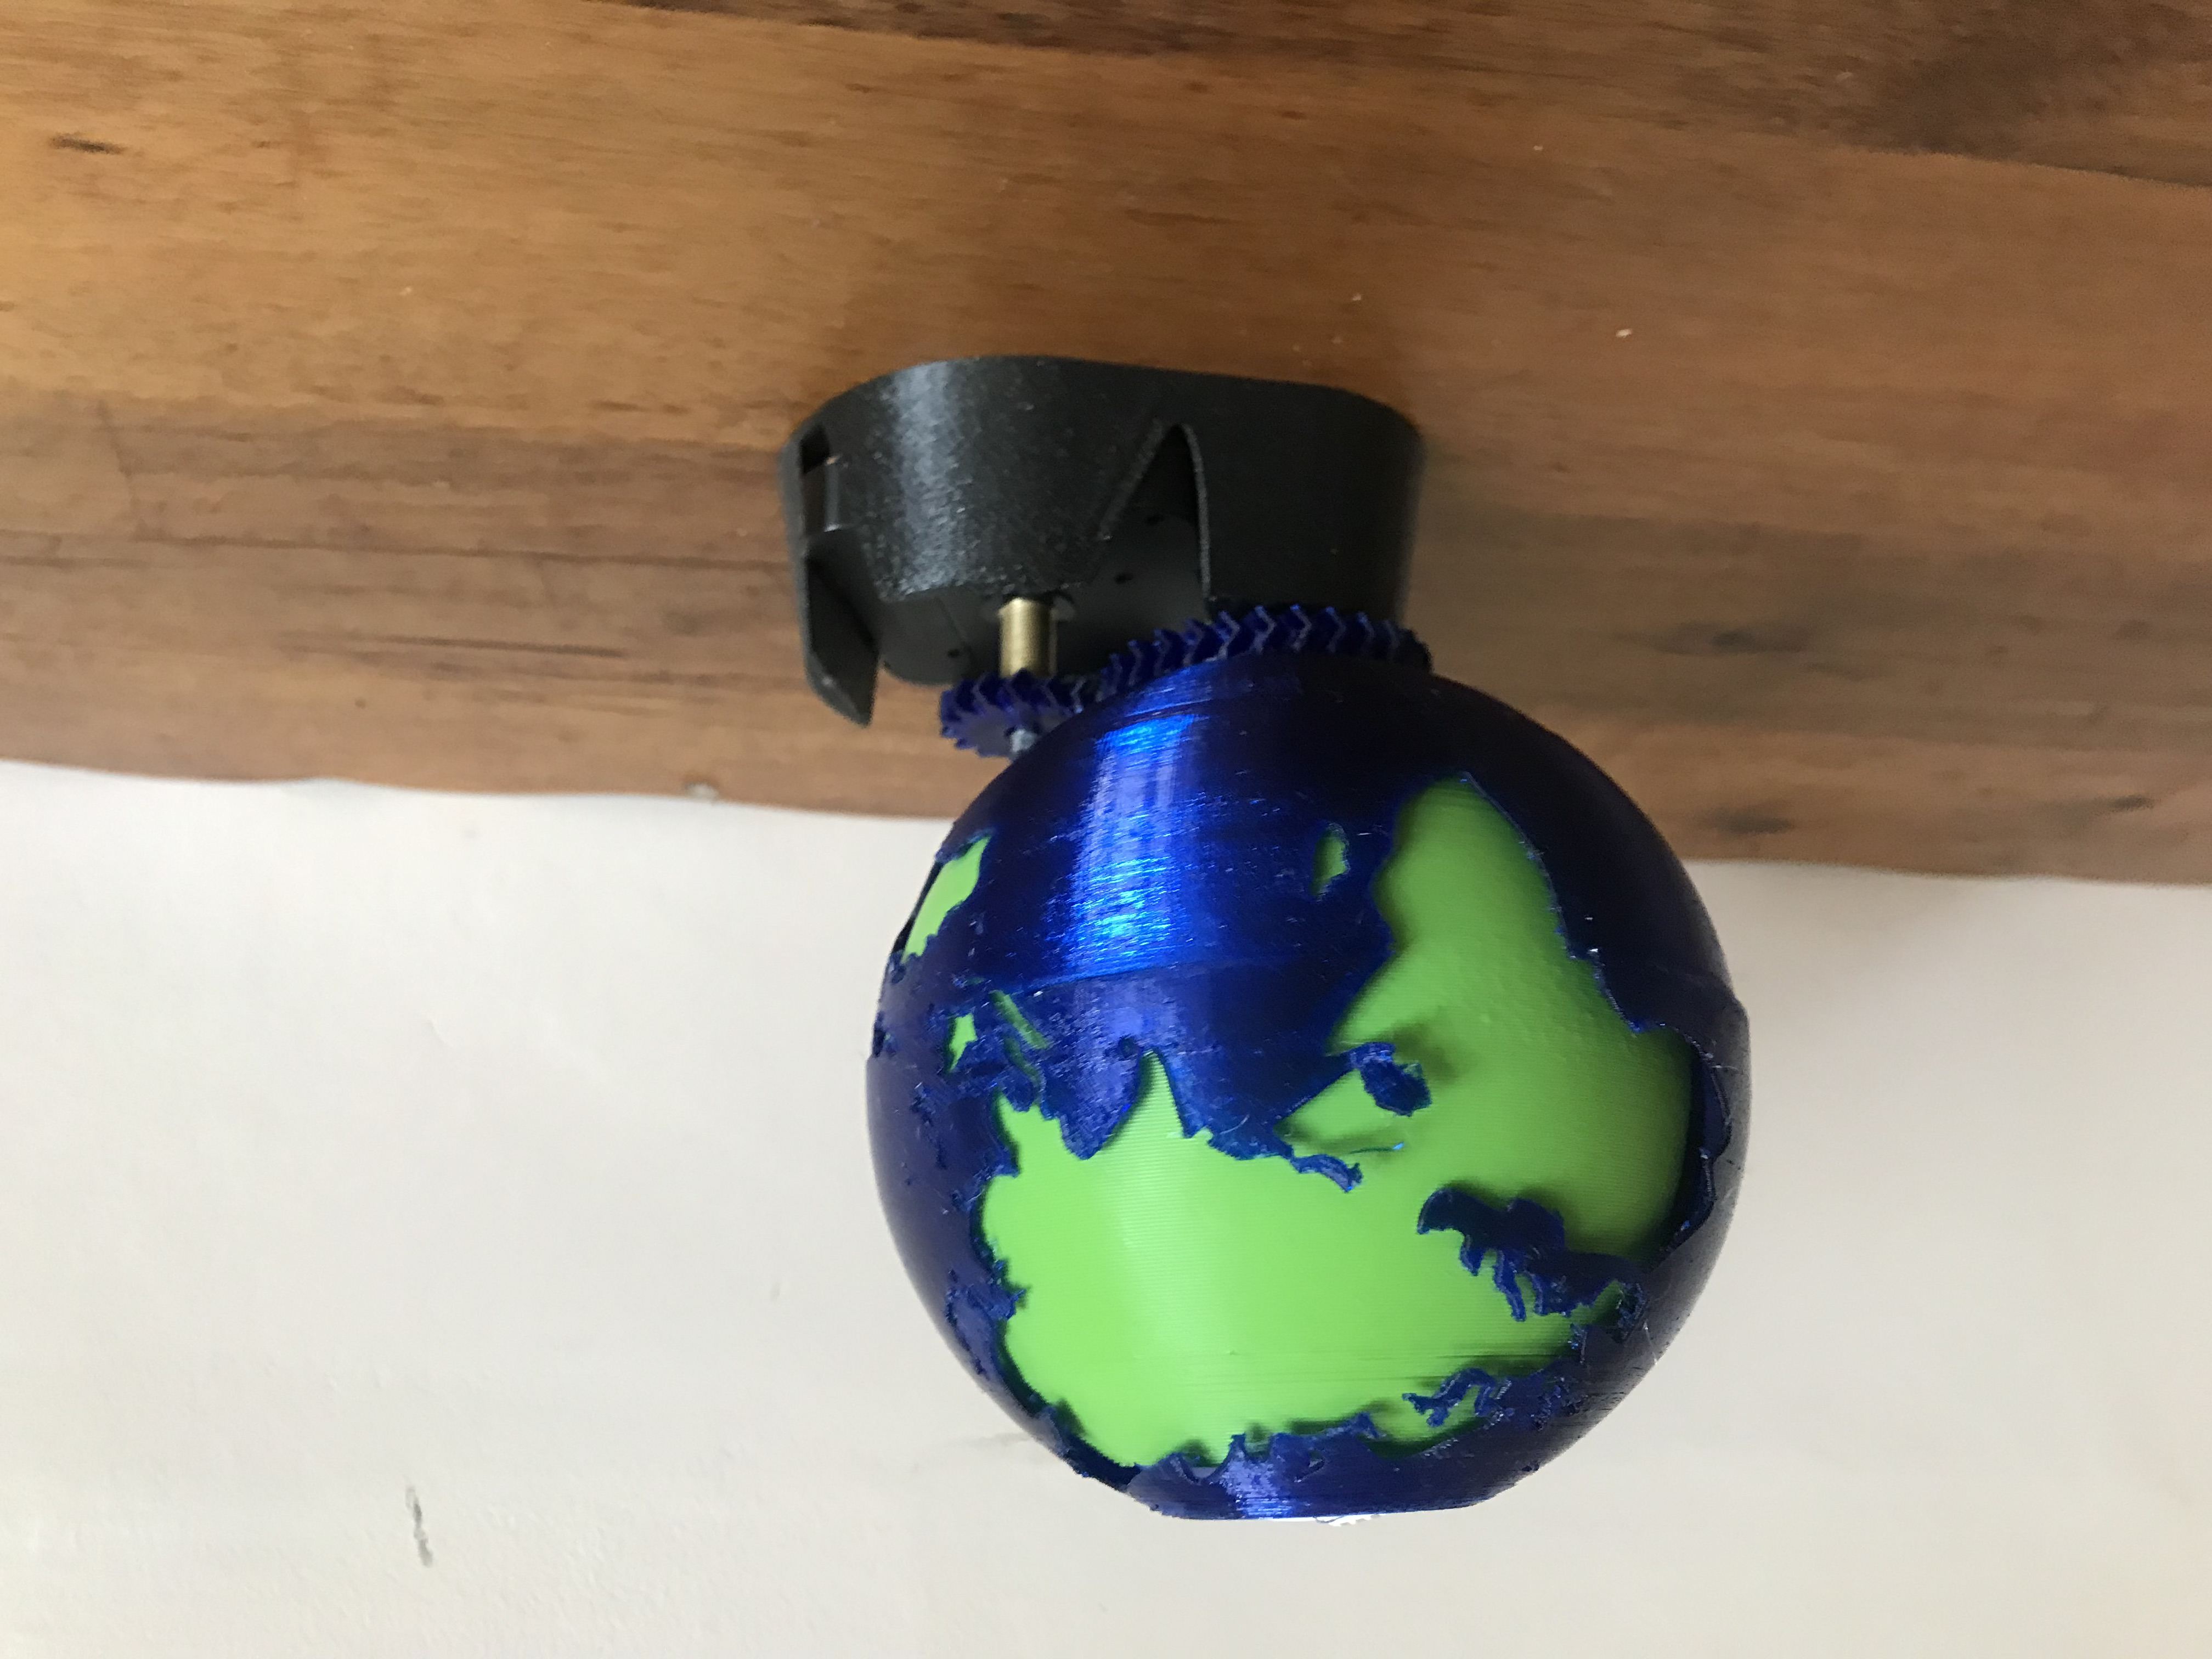
<p>This 3d printed globe is geared to a clock motor to rotate once every 24 hours. The continents are cutout to reveal a day side and a night side. If you set this up in the right place, it should show the exact position of the earth in time. </p><p>It also serves as a night light. The green and black inner shells are designed to hold a battery powered night light with the switch accessible at the very top, and the light shines through holes in the night side to give a star-like effect. </p><h4>Printing tips</h4><p>The outer globe is a fairly challenging print. I printed it in two halves out of Ultramarine blue Prusament PETG. I'd suggest 150% XY separation for the supports to prevent interference, but these two parts will require some very careful work with some snips to remove the supports. The files are set up for Prusaslicer and should have the configuration available. <br><br>I'd suggest printing the timing gear with the same filament and configuration as the globe to ensure smooth operation. </p><p>The other parts should be a lot easier to print and material shouldn't matter too much. </p><p>I printed the globe and timing gear with a 0.4mm nozzle, and used 0.6mm for the rest of the components. </p><p>NOTE: the files on the system are updated from the photographed model for better printability and larger tolerances. Unfortunately I've been away from my printer for the last two weeks so didn't have time to get photos of the updated version. </p><p>If you have a lot of time to print this you may want to consider scaling the whole thing up by 120-150%. It will take a lot longer to print but the clearances will be larger and the finer details less delicate. Currently the globe is around 12cm in diameter. </p><h4>Assembly</h4><ol><li>Place the clock motor in the square recess in the base, and press-fit the timing gear onto the hour shaft.</li><li>Place the light into the recess on the night side with the light side facing towards the holes.</li><li>Place the lower half of the outer globe in place with the gears meshing. (You may want to add some butter or oil to the contact surface to ensure it runs smoothly)</li><li>Place the day side over the other side of the lamp to form the inner globe. (See section views for further information)</li><li>Place the inner globe into the base. The small circular stem from the base of this globe fits into the circular recess in the base.</li><li>Place the upper half of the globe over the inner globe, taking care not to damage any of the fine details. Use a dab of glue or tape to secure it to the bottom half.</li><li>Check to make sure that everything is rotating smoothly. The light switch should be accessible at the top.</li></ol><h4>Components used</h4><ol><li>Night light: <a href="https://www.amazon.co.uk/gp/product/B00EIIDA1Q/">https://www.amazon.co.uk/gp/product/B00EIIDA1Q/</a></li><li>Clock motor: <a href="https://www.amazon.co.uk/gp/product/B078RK47HL/">https://www.amazon.co.uk/gp/product/B078RK47HL/</a></li></ol>
With this file you will be able to print "The Earth in Time" Clock + Night Light with your 3D printer. Click on the button and save the file on your computer to work, edit or customize your design. You can also find more 3D designs for printers on "The Earth in Time" Clock + Night Light.