The FoxTrot Mk II
thingiverse
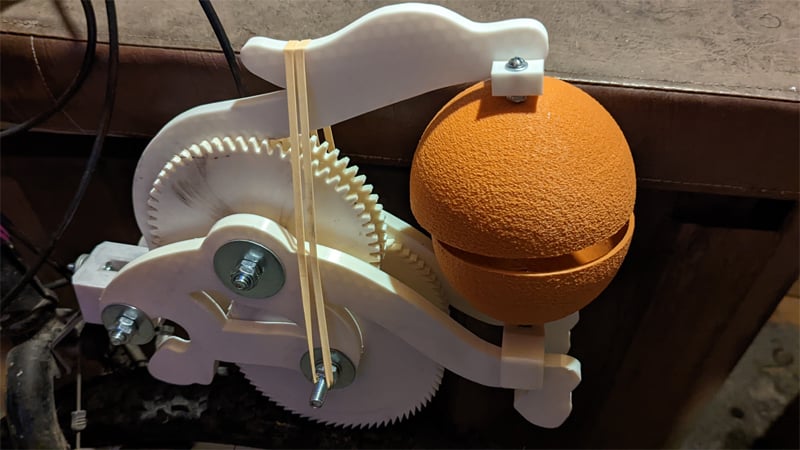
Update: Added Left_Drive_Wheel_Canter_Fast.stl and Left_Drive_Wheel_Trot_Fast.stl models to address problems with skipping "hoofbeats" when cycling fast. Use these updated models unless you need a really discrete "clop" sound at low speed, and don't mind skips at high speed. New version of the original Foxtrot ( https://www.thingiverse.com/thing:5328487) that takes less time to print and works much better. Now it's even easier to make your bicycle sound like a horse, and more reliable as well! Based on the design at trotify.com, but with many improvements. Everything was created in Blender, with gear outlines created from gear generation utilities at otvinta.com (seriously, the resources at otvinta are amazing) Upgrades: - New symmetrical design that avoids the whole thing slipping off to one side and losing traction - Unified body that eliminates skipping when travelling over bumps - Symmetrical drive gears also prevent the main armature from skewing to the side Hardware:: - 3 5/16 or 3 M8 bolts - 6 5/16 or M8 jam nuts - 6 5/16 or M8 fender washers (optional but recommended) - 4 5/16 or M8 standard washers (optional but recommended) - 4 or 5 M4 bolts and nuts (depending on reflector mounting option) Assembly: Glue the two halves of the main drive wheel to each other. Do the same with the two halves of the tire wheel. Assemble with 3 M8 or 5/16 bolts and jam nuts on the axles and reflector mount, and 3 M4 screws and nuts for the "coconut" halves. Glue the top shell mount to the top armature, and the bottom shell mount to the main body. You will also need either the legacy reflector mount or one of the modern ones from the parts list, but not both. 1-2 additional M4 screws and nuts are needed for the reflector mount, depending on which one you choose. Washers on the axles are not a bad idea either. Use white lithium grease (or something slippery) on the eccentric wheel to avoid excessive friction against the main armature that might melt the plastic. Finally, a rubber band should be stretched across the top to keep downward tension on the main armature. When gluing, an acrylic solvent to seriously bond the parts is recommended, but not required. I personally use Weld-On #4. Please print the three test fit pieces to verify your printer's tolerances before printing the rest of these models. Print the fake coconut halves with "fuzzy skin" to add that silly touch to this otherwise totally serious and necessary machinery. UPDATE: I've found that while the cantering sound tends to scale really well at high speed, the part of the armature that rides on the eccentric cam tends to wear away (melt?) at somewhat higher speeds (15+ mph), so I have added three new parts that all begin with "Bearing". The armature can be now replaced with one made of two halves that take a single 608 bearing in between them, and the Left Drive Wheel can be replaced with an updated version that is more suited to the new bearing armature. One fitted, I recommend using springs and a chain instead of a rubber band to really tension the armature for an incredibly loud clopping sound (people can hear it from inside their cars and houses!)
With this file you will be able to print The FoxTrot Mk II with your 3D printer. Click on the button and save the file on your computer to work, edit or customize your design. You can also find more 3D designs for printers on The FoxTrot Mk II.