The Hulk FPV Quadcopter
thingiverse
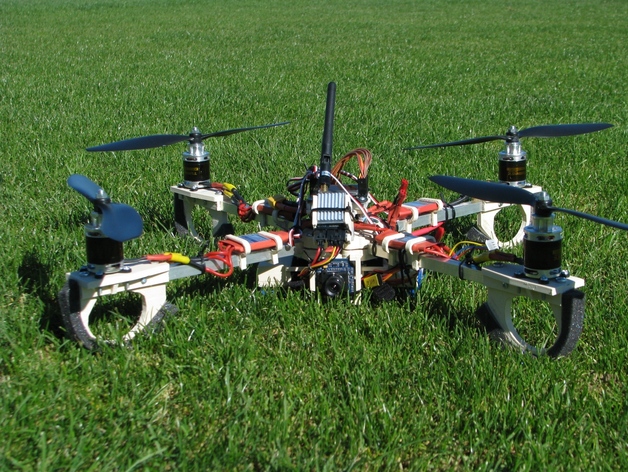
This FPV quadcopter project features a heavy-duty design with room to add extra batteries or payload. The downloadable files include Blender models, STLs, and component shopping lists. Inspired by an article from TechLife Magazine, the builder chose components similar to those recommended in the piece but added a superior transmitter, FPV functionality, and stronger powertrain options. All parts were designed using Blender 2.58 and printed on an Ultimaker. STLs are included for non-Blender users. The printed pieces were assembled with Velcro ties, cable ties, and nylon lock nuts to secure components and keep wiring tidy. However, the Power Distribution board's current rating is insufficient for the ESCs at full power; a solution provided by the builder was to add heavy copper wire between connectors. The builder also highly recommends using a flight simulator like RealFlight or PhoenixRC to practice flying before attempting with the actual quadcopter, as it can save time and money on repairs.
With this file you will be able to print The Hulk FPV Quadcopter with your 3D printer. Click on the button and save the file on your computer to work, edit or customize your design. You can also find more 3D designs for printers on The Hulk FPV Quadcopter.