The Just-In-Case Belt Hook
thingiverse
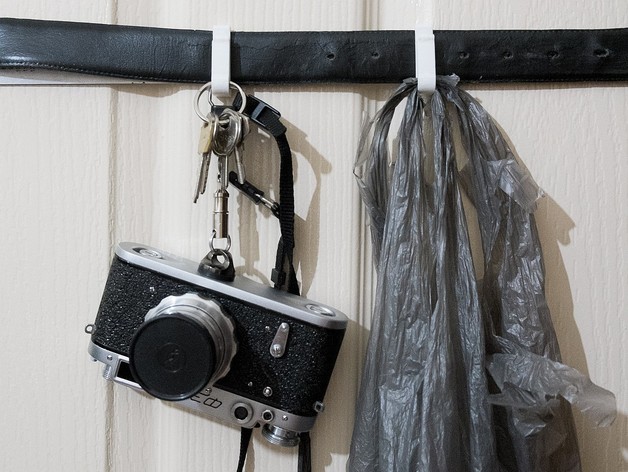
This is a small, unobtrusive hook that you can wear on your belt and forget about. If you want to carry something and leave your hands free, you can hang it on your hook and make everyone around you super jelly. Like really: I keep two on my belt just in case. It fits on belts up to 35 mm wide and 5 mm thick. Things that I have hanged on my belt hooks in the past week * : Keys Hat Shopping bags (standing in a long check-out line, so I hanged my bags on my hooks and played with my phone) Cameras GPS receiver Power drill 2 kg demolition mini-sledge Clipboard Spool of string (via a loop through the middle) *: Of course, use personal discretion when hanging anything on your hook. It's up to you if you want to hang a $3,000 camera off it, but I personally wouldn't trust anything 3D-printed with something that heavy and precious. My rule: If I can drop it, I can hang it. Print Settings Rafts: No Supports: No Resolution: 0.2 Infill: 50% Notes: Important! I have designed internal voids into this object (they are on Layers 16–35 if you are printing at 0.2 mm resolution) to prevent delamination in the Z direction and compensate for weak infill-perimeter adhesion, which was a common failure mode in destructive tests that I've done on these hooks. Your slicer settings need to keep these voids intact. (These voids are why the part takes so long to print, by the way.) In the case of Cura, going to Expert Settings (Ctrl+E) and unchecking Combine everything (Type-B) will achieve this. Double-check in the Layer View to be sure. Post-Printing As with all wearable objects, it's a good idea to soften the edges with a deburring tool, craft knife, or needle file. How I Designed This Forming a specification I like having my hands free where possible, so I've always found it really handy to hang stuff from my belt loops. However, this is only possible when the thing has a lanyard that I can tie onto the loop. I tried the only belt hooks I could find on Aussie eBay but they don't work for me for a bunch of reasons: These hooks are huge even when folded against my body, so they dig into me when I'm seated in a car. These hooks often unfold themselves and catch on the underbrush when I'm walking in the bush. These hooks just slip over the top of my belt, so they can ride up or jump off my belt completely if I am seated or if I jog while carrying something. I can only hang things that fit over the large bulb on the end. The hooks don't positively retain the things I hang on them; if it fits over the bulb, it can fall past the bulb given the right angle and forces (and the hook itself swivels, so this happens more often than you'd expect). They're also expensive, of course. So the spec for this object is: Must: Be as small as possible; I should be able to forget I am wearing the hook. Must: Be a single rigid piece. Must: Attach to the belt with a loop and not a clip. Must: Mechanically retain objects hanged on the hook. Must: Hold a useful amount of weight. Should: Hold narrow loops too. The loops on key tags, for example. Let's go! Roughing out the belt loop Because I use a 0.4 mm nozzle, I like having wall thicknesses of 3 mm because it gives me 0.8 mm perimeters on both sides and enough room for infill. So I simply measured my belt, added 3 mm on either side, and cut a belt-shaped hole in the middle. I used MetaFillet by BobKrause to cut radii into the sharp edges of the belt loop to soften them for both the wearer and the belt. Forming the hook and its mechanical retention My idea for the Mechanically retain objects requirement was two-fold: The hook should clip the item in to prevent it from coming out. Add some physical barrier to the inside of the hook to prevent the hanged item from being pulled up too easily. I made a hollow tube and lined it up with the bottom of the belt loop. I then took a strip and paired it with the tube, angled so that the newly-formed hook would be narrow at the top and wide at the bottom. Crucially, the transition between the strip and the tube is not perfect. There's a shoulder left on the inside, and this shoulder makes it harder to pull something out of the hook when it is being pulled away from your body (imagine that you've hanged your keys on the hook, and the keys are caught on a shrub). You need to push the keys into the back of the clip and then pull up to withdraw them. I cut an angle onto the top of the hook to narrow it, making it easier to insert narrow objects like key loops. I also made sure that the hook was shorter than the belt loop to make it simpler to insert objects in general; simply push something against the back of the belt loop and then push down. If the clip and loop were the same height, you would need to fish for the opening. Adding internal voids and through-holes for strength The top of the hook has a hole passing through it. The purpose of this hole is to 'weld' the multiple layers together, ensuring that this part will not delaminate. If you look at it in the layer view, the tip of the hook is equivalent to 100% infill because of this design feature even though the rest of it is only 50%. I used the same trick in the areas at the back and base of the hook too, here ensuring that the part could withstand flexing and that the hook was properly attached to the belt loop. I used internal voids for these ones so that I could have a nice surface finish. I made the internal voids by simply using floating 1mm OD Hole cylinders to cut them out of the material. Version history v1 — 16 Oct 2015 Initial release Thingiverse source document https://www.tinkercad.com/things/9Hs4XKkisI6-just-in-case-belt-hook-v1
With this file you will be able to print The Just-In-Case Belt Hook with your 3D printer. Click on the button and save the file on your computer to work, edit or customize your design. You can also find more 3D designs for printers on The Just-In-Case Belt Hook.