The Matrix - Sentinel
thingiverse
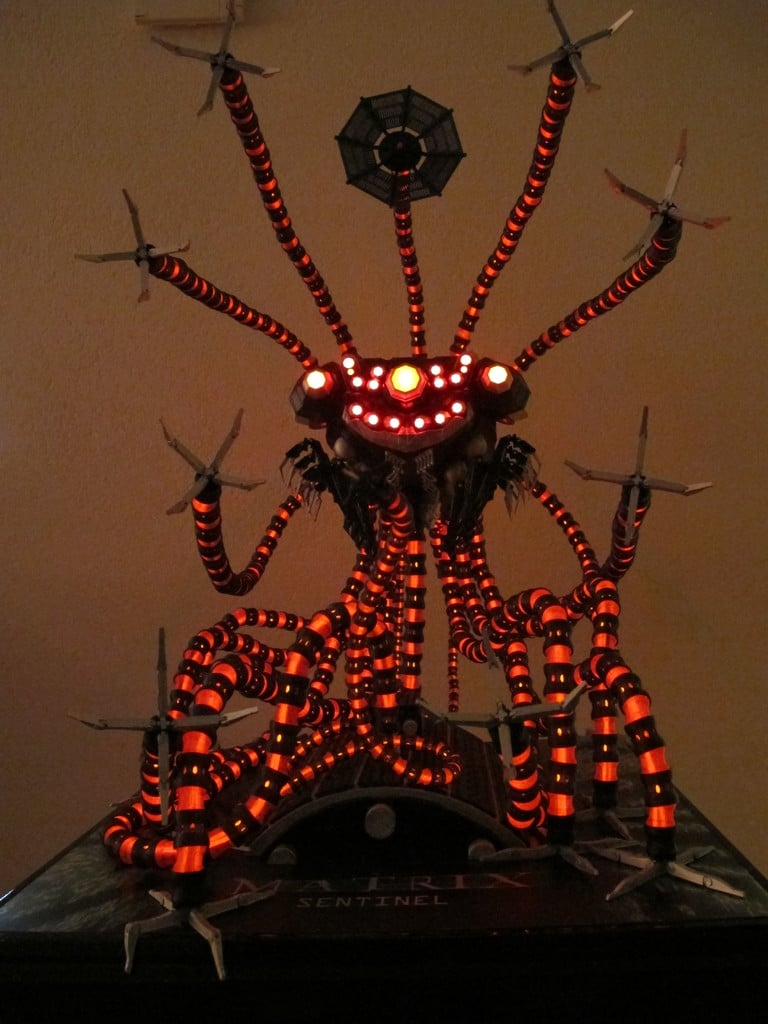
Here is a summary of the components and materials used for the Sentinel 3D printed model: **Components:** * Jackplug 2.5 mm Connector: 2 pieces * Tamiya Connectors male/female: 3 sets * PAINT: + Smoke back-light paint (black) + Silver-paint from Tamiya X-11 **Materials:** * Blue/grey filament for the main body of the Sentinel * Silver filament for the silver parts * Iron rod for the weight stabilizer in the thick tube * Wooden block with a little hole for flattening the claw hinge-pins * Solder (flat blade) for attaching the claw hinge-pins **Software and 3D Printing Tools:** * Blender for modeling and design * Simplify 3-D for simplifying complex models * Felix 3.1 3D printer for printing the parts * Tamiya X-11 silver paint for painting the silver parts **Construction Time and Printing Time:** * Total building time: 4.5 months * Total printing time: 370 hours+ * Head: 10 hours printing * Body: 42 hours printing * Back: 10 hours printing * Arm part red and grey: 200 hours printing
With this file you will be able to print The Matrix - Sentinel with your 3D printer. Click on the button and save the file on your computer to work, edit or customize your design. You can also find more 3D designs for printers on The Matrix - Sentinel.