The Possible Print: Lockable Print-in-Place Geared Latch Box
prusaprinters
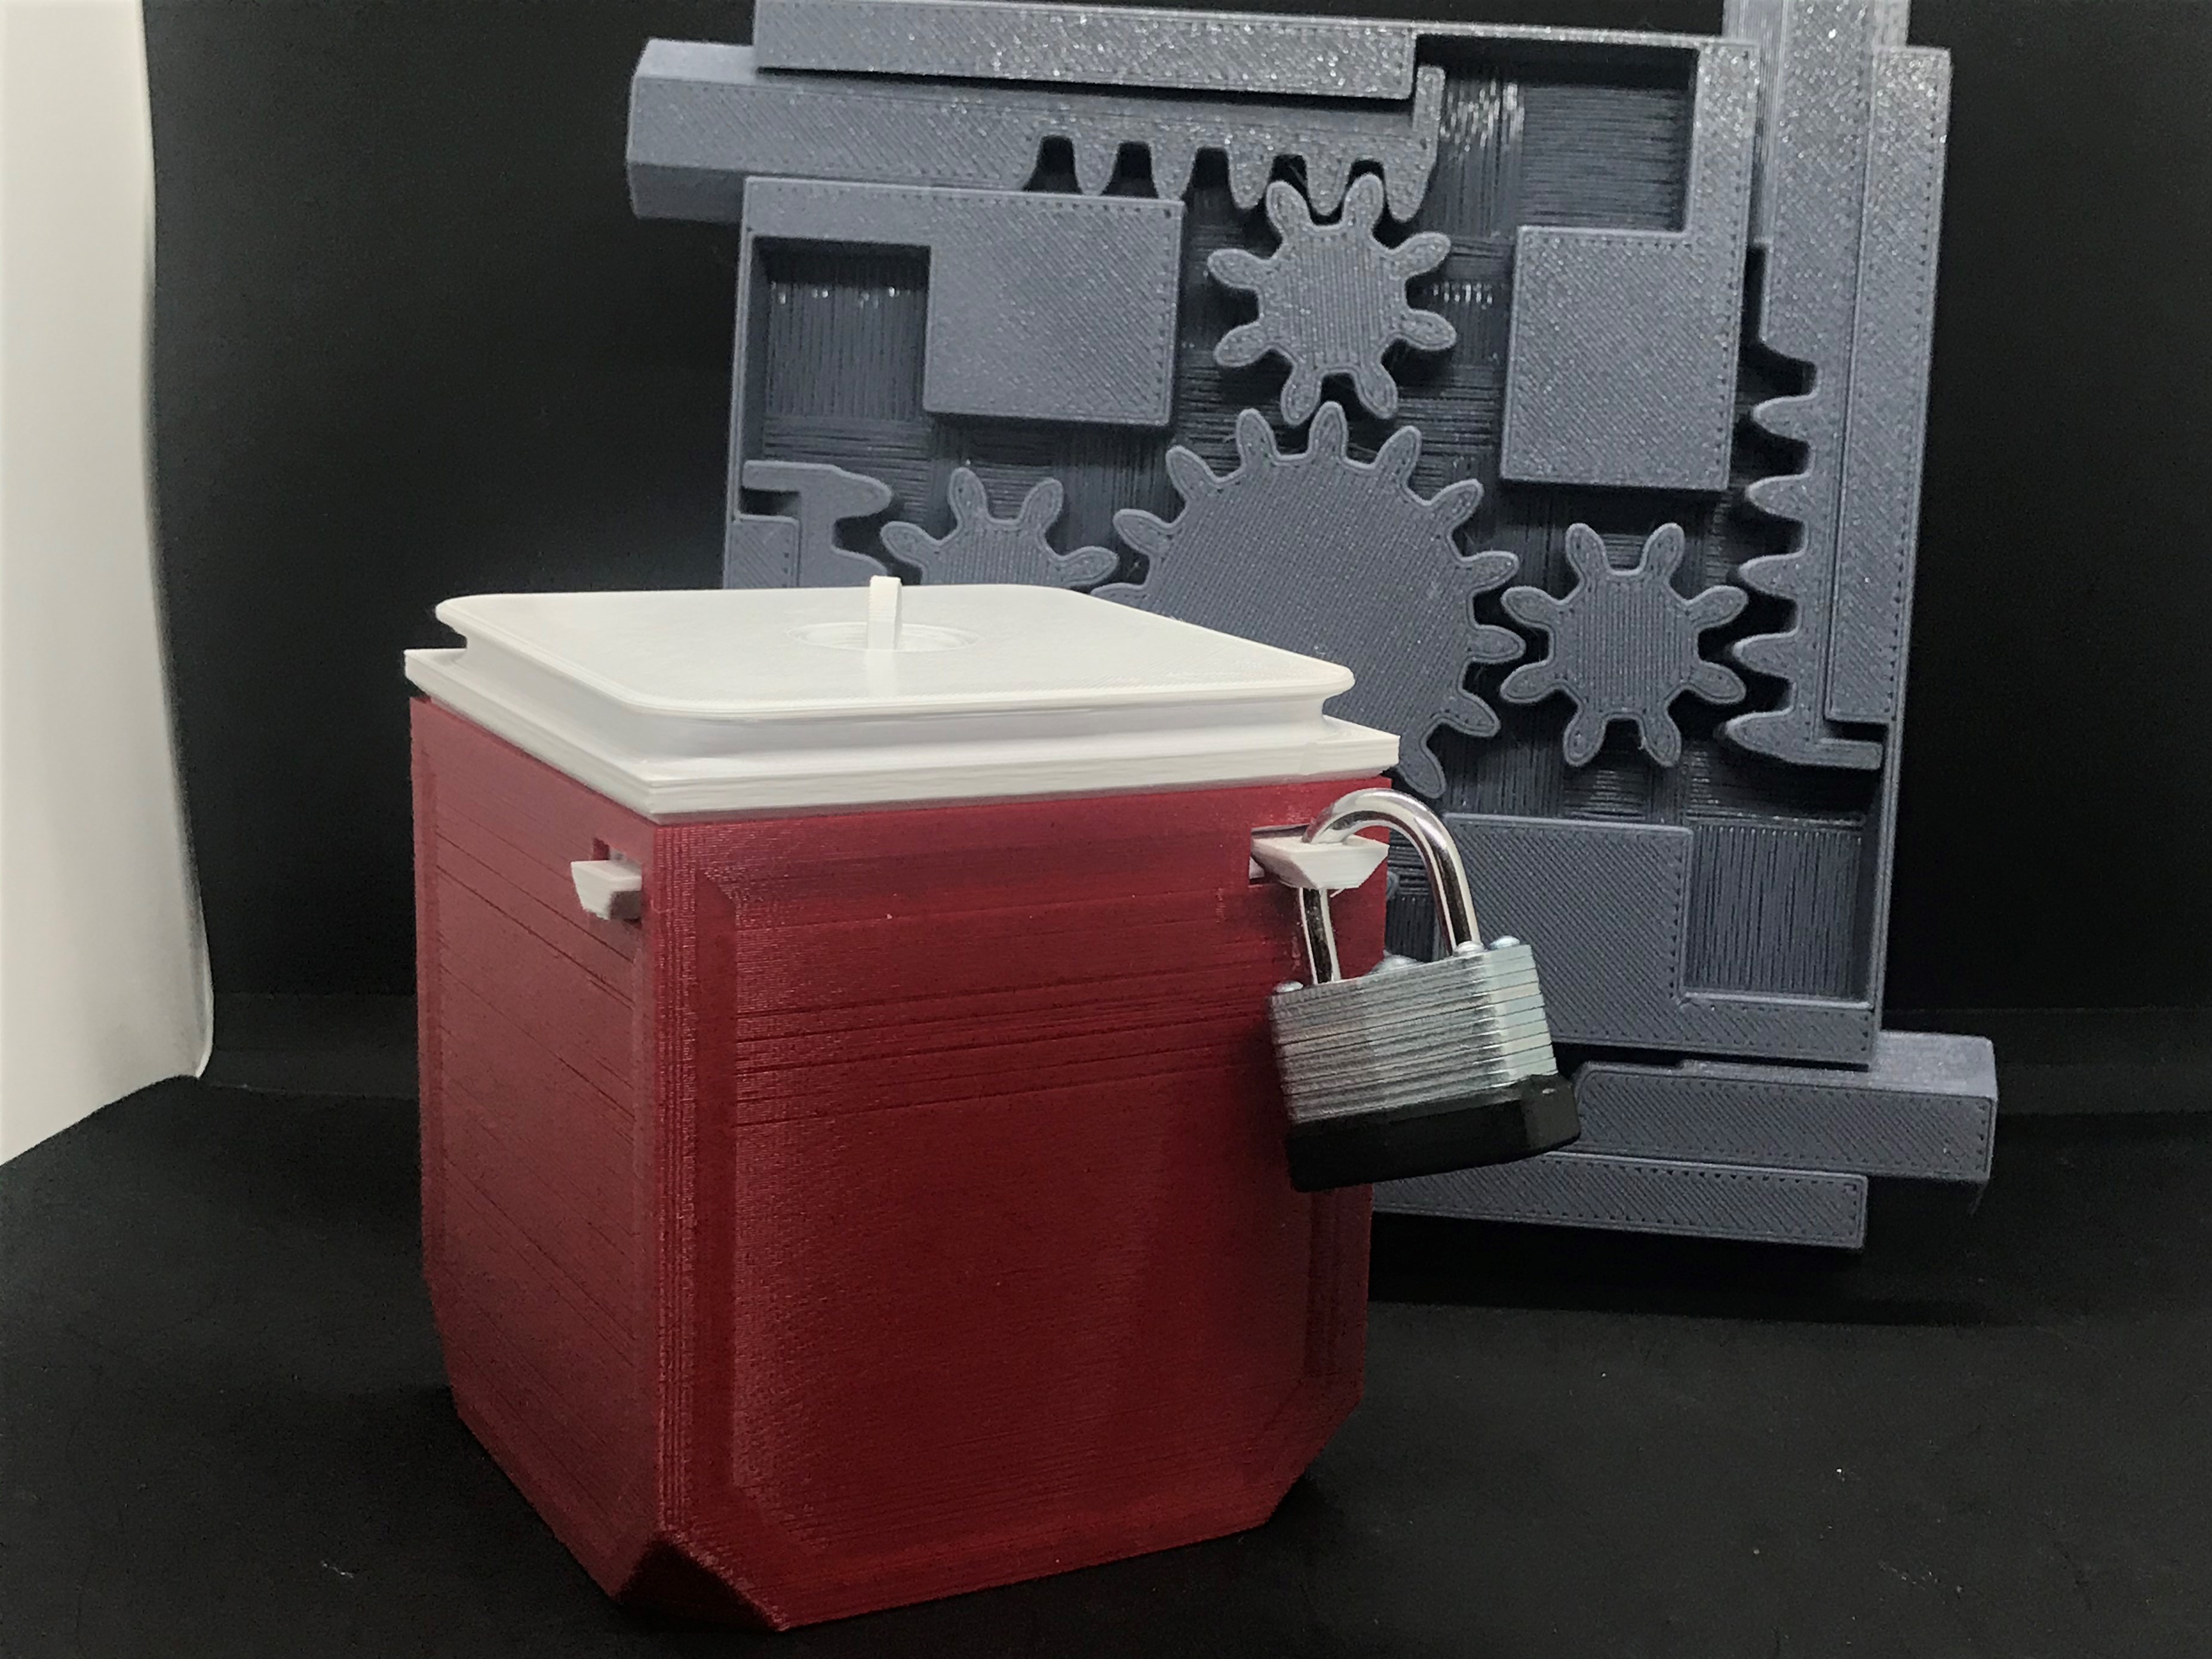
<p>I use to think that floating holes were not possible to print without support. Oh how wrong I was.</p> <h3>Print instructions</h3><p>After reading the comments of With_Maltodextrin and most importantly, watching this video: <a>https://hackaday.com/2020/05/17/look-ma-no-support-for-my-floating-holes/</a> I needed to try tricking the slicer myself.</p> <p>Submitted for the approval of the <del>Midnight</del> Prusa Society, here is a support-free, print-in-place parts box that utilizes floating gears and racks to create a four sided latching lid. A simple turn of the handle on top latches the lid to its base.</p> <p>I wouldn't classify this as an easy print, but its not too hard either if you have a good first layer. I have successfully printed at 50% reduced size but am experiencing a bit of warping on the corners. Everything still moves properly but I wouldn't mind it being just a little more level. I am using the default settings of .2mm in Prusa Slicer for the lid and .3mm layers for the box itself.</p> <p>I started by working big (full print-bed) but kept the thought of shrinking the design later on in mind. Instead of using .2mm bridge layers, as done in the demo, I used .4mm bridges. This way when scaled to 50%, the bridges are .2mm. I also used large gaps for mating pieces, nearly 1mm so that when scaled down the tolerance would still be there. It took me a nights worth of work to put the bridges in properly (maybe a little longer) but the result is well worth it. It's a great technique. I'm still learning the process so more floating hole designs to come, I'm sure.</p> <p>I'm including my original SketchUp file in case anyone wants to edit the model. I found that coloring the different layers helped keep track of what level each bridge needed to be at and that corners of bridges of the same height shouldn't touch. Also, since it is bridging, the filament may sloop downwards a little. I had to make sure the clearance between the moving parts and the bottom of the bridges didn't touch and fuse together.</p> <p>Update: I successfully printed at full size with a 0.4mm layer height using a .8mm nozzle. That being said, The lid is massive and took half a roll of filament. It's heavy and dense. I don't like it. It works great, but it's just too much I think. Stick to the 50% if you want to give this design a try. Also I think 25% would work at .10mm layer height with a .25mm nozzle. I just tried 12.5% scale at .05 layer, it looked like it might work but the bottom layer was fused together so I don't recommend it.</p> <p>Update: I've modified the model to include a hole that a small lock can fit through; now it's a locking box.</p> <p>Update: Added a tall box that fits the 50% lid. Now you can lock away a phone or something else more practical. Organize your life.</p>
With this file you will be able to print The Possible Print: Lockable Print-in-Place Geared Latch Box with your 3D printer. Click on the button and save the file on your computer to work, edit or customize your design. You can also find more 3D designs for printers on The Possible Print: Lockable Print-in-Place Geared Latch Box.