"The Stubbie" Drywall Anchor
thingiverse
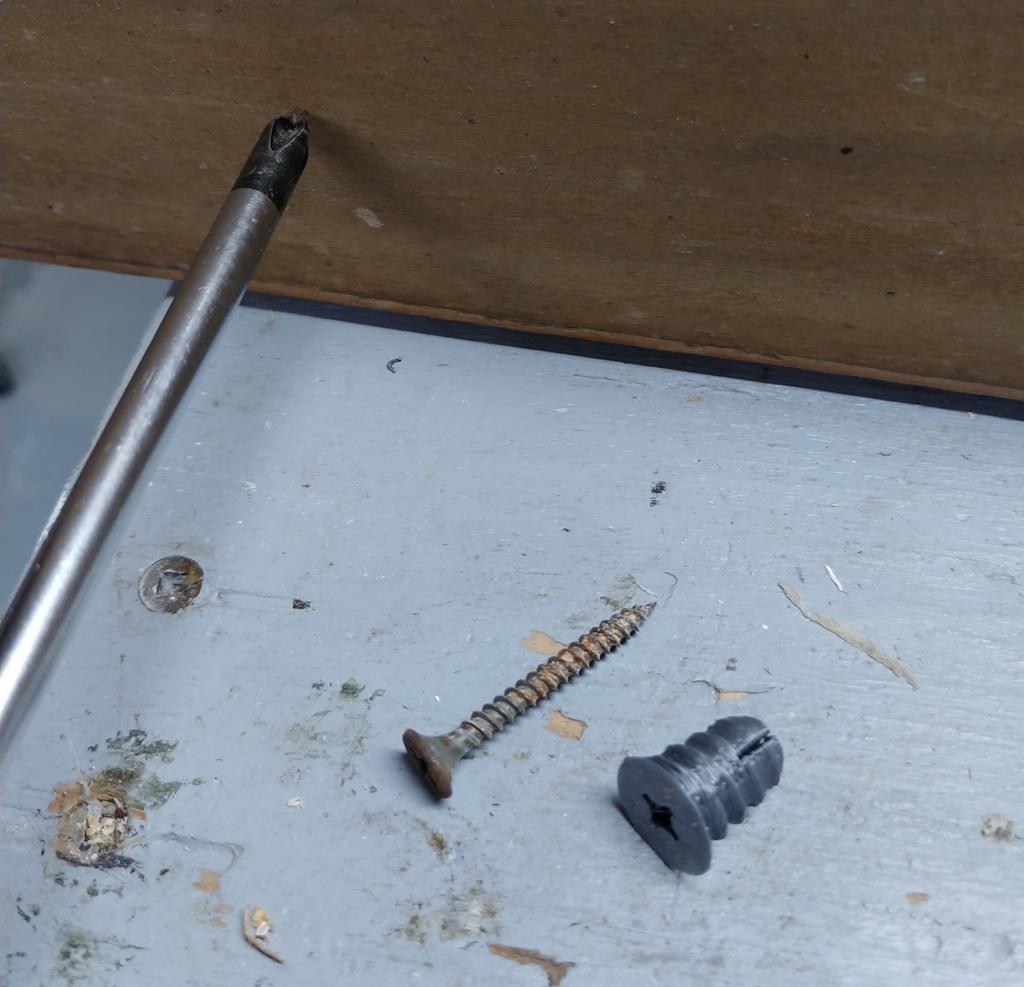
I designed this peculiar drywall anchor iteratively, following the demise of coat hanger screwed in drywall with "standard expansion-type drywall anchors" (the narrow split ones). I started by reproducing the "threaded" type of drywall anchor, like a few other "thingiversers", but wasn't satisfied. Needs ===== So the designed evolved to fit the following needs: - shorter so that there's less material "wasted" behind the drywall (saving plastic...) - as narrow a footprint as possible - being as sturdy as possible while meeting the above needs - fit in a pre-made hole that is either; left from a ripped-off expansion-type anchor, made with a common 1/4 inch drill bit or, if you're really in a pickle, pierced / eroded with a very common Philips screwdriver. (if somehow you own a 3D printer but no drill...) Characteristics ============ Meeting these needs spawned the following characteristics: - just slightly longer that the thickness of a typical drywall (3/8 inch) - smaller thread pitch than the regular metal anchor; more turns to compensate for a narrower thread profile (overall diameter of the anchor) - split end, to take advantage of the expanding-while-screw-gets-in principle in addition to the obvious auger principle. The split end also helps "eroding away" the gypsum as it enlarges the initial hole. - technically, if you are in front of a stud but your screw is too short to really get into it, you can use "the stubbie" after using it first for pre-threading its hole and then breaking off the split ends. You won't have the same pull-performance, but it's still way better than a screw alone directly in drywall. (expect around 10 kg / 22 pounds pull force max.) Performance Testing ================ 4 anchors were tested in a very old piece of drywall I had laying around. Two types of holes were tested: drilled with a 1/4 inch drill bit and pierced / eroded with a Philips screwdriver. Two types of screws were tested: standard drywall screw (i.e. to affix drywall to studs) and typical Ikea-style screw used to hang stuff on walls (ever-so-slightly wider than the drywall screw, shorter with a slightly longer thread pitch). You can see all the steps and setup in the pictures above. - drilled hole with Ikea-style screw; well I screwed up drilling the hole. I pushed too hard while turning too slow and made kind of a mess on the back side of the drywall. Incidentally the anchor had much less "stuff" to grip into. Well, still around 10 kg / 22 pounds of pull force required to rip the anchor out. - drilled hole with drywall screw; I stopped the test past 20 kg / 44 pounds as it was getting ridiculous - screwdriver-made hole with Ikea-style screw; I stopped the test past 20 kg / 44 pounds as it was getting ridiculous - screwdriver-made hole with drywall screw; I stopped the test past 20 kg / 44 pounds as it was getting ridiculous So here you have it, an outlayer at 10 kg / 22 pounds (because I messed up the hole in a first place) and 3 very solid, **over 20 kg / 44 pounds of pull-force** anchors (max. unknown!!!) However... ======== No design is perfect and this one has that flaw: because its "stubbier", it requires both more care (alignment) and more force during the anchor screw-in step. This is to ensure it gets in straight and that the threads bite in the drywall. It's still quite easy, but not as easy as with the long and more tapered designs.
With this file you will be able to print "The Stubbie" Drywall Anchor with your 3D printer. Click on the button and save the file on your computer to work, edit or customize your design. You can also find more 3D designs for printers on "The Stubbie" Drywall Anchor.