
The Taz Pro Fix Project - Hardware Endstops, Wider Chassis, Carriage fixes, and other fixes
thingiverse
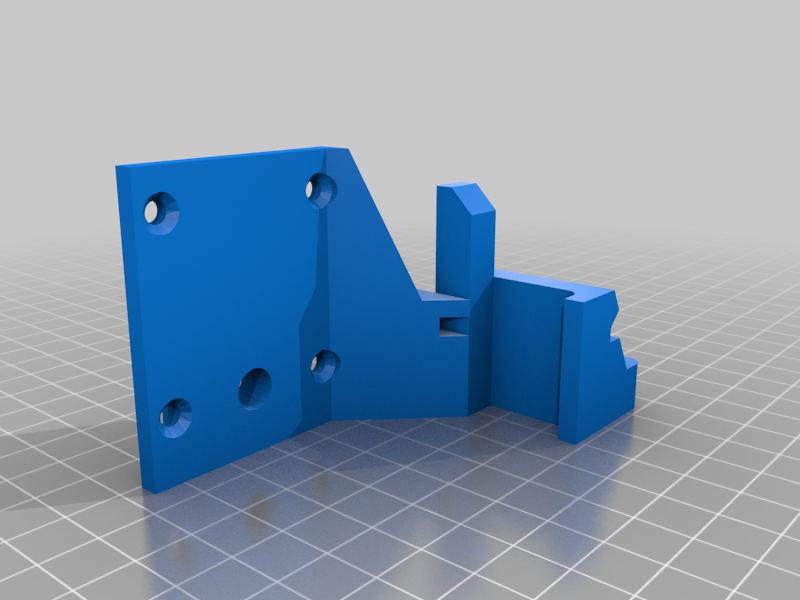
This is my personal repository for fixes I have made to the Taz Pro design. There aren't really going to be any instructions or how-to's with this, and use of anything here is done so at your own risk and voids your warranty. The Taz Pro design seems to have some shortcomings. I attempt to address these shortcomings with various fixes. Shortcoming 1 - The chassis seems to be too narrow to properly support standard mount single toolheads (without moving the bed mount slightly when switching firmwares, that is). So if you want to remove the behemoth dual head so you can print faster, and you install a single toolhead, keen observers may note that the toolhead just BARELY hits the front left pad. And sometimes, at least for me, the nozzle misses the pad completely and overshoots - because of Shortcoming 2 listed below (Software Endstops suck). And you can't shift the table or do anything else to address this, other than modify the back plate for the single toolhead - breaking compatibility with other machines. Fix? Widen the chassis. Instead of the horizontal 2020 rails being 530mm, I re-cut them to 540mm. This width still maintains compatibility with the original X rails and the Printed Solid enclosure. The rails only sit inset about 2.75mm on each end of the X-axis mounts, but that makes no functional difference and it still hits the set screws easily. The printed solid enclosure actually fits properly (rather than being wider) with this mod, as well, but you'll need revised "hangers" for holding the enclosure. I've provided those replacement parts. Widening the chassis also has the benefit of giving the dual head a bit more room to work without inappropriately ramming into things (particularly the right hand side overshoot) as well as giving a bit of a "filament dump" area on the left middle of the bed. You'll need to modify your firmware layout positions. I suggest using the DrunkenOctopus for a starting point, and modding from there. Shortcoming 2 - Software endstops. My opinion - a major mistake. The Taz Pro often overshoots and grinds because of the software endstops, but, surprisingly, that's not why I've changed it. I changed it because software endstops are too inaccurate to trust for print resumes. There is too much variance between where it stops - it's not precisely repeatable, and that leads to minor layer shifts if the printer stops and has to rehome (out of filament, or if you try to activate power loss recovery in the firmware). So I added hardware endstops to X and Y. For the Y axis, I used the stock motor mount parts from the Taz Workhorse (I've included the parts here, but are not my design or mods and anything prefixed "lulzbot_original" falls under Lulzbot's license terms, not these ones). For X, I made a custom mount. This requires that you do some additional wiring, and that you tweak the interconnect housing. There is room to stack 2 connectors on top of eachother in the interconnect housing, so that makes life easier. There is a replacement interconnect housing included here to fit the extra wire for the X axis. No additional space is needed for the Y axis as it's only 2 wires on a tiny connector, so you can stack them. For the wiring, I ordered the proper IGUS flexible cable, the exact same wiring that the Taz Pro comes with. For the cable chain, fortunately, there is room in the cable chain for one extra wire. I have a suspicion that, between this (cable chain room) and the fact that the PS enclosure fits properly at 540mm leads me to ponder the possibility that the Taz Pro was actually originally designed @ 540mm with hardware endstops, but that they cut this out to reduce BOM cost before production. I don't know. Shortcoming 3 - The X Carriage holders posilock nut holder is just marginally too small, at least for any of the posilock nuts I can find. So I widened it marginally, and thickened the top of the mount by 0.5mm. Why? Because without these changes, the damn top screw cracks the carriage mount when tightened sufficiently to remove the wobble from the top bearing, so these changes should prevent the crack. Shortcoming 4 - The interface board mount screw that retains the bearing/bushing, when torqued to lulzbot spec, tends to crack, even when proper inter-layer adhesion is achieved with high quality ABS. While making room for the revised thickened carriage (revised to avoid cracking), I thickened the base that the screw seats on to attempt to mitigate this cracking. Shortcoming 5 - The single toolhead can't reach the calibration cube. Wow. This, too? Makes you think about how well this printer was tested before release. The only way to fix this properly, while maintaining compatibility with both the single toolheads and the dual toolheads, without changing toolhead design, would be to increase the length of the 2020 rails on Y by 10mm as well. But that means I need larger 10mm rails, and I don't want to order those - I'm already too $$$ on a printer that was, IMO, designed broken, and I'm not willing to do that. So, with widening to 540mm horizontal 2020 rail, we are now able to reach and therefore leverage the front right levelling washer for the hysteresis calibration, rather than the "calibration cube". Functionally, it's the same thing, though we're not able to reach all 4 corners - only 3. Good enough, from my test results. Shortcoming 6 - The horizontal cable chain (X) has the motor mount side 1.25mm proud of the double bearing holder receiving side when installed, so the chain assembly gets slightly twisted, which is inappropriate. This was verified by mocking up the entire X axis in CAD; the part is simply misaligned, it does not appear to be a mistake with my assembly, so I Fixed it. Shortcoming 7 - This one, honestly, I find baffling. I checked, and re-checked the frame measurements until I finally said 'WTF' and loaded a bunch of relevant Lulzbot parts into CAD to do a mock-up of the alignment, and, sure enough, the Z-upper spacing of the 10mm rails is wrong. They need to be inset by 0.6mm if they are expected to be in proper alignment with the Z-lowers, unless you want your Z-lowers sticking proud from the sides of the machine which interferes with enclosures and other things you might mount.. I realize 0.6mm doesn't seem like much, but that adds up to 1.2mm total variance from top to bottom. Feel free to line up the Z-Upper and Z-Lower against a mock 2020 rail in a CAD program to see for yourself, but I measured the distance in CAD (0.6mm) not on the machine itself. On my machine itself, after allowing for "slop" and variance in the rail, I had to move it by 0.8mm each side, so those are the ones I've uploaded here. Lulzbots Z-Upper plastic parts also didn't have the helpful chamfer to help set the heat set inserts in the proper location, so I added that in, too. Given that I can't explain this variance (the mistake seems absolutely baffling to me, because from my perspective this is a serious oversignt that screws with Z alignment and travel), you would be well served to measure your gap top to bottom (front and back sides) between your Z rails to validate they're all even if you use this design. Tweak 8 - Well, this is not really a shortcoming from the perspective of Lulzbot because they order a very consistent 2020 rail, so let's call it a 'tweak'. However, none of the 2020 rail I can seem to source matches the exact profile of lulzbots, so I'm stuck using aftermarket rail and t-nuts and the bed chassis mount is incompatible with aftermarket T-nuts that stick a bit proud of the recessed area (but still within the constraint of the rail), whereas Lulzbots sit perfectly flat. Anyways, I adapted the Chassis Bed Mount to support the T-nuts that I have on hand, since, otherwise, the bed would not mount evenly to the chassis. Shortcoming 9 - Frame Stability. The frame, being entirely made of 2020 rail, is very difficult to keep square, particularly when your printer is sitting across a badly bowed desk on a 45 degree angle, and you print in an enclosure with the bed at 115 and the nozzle at 255. It seems that so much heat builds up in the enclosure chamber while printing ABS that, when the printer is not set on a perfectly flat, surface, the frame can twist and bend the Z-lowers enough to twist the X axis marginally - just enough to screw up bed levelling such that the nozzle "sees" a different position of the bed than reality. X-axis twist causing failed bed levelling, while not specific to lulzbot, is heavily mentioned in the reprap forms when people think the bed levelling code is buggy when it is not. Anyways, I designed a custom frame stabilizer which mounts across the bottom of the frame and secures it tightly in place. Top stability still becomes compromised if you take the Z-uppers off for any reason, so, keep that in mind. A DXF file is attached that you can have laser cut or CNC'd - I had mine cut in 5mm thick 304 stainless steel - overkill, but it really shifts the weight to the bottom of the chassis, strengthens the frame, and *maybe* even marginally improves print quality by helping to control vibration through the chassis. This custom design part will only fit the modified chassis that's mentioned here (540mm). It also serves to isolate the feet from the vertical rails which support the Z axis so that if one foot is pressed higher than the other, it distributes that unevenness across the bottom, rather than reefing up one corner of the printer and messing with Print Levelling. Tap 4 inner holes at M6 and use M6 adjustable feet. Tweak 10: The Z lowers are a constant area of friction for me during assembly, because they tend to stick proud of the chassis when you let the Z axis sort of 'rest' or 'settle' during install (per the OHAI). But if they stick out, that means they'll bump the electronics box. Which I'm concerned, over heat cycles, will cause the Z lower to shift inwards because it is being squeezed by the electronics case when this happens. So I lopped off 1mm from the bottom (outward facing when installed) side of the Z lower to make this considerably easier to install. I also decreased the size of the alignment notch, again, due to variances in the 2020 rail that I use vs the 2020 rail that Lulzbot uses. Other Fix - After adding an additional wire on the Z cable chain for the X min hardware end stop, the wires no longer stay in place at the end of the chain due to the short length before the control box. Created an alignment clip and a cable chain retainer pin to address. There are other odds and sods in here and I may or may not add additional details regarding "why" - again, this is being posted primarily for me as a backup, but I thought perhaps other adventurous modders may want to try this too at their own risk. Cheers.
With this file you will be able to print The Taz Pro Fix Project - Hardware Endstops, Wider Chassis, Carriage fixes, and other fixes with your 3D printer. Click on the button and save the file on your computer to work, edit or customize your design. You can also find more 3D designs for printers on The Taz Pro Fix Project - Hardware Endstops, Wider Chassis, Carriage fixes, and other fixes.