The Tip Nipper
thingiverse
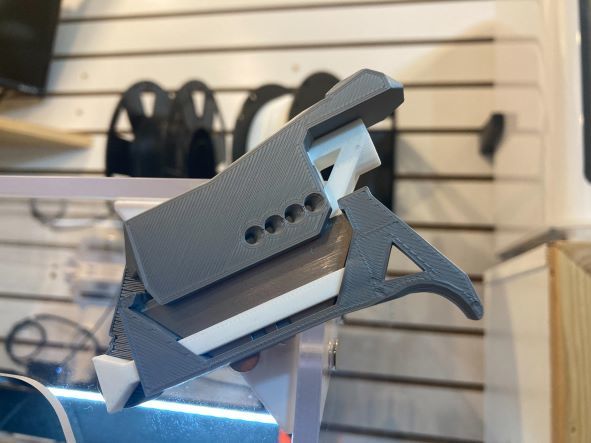
This is the Tip Nipper filament cutter. It uses a standard utility razor blade to cut your 1.75 mm filament at a 45 degree angle and keeps the offcuts in a removable tray so they don't go flying everywhere. There are four 2.8 mm holes that are large enough to facilitate a globby melted end. This is so you can dull the blade in four different places before turning it around to use the other half. I designed it with function, efficiency, and safety in mind. I printed almost 20 versions as I honed and tinkered it into a design that was worthy of sharing with the world. The nipper consists of 4 pieces: the Blade Side, the Holes Side, the Blade Strap, and the Offcut Tray. I have taken every consideration to ensure that this is a safe and effective tool, but I cannot make any guarantees against accidental cuts and such. Please be careful during assembly, and always be mindful of the blade. To assemble, simply line the Holes Side's hinge up with the grooves on the Blade Side's hinge and insert. Insert a standard utility blade into the depression on the Blade Side. Note that you will need to insert the blade into the corner cavity and then continue to lay the rest of the blade into place. Insert the Blade Strap into the rectangular hole and press it all the way through across the top of the blade, and insert it into the rectangular hole on the opposite side. It should click into place. This fully locks the blade into place, as well as the hinge. Then, squeeze the Holes Side and the Blade Side together until they are parallel, and slide the Offcut Tray tongue into the groove on the Holes Side. Continue to gently squeeze the two sides together as you slide the Offcut Tray into place. Note that there is a tab on the offcut tray and a tab on the bottom of the Blade Side. The tab on the Offcut Tray keeps the tab on the Blade Side from opening all the way, thus keeping the blade closed in and protected by the Holes Side. Almost done. Optionally, insert two 3mm X 8mm magnets into the cavities on the bottom of the nipper to expand your options for storage. There is a small glue gap, so you will need to super glue the magnets into place if you want them to stay in. Now you're all set! Note: The best way I have found to print this is with the Blade Side right-side-up and the Holes Side upside-down. Supports were needed underneath half of the Blade Side and underneath half of the Insertion side, as well as underneath the spring on the Insertion Side. I have included the G-Code file that I used to print my final version of the Tip Nipper. It uses .2mm layer height, 210/206 PLA temperature, 60 degree bed heat, supports in all the right places, and 30% infill, as well as an 80% infill modifier on the Blade Strap, Offcut Tray tongue, Blade Side hook, and most of the Holes Side. It was sliced on PrusaSlicer for my MK3S+. It is a 3 hour 54 minute print, but it produces a quality tool. Please feel free to sahre makes! Comments, reviews, suggestions, and questions are always welcome. Happy printing!
With this file you will be able to print The Tip Nipper with your 3D printer. Click on the button and save the file on your computer to work, edit or customize your design. You can also find more 3D designs for printers on The Tip Nipper.