The XCLIP, a Raspberry Pi (and PCB) mounting solution
thingiverse
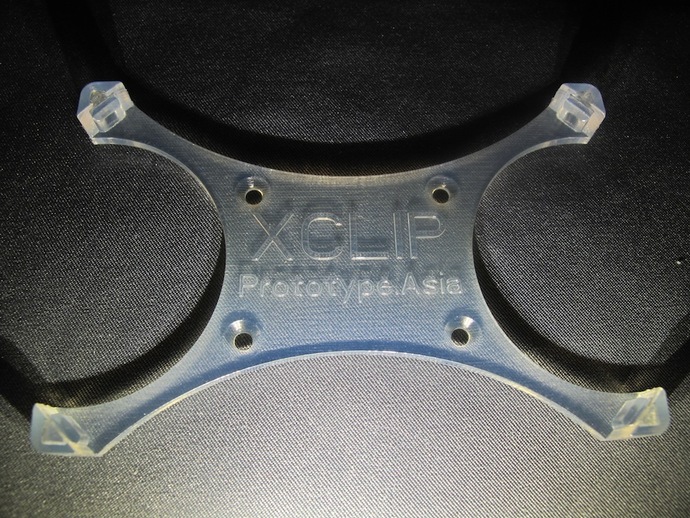
At Prototype.Asia, we utilize Raspberry Pi computers and FPGA prototyping boards to create multifaceted prototypes for retrofitting devices, objects or places like televisions, refrigerators, lamp posts, chairs, doors, and walls. To ensure a low-profile and cost-effective solution for mounting PCBs on any flat surface without adding more than 2mm in thickness to the assembly, we developed the XCLIP. The XCLIP is a fully parametrizable four-corner PCB mounting solution that can be securely mounted on any flat surface. It is configured using four parameters: PCB length, width, thickness, and component clearance. The XCLIP configurator generates an STL file which can be 3D printed in less than 25 minutes on either FDM or PolyJet 3D printers or any other 3D printer. The design of the XCLIP ensures a firm hold on the PCB without over-engineering or adding bulk, and it increases retention force as the PCB is pulled away from the mounting surface. It achieves this by centering the mounting plate and using thin flexible arms to hold each corner of the PCB. The XCLIP can be purchased on Shapeways and printed with customized specifications using PTC Creo. Printed parts may require filing down to allow clearance for components like RJ-45 connectors, and FDM printers may need an extra 2mm in the PCB's XY plane. A Raspberry Pi FDM-specific STL is also included for reference.
With this file you will be able to print The XCLIP, a Raspberry Pi (and PCB) mounting solution with your 3D printer. Click on the button and save the file on your computer to work, edit or customize your design. You can also find more 3D designs for printers on The XCLIP, a Raspberry Pi (and PCB) mounting solution.