The YC66 Special - Gasket Mount, Thin(ner) Bezel Version
thingiverse
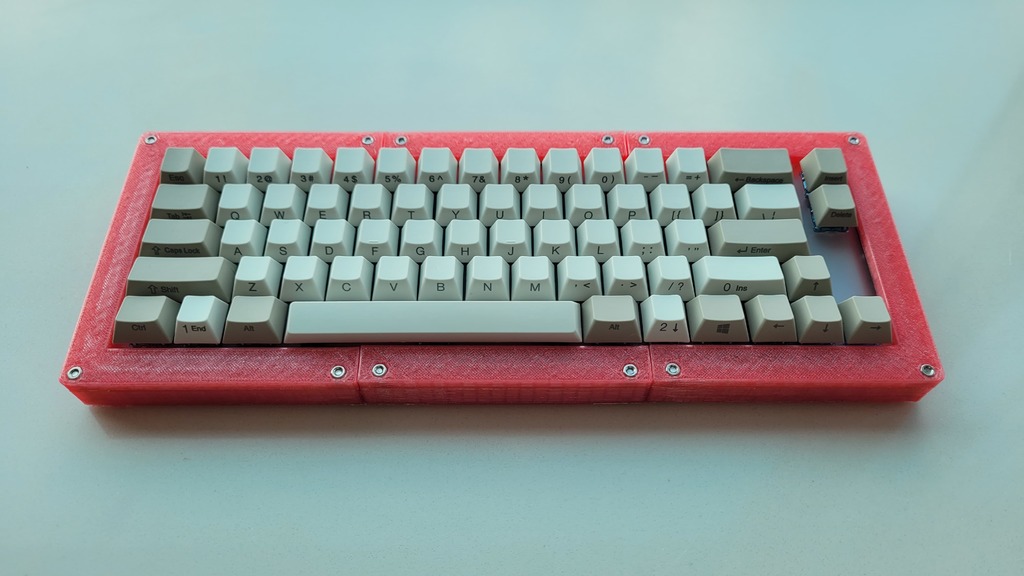
INTRODUCTION: This is a poron gasket mount case for the YC66 plate and PCB. (I am not certain whether it will work with the Womier K66 or Gamakay K66.) It is a variation of the case posted here: https://www.thingiverse.com/thing:4756026. As compared with that earlier version, this version has thinner bezels (for faster printing), a lower front (for more comfortable typing), and a space for a weight. Also included with this version is an alternate top-half/top-right piece with a blocker to cover the previously exposed top-right portion of the keyboard. N.B. I modeled the screws around M3 screws with a head diameter of 5mm, which I've belatedly realized is insufficient. Screws with larger heads therefore will not work. PARTS LIST: YC66 plate and PCB M3 x 20mm screws x 6 (top row screws) M3 x 16mm screws x 6 (bottom row screws) M3 nuts x 12 Poron foam adhesive strip (2 mm thick, and either 3 mm or 5 mm wide) https://item.taobao.com/item.htm?spm=a1z09.2.0.0.67002e8dkmCU09&id=596691601583&_u=920rh52k32ea Keyswitches Keycaps Silicone/rubber feet (Optional) Case foam (Optional) ASSEMBLY INSTRUCTIONS: (1) Print out the case. If your printer's build volume is large enough, you can print out each half (TOP HALF and BOTTOM HALF) in its entirety. But I've also sub-divided the case into six parts (top left, top center, top right, bottom left, bottom center, and bottom right), in the event your build volume is too small to print out an entire TOP HALF or BOTTOM HALF. If you want a blocker to cover the exposed portion in the top-right of the board, you should print the ALTERNATE TOP HALF WITH BLOCKER instead of the TOP HALF, or the alternate top-right with blocker instead of the top right. Depending on the accuracy/tolerances of your printer, you might consider only gluing/binding the parts making up the lower half of the case (assuming you are printing out the subdivided bottom), in order to ensure that you can properly align the screw holes on the bottom and top halves of the case. By contrast, if you also glue the top half together, it may become more difficult to align all twelve screw holes on the top and bottom halves. (2) Apply the poron adhesive strips to the top and bottom halves of the case. You can either apply the poron along the entire perimeter of the case, or at discrete segments, according to your preference. (3) Disassemble your YC66 (i.e., unscrew the screws). You will only need the plate layer and PCB. (4) Install switches and keycaps onto the YC66 plate/PCB (if not installed already). (5) Sandwich the YC66 plate between the top and bottom halves of the case and screw together. The distance between the top and bottom ledges is approximately 6 mm, and the YC66 plate is approximately 4.7 mm, so the poron on the top and bottom halves of the case will be compressed to about a combined 1.3 mm. OPTIONAL STEPS: Add a case weight: https://item.taobao.com/item.htm?spm=a1z09.2.0.0.67002e8ddBjOAX&id=560138068179&_u=720rh52kbf19 Add plate foam prior to installing switches. Add silicone/rubber feet to underside of case. Add case foam to bottom of tray. TO DO: Increase screw head diameter. Hide screws. Add space for hot-swappable magnetic badge.
With this file you will be able to print The YC66 Special - Gasket Mount, Thin(ner) Bezel Version with your 3D printer. Click on the button and save the file on your computer to work, edit or customize your design. You can also find more 3D designs for printers on The YC66 Special - Gasket Mount, Thin(ner) Bezel Version.