Thing-O-Matic Reel and Filament Control System
thingiverse
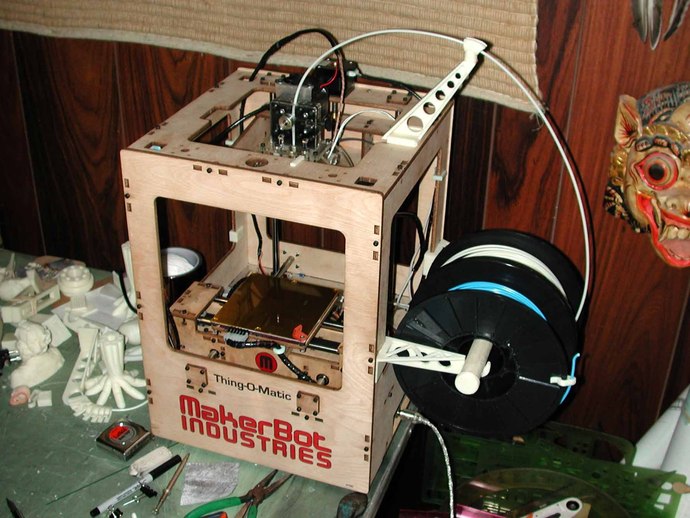
This easy-to-assemble system offers several advantages. Parts snap or push together without needing glue, and the Reel Arms can hold two 8-inch reels on the Thing-O-Matic's side or back. Alternatively, you can place them on all three sides for six reels at once! The arms keep filament from spilling and make it easy to reload if needed. The Filament Guide Arm is adjustable, with the tip swiveling for a smooth path. Friction isn't an issue as filament easily pulls off the reel, and assembly requires no fasteners - just clipping onto the Thing-O-Matic frame. Set-up and take-down are quick, storage is minimal, and it includes a Filament Clip to hold idle filament on the reel. However, the Reel Arms may need adjustment for a 110mm x 110mm build platform, and the Filament Guide Arm requires 106mm in the Z plane. Print all parts with 0 extra shells and 100% fill, but some cleanups may be needed. The bar across the arms should ideally be a 1-inch diameter by 12-inch long piece for easy reeling. End caps help prevent slipping and improve appearance; adjust size in your slicer to fit your material. Assembly involves snapping the Filament Guide Tip onto the top of the Filament Guide Arm, sliding it into the clip, pushing Reel Arms onto the frame, and attaching end caps to the dowel with a hammer or glue. Finally, remember to remove the Filament Clip from the reel before pulling out filament to avoid damage.
With this file you will be able to print Thing-O-Matic Reel and Filament Control System with your 3D printer. Click on the button and save the file on your computer to work, edit or customize your design. You can also find more 3D designs for printers on Thing-O-Matic Reel and Filament Control System.