ThinkFun BoatBuddy Expansion Set Upgrade
thingiverse
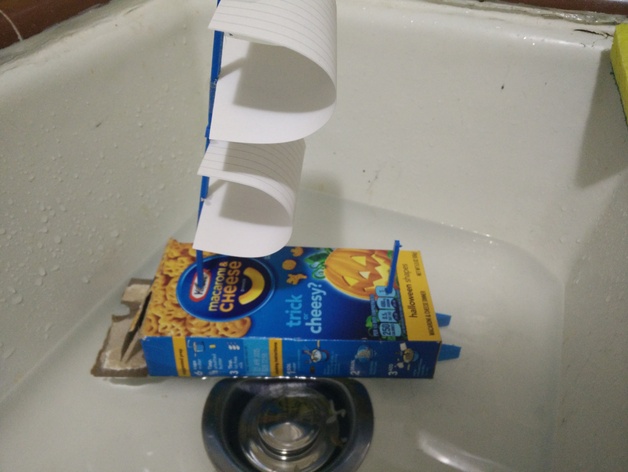
UPDATE 11/4/2015 With my low-cost purse i3 printer, I successfully printed it without much trouble. I uploaded pictures of my BoatBuddy and I resized the files except for the mast, which I scaled up by 105% and extruded an extra 2mm to ensure that the paper remained securely in place within the mast. The top portion of BoatBuddy features a hole designed specifically to be compatible with the rod from Thinkfun. As this project will require further refinement before completion, please report any issues so I can address them promptly. Additionally, I'm willing to share my print settings. **REQUIRED MATERIALS 1 x BoatBuddy At least 2 masts 1 or more connectors (equal to the number of masts printed) Water-resistant adhesive or glue A rectangular box with dimensions 7" x 1 1/4" x 3 2/5" (Macaroni and Cheese packaging) Index cards or sheets measuring 3" x 5" in size, equal in quantity to the number of masts required This is BoatBuddy - an innovative solution designed to enhance your ThinkFun set by providing you with control over land and sea. BoatBuddy comes equipped with a sturdy float that supports a standard Macaroni and Cheese box and can be used for either water or wind-powered functionality. **INSTRUCTIONS 1) Find an ideal location within the box where the mast will smoothly exit from both sides. Make a hole of sufficient size to accommodate the mast but not too large. 2) The mast's length is determined by your preference; however, exceeding its optimal height can cause loss due to excessive torque and decreased stability. Note that the recommended maximum mast length for each print is 75mm, while the connector piece serves as a joint linking the masts together, with two small openings on either side where you can insert an index card (oriented along the shorter edge) and secure it in place using adhesive or glue. 3) Feel free to customize and display your BoatBuddy, adding an extra touch of creativity to your ThinkFun vehicle! **PRINT SETTINGS Rafts: None Necessary Supports: Not Required (But You May Opt for It) Resolution: Rectilinear Mode Enabled Infill Density: Set at 20% Additional Notes: Due to the layout of my print objects lying flat, supports were unnecessary. Nevertheless, it's your choice whether or not to employ them. **I USED SLIC3R FOR PRINT SETTINGS** The default settings included a 20% infill density; you may adjust this value down to at least 13% if you wish for greater strength without the need for support material in areas prone to damage during removal. To increase top layer stability, it is highly recommended that three layers are used. My own design exhibited slight imperfections at vulnerable spots which allowed water penetration. Material selection wise I opted for PLA since ABS tends to warp under certain environmental conditions and its odor is overwhelming. In the end my print bed broke, leading me to opt out from printing ABS. The layer thickness used initially is .2mm, whereas the remaining ones have been set to a minimum of 15 mm. Speed Settings: Outer wall perimeter speed: 45 mm/s Inner wall speed: 70% Infill speed: 40mm/s Solid infill top speed: 35 mm/s Support speed: 30mm/s Bridges: 50 mm/s Gaps: 20mm/s Main movement speed:100mm/s Speed on the initial layer: 30% of its total print velocity Optimum max velocity : 80 mm/s
With this file you will be able to print ThinkFun BoatBuddy Expansion Set Upgrade with your 3D printer. Click on the button and save the file on your computer to work, edit or customize your design. You can also find more 3D designs for printers on ThinkFun BoatBuddy Expansion Set Upgrade.