Three digit electromechanical Counter / Register 2.0
thingiverse
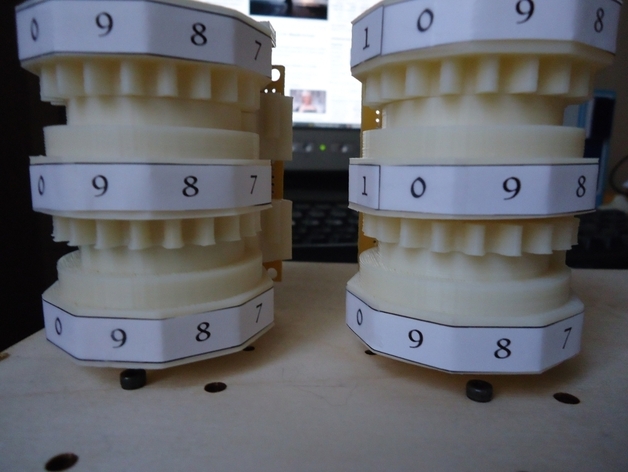
This 3-digit register version 2.0 is designed for an electromechanical computer, featuring a stepper-driven mechanism that functions as a 3-digit counter ranging from 000 to 999 before rolling over. Upon reaching "000", three reed switches will close and complete a circuit, indicating the condition. This improved version uses fewer components and has been tested at least once. It also boasts larger digit surfaces for enhanced visibility and offers printable labels for easy identification. To assemble this counter, begin by printing one copy of each piece and an additional copy of the 8-tooth partial gear. Mount three reed switches in a reed holder leveler, connecting them in series with proto-board. Attach the reed_holder_leveler to the stepper motor/frame using an M3 bolt. Next, secure a 1/8" piece of wood between the stepper motor and the reed_holder_leveler, ensuring the motor is angled at 45 degrees relative to the front of the counter. Install two 4-40 bolts in a mounting hub and attach it to the motor shaft. Place a 1/8" magnet on the face of each digit wheel, oriented correctly to trip the reed switch at an optimal distance. Attach digit_wheel_labels using scotch tape, with the "0" facing the magnet side. Place the 'counter_gear_lowest' on top of the mounting-hub/motor-shaft, followed by 'counter_gear_top' and 'counter_gear_highest'. Ensure the 20-tooth gear is at the bottom of each layer. Rest a segment of 5/32" brass tube on top of the motor shaft, reaching the reed-switch holder. Insert two 8-tooth partial gears between the digit layers and secure them with another brass rod segment. Upon completion, all three reed switches should trip when the counter reads "000", completing the circuit and indicating the condition.
With this file you will be able to print Three digit electromechanical Counter / Register 2.0 with your 3D printer. Click on the button and save the file on your computer to work, edit or customize your design. You can also find more 3D designs for printers on Three digit electromechanical Counter / Register 2.0.