Thumb-drive-style emergency cash holder (1 or 2 bills)
thingiverse
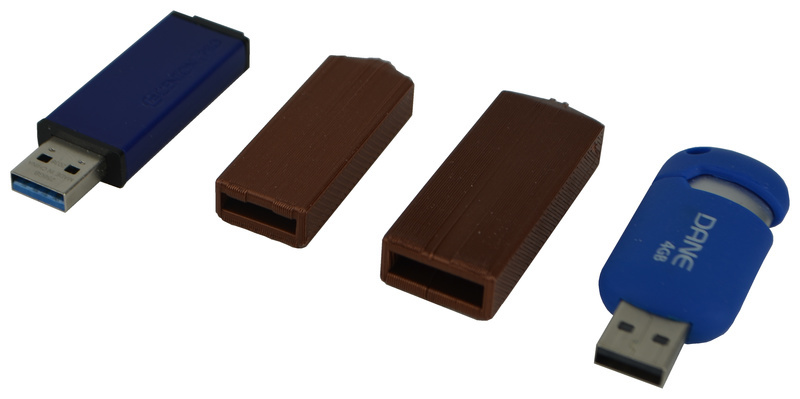
This is not a remix but was inspired by multiple other emergency cash things: [2797977](https://www.thingiverse.com/thing:2797977), [3087577](https://www.thingiverse.com/thing:3087577), [3977546](https://www.thingiverse.com/thing:3977546), [4061408](https://www.thingiverse.com/thing:4061408) First, some details, definitions, and caveats: * I'll use the visual of a rocket on a launch pad to describe this design; it has a nose cone (with a hole so it can be attached to something), a main chamber (which holds the money), and a nozzle (which keeps the money from falling out) * The money is a "Wad", defined with a width, height and thickness (front-to-back dimention) * This particular thing may be more difficult to open than the others (I haven't actually tried those), but I am able to do it with a key and in an actual emergency that requires cash there's a decent chance a screwdriver or pair of pliers can be found. * Select the model you want to print based on your printer's nozzle diameter, paying special attention to whatever preview you have available in your slicer. You want one perimiter shell with a tiny bit of squigly filament in between shells * The OpenSCAD file is attached for anyone who wants to dive in. I've also enabled the customizer but this is my first attempt at that, so your mileage may vary. So, looking at the existing emergency cash things, I was concerend that the grain of the FDM printing that makes cracking it open easier also means that the hole for a key ring is a weak spot. Putting it in a pocket, bag, etc. meant that unexpected leverage could break of the nose cone. So I decided I wanted to print mine on its side, but that was not an attractive option as anyone who's tried to print a cylinder on its side can tell you. Even printing with supports, at least in my experience, that thing is going to come out looking rather like Two-Face. That meant moving to a rectangular shape. And on its side, now the key ring loop would actually be a loop, with contiguous filament running all the way around from the nose cone to the nozzle. Since I also found tightly rolling a dollar bill to be... not my favorite thing, I experimented with folding. That went okay, and the end result was more or less rectangular, perfect for the new exterior shape I had in my head. It wasn't until I had printed my first test and was holding it in my hand that it occurred to me it looked a lot like a USB thumb drive. Then I added a two-bill version, with slightly different folding steps. ### Folding instructions (illustrated with attached photos): 1. with the bill(s) oriented as though you are reading the front, fold from one side to the other so the shape is now nearly square 2. fold in the same direction again so the shape is now 1/4 the original width, tall & narrow 3. fold in half from top to bottom; shape should now be nearly square again 4. * for one bill, make two folds in from the left and the right, each about 1/3 of the way in from the edges, like a brochure * for two bills, make one fold from top to bottom You now have a money wad that will fit one of the two sizes (I guess technically the single bill folded up will also fit in the two-bill design, you pedant, don't @ me!) ### Inserting the wad (also illustrated with attached photos): Pretty straight forward. I tend to put the end with the most raw paper edges in first, but it probably doesn't matter. Use something narrow to push the bill(s) in all the way. ### Breaking it open in an emergency (illustrated with yet more attached, blurry, photos): My technique is to put a key into the middle of nozzle opening at an angle such that the key makes minimal contact with the thing, focusing its force on the smallest area of plastic. Then rotate the key on two axes, straightening the key so the edges push against the middle of the nozzle walls while pushing down to focus that key edge onto the wall.
With this file you will be able to print Thumb-drive-style emergency cash holder (1 or 2 bills) with your 3D printer. Click on the button and save the file on your computer to work, edit or customize your design. You can also find more 3D designs for printers on Thumb-drive-style emergency cash holder (1 or 2 bills).