Tic Tac Minifigure Display
pinshape
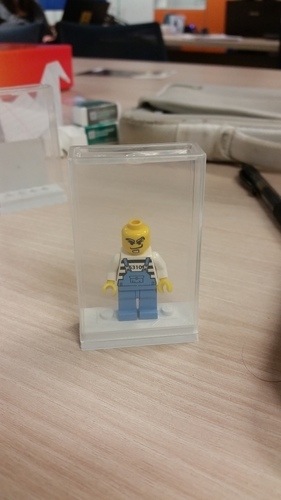
This was created following the Tic Tac Box Challenge by DesignMakeTeach. As soon as I read about it on Twitter, I thought this would be something I could design. I started thinking about what kinds of things could fit inside a Tic Tac container and eventually thought of a Lego Minifigure. I initially considered adding a 2x4 Lego strip to the design, but it ended up being too wide to fit well. So, I cut the 2x4 strip down to 1x4, centered it, and made this design. The design with _v1 at the end is actually not centered, though. It's a little bit off. At first, I considered this pointless, but I'm thinking having the strip offset in the y dimension might be helpful for either having the guy hold up his hands or to fit a flowing cape. However, the _v1 design is not very off-centered and might not make a considerable difference. I printed one off and will update this after some testing. The _v2 file is centered. I then repaired it in Netfabb Basic; the original had shells around each individual part, Netfabb combined them into one. It shouldn't have any weird holes or whatnot. Let me know if you experience any problems design-side. The idea is to have a fun way of displaying your cool, custom Lego minifigures using something you might normally throw away; a Tic Tac container! Print Settings: Printer Brand: LulzBot Printer: TAZ 5 Rafts: No Supports: No Resolution: Don't remember Infill: 20% Notes: If you have a printer with some bridging issues, I would suggest trying printing at a higher infill. When it was printing, it did some weird things when I got to the top part of the infill. The TAZ was able to do it, but I don't know if it would turn out the same way with other printers. Something to consider. I also printed this in High-Impact Polystyrene (HIPS) which may mean it turned out differently than a print in ABS or PLA would. Post-Printing: I didn't need to do any post-printing work. I used the "High Detail" print profile in Cura and had no issues with having to sand the piece down. I did put a minifigure onto the Lego strip immediately, figuring that it might be able to shape the hot plastic into better fitting the inside of the little leg holes. It was a tight fit for me, so adjusting with sandpaper might be beneficial if the fit is too loose. The actual lid portion fit very snugly into a Tic Tac box container! I usually have to use a fingernail between the model and the container to get them apart, which I think was just enough force to keep it together without making it impossible to pull apart. How I Designed This: I used the Chrome App 3D Design something. I like the ease of use for the Boolean functions this program has. I used DesignMakeTeach's original design of the Tic Tac Box lid and orb74's design of a Lego 2x4 to create this model. I will be adding the individual components into a Tinkercad project so that other people can edit them if they would like (move the Lego strip around or whathaveyou).
With this file you will be able to print Tic Tac Minifigure Display with your 3D printer. Click on the button and save the file on your computer to work, edit or customize your design. You can also find more 3D designs for printers on Tic Tac Minifigure Display.