TIL+ Wood Panel Walls and Opening Door for Resident Evil 2 Boardgame
thingiverse
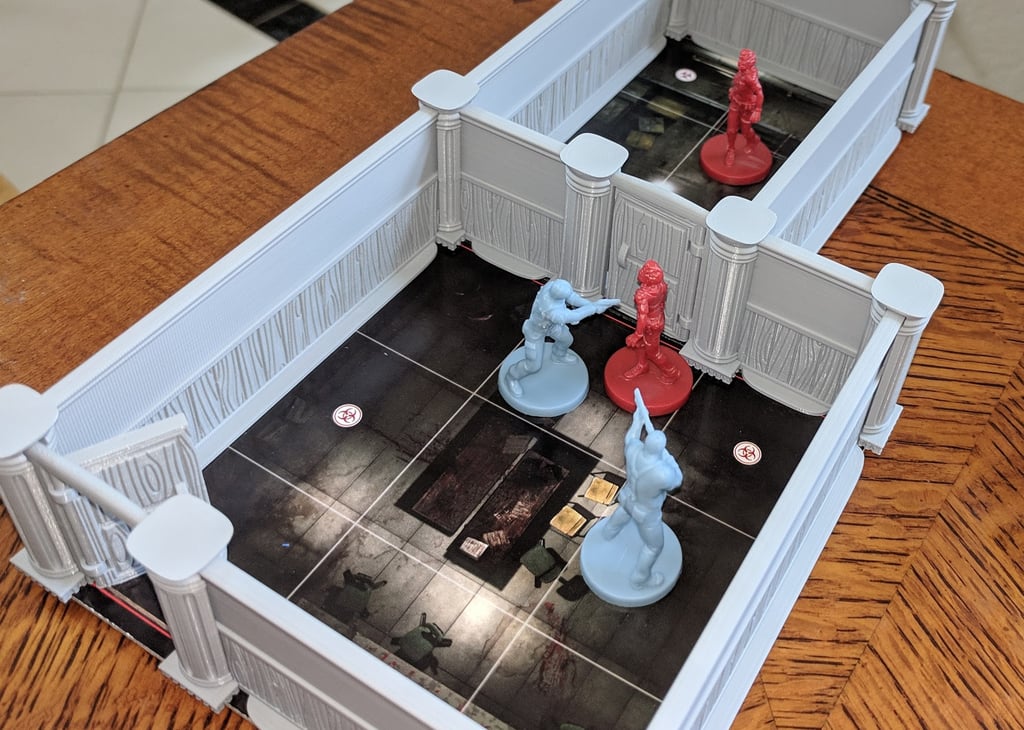
I got the Resident Evil 2 board game and one thing pretty immediately popped out at me: this thing needs better walls. So, I made a wall to replace the little cardboard wall overlays, except that those walls looked weird being the only 3D terrain element on the board, so I figured that I would expand my wall collection to go around the perimeter of the tiles as well as replacing the overlays! That led to the creation of the columns with cutouts to allow walls to plug into them from the various ways that walls might be needed, allowing them to go around the tiles and avoid having to make a custom set of walls for every single tile. Of course, with 3D walls came the need for a 3D door, so I figured that it would be cool to have a door that could slot into the columns the same way a 1 square wall segment would... so I made that, too! These walls are sized to work with the Resident Evil board game, ranging from 1 square to 4 squares in length. In real human measurements, the walls are all 40 mm per square - 7 mm for the tile boundary (which is where the column lives). This set of sizes matches the way that the squares are made on the tiles, where the squares on the edge of the tile are actually 3 mm narrower on the edge side (so that the tile edge itself, rather than the marked square, is the 40 mm mark). These all printed just fine for me on a Prusa MK3 with no supports (I used .1 mm layers, but .2 would probably work fine too), but you'll need to ensure that you've got good bed adhesion! This is probably superstitious, but I always rotate these (the doors and walls) so that the long dimension is in line with my printer's Y axis (since that's how the bed moves)... I just figure that there's less chance of things coming loose that way. The door has print in place hinges and might take a little wiggling to come loose after printing, since the function of the hinge basically depends on your printer's ability to bridge. There might also be some loose strands in the doorframe over the door (once again, a long bridging spot), but you can either melt them back on with a soldering iron or just cut them loose. This set of walls (and door) is an interior wood-panel theme - I intend to make sets for other themes in the not-too-distant future, too! Right now, I'm planning on a brick theme (for streets or sewers tiles) and a tile theme (for the lab or possibly sewers tiles)... so hopefully they'll be available soon! As always, the .blend file that I used to make these is available to my patrons at https://patreon.com/VirtuallyJason. If you appreciate my work and can spare a few dollars each month, please consider joining in!
With this file you will be able to print TIL+ Wood Panel Walls and Opening Door for Resident Evil 2 Boardgame with your 3D printer. Click on the button and save the file on your computer to work, edit or customize your design. You can also find more 3D designs for printers on TIL+ Wood Panel Walls and Opening Door for Resident Evil 2 Boardgame.