Tiniest Programmable 2 Key RGB Macro Keyboard w/ Arduino Pro Micro
thingiverse
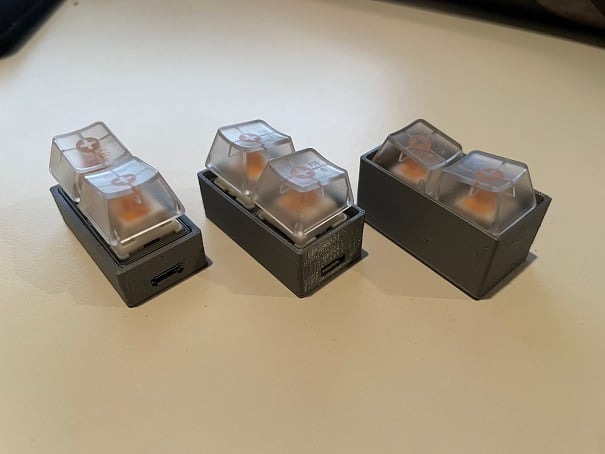
(UPDATE June 22, 2021) I'm getting a SLA printer this week, and I will be building a v2 of this in the near future. DETAIL SUMMARY AND ASSEMBLE GUIDE UPLOAD SOON This is the smallest possible 2 Key Macro Keyboard using Arduino Pro Micro. The Arduino Pro Micro uses ATmega32u4, which support USB HID device natively, making it the best thing for macro keyboard. Rough Assembly guide: 1. print parts (1 top 1 bottom) 2. cut LED stripe to include 5 LED. 2. Solder LED strip to Arduino Micro using magnet wire. Solder magnet wire on the arduino pin that will be connected to the switch, leave some extra so its not too hard to solder it onto switch later. 2.5 Coat Arduino pins and LED stripe with Nail polish. This is to prevent shorting, they are so close together there could be arduino pin touching the led solder points. 3. Put Arduino Pro Micro in the bottom case 4. Stick LED to the inner wall (bottom of LED stripe should extend to reach the same bottom of arduino, the LED stripe should be just below the top of the SLIM version of the bottom case (0.5mm below) 5. If you look carefully, or use your finger to feel the bottom case, you will notice the top edge of the SLIM bottom case is warpped towards inside on 3 edges (except the edge above the USB port.) This is to make sure the top case will stay in place after install. 6. install top case into the bottom case. This step is not very easy if your print of the top has rough feets. after it gets to the bottom, it will stuck between the warpped edge and the LED 5050 SMD and also the feet will all reach the bottom (some reach case bottom, some will push against the arduino pro micro, one will push on usb port). Make sure you don't install it reversed, there is an additional feet on the side of the USB port. 7. solder switch to arduino 8. Bend the metal feet of the switch. The metal feet is taller than the bottom plastic part, it will push down on the pro micro and even cause short circuit. Then push in switch. 9. connect to PC and flash the arduino code with arduino IDE. 10. Done.
With this file you will be able to print Tiniest Programmable 2 Key RGB Macro Keyboard w/ Arduino Pro Micro with your 3D printer. Click on the button and save the file on your computer to work, edit or customize your design. You can also find more 3D designs for printers on Tiniest Programmable 2 Key RGB Macro Keyboard w/ Arduino Pro Micro.