Tinkertoy Construction Set - Replacement Parts
prusaprinters
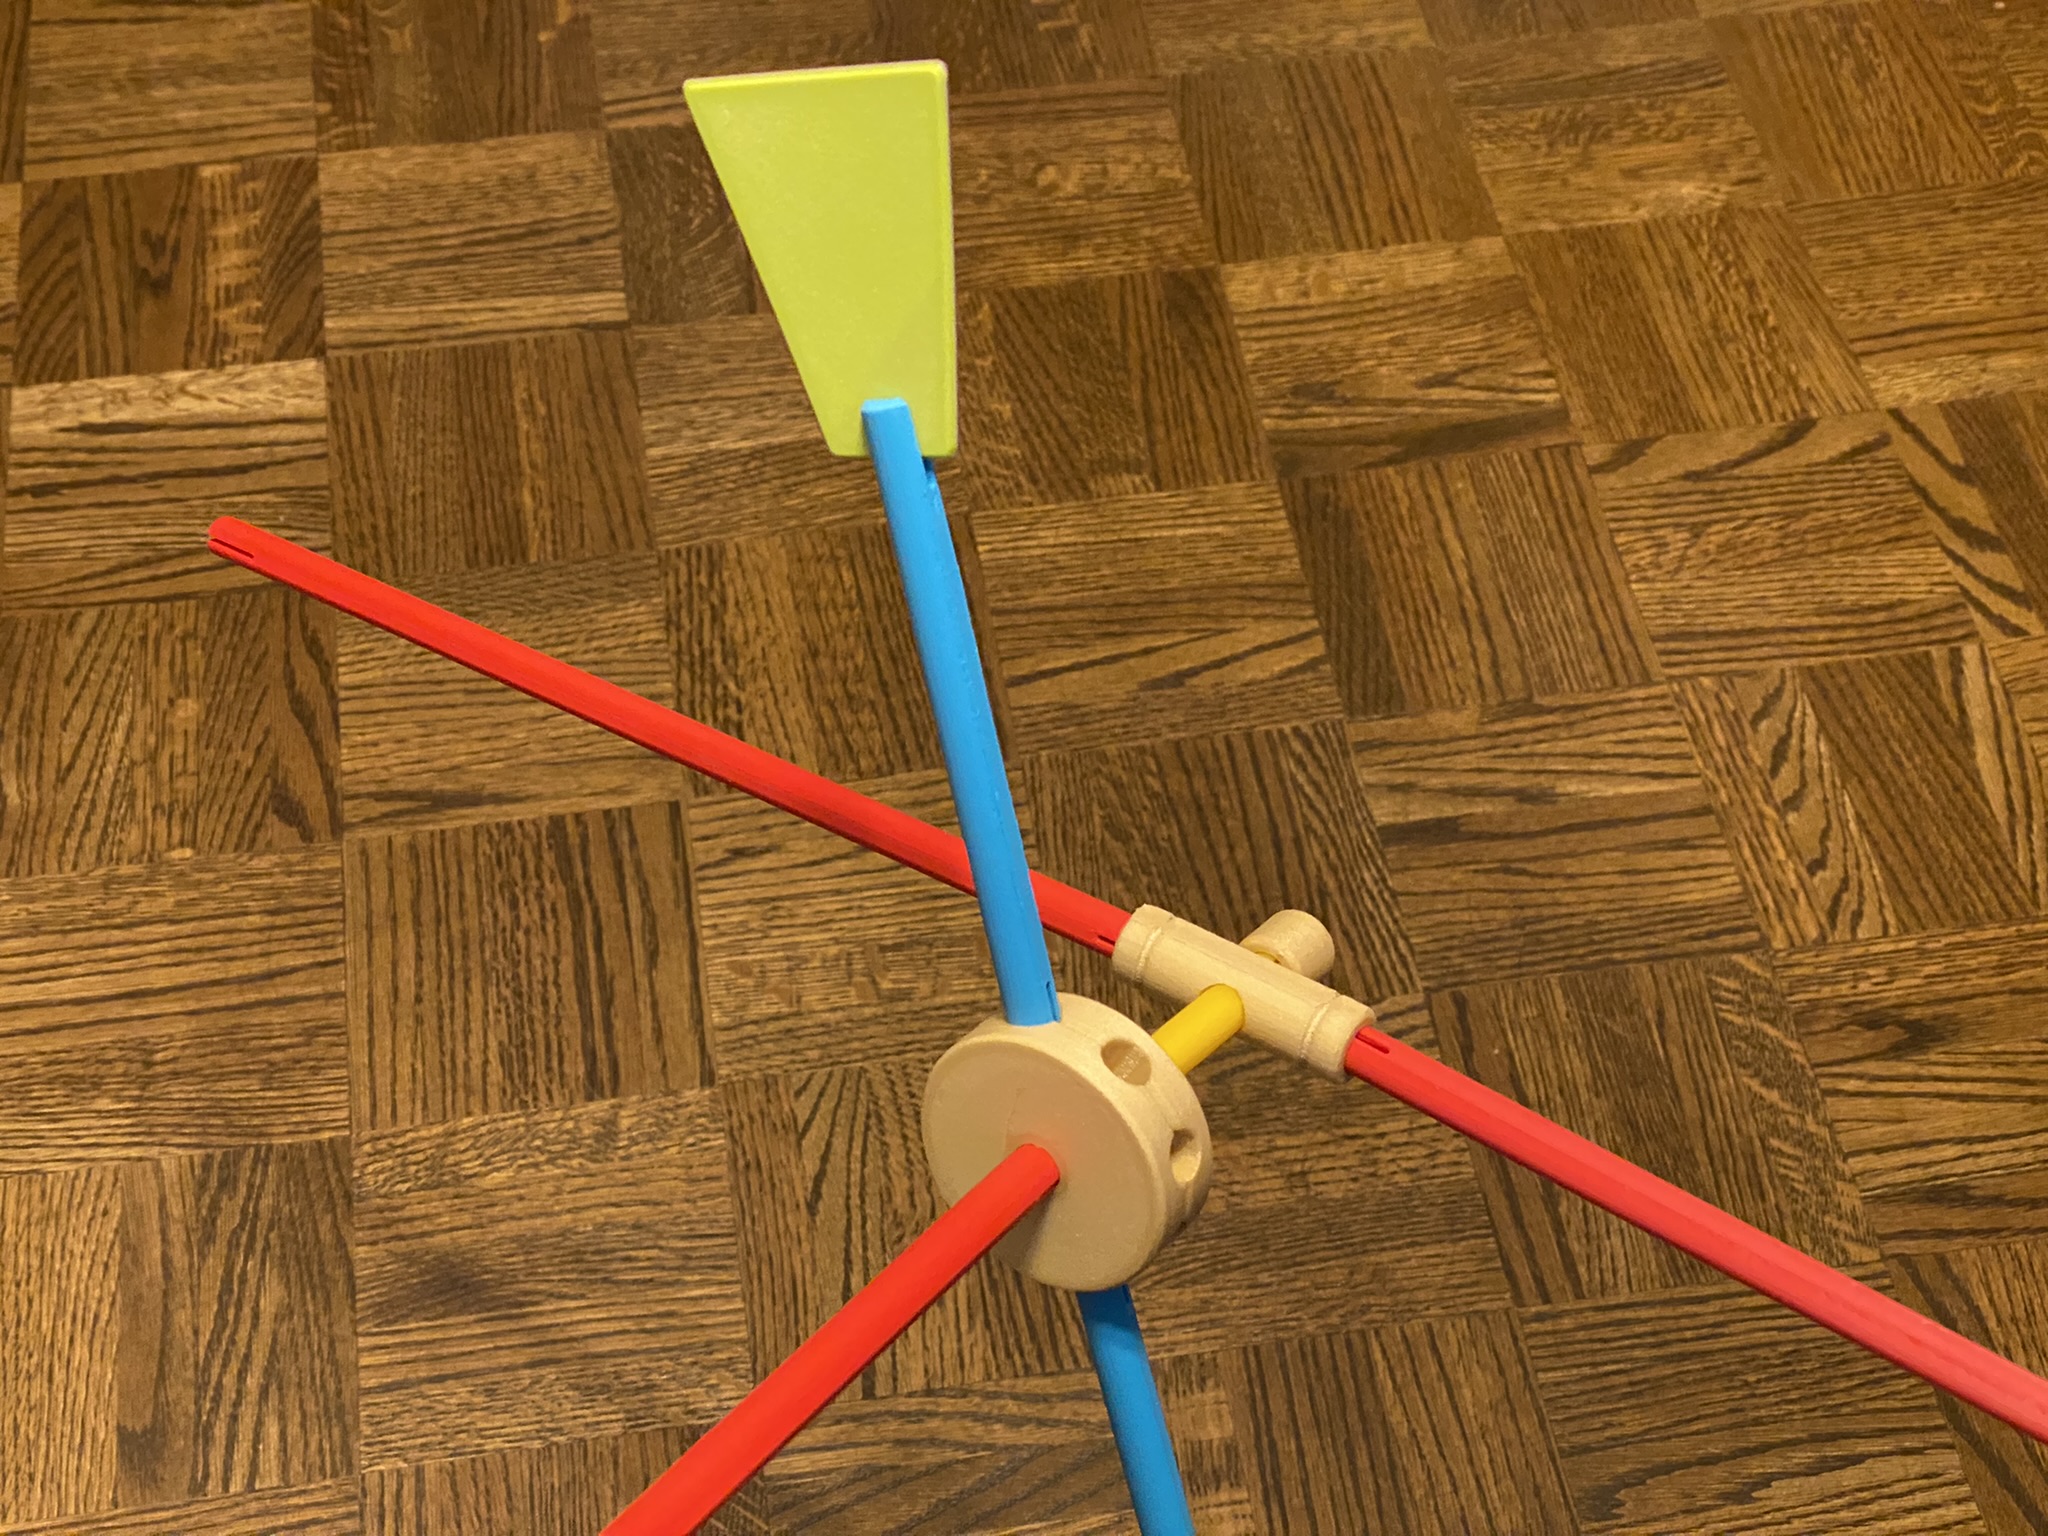
<p>These models are replacement parts for the <a href="https://www.basicfun.com/tinkertoy/index.html">Tinkertoy Construction Set</a>. I've designed them using an existing set as a reference. I may be missing a few parts that weren't in my set.</p><p><strong>Parts included:</strong></p><ul><li>Rods in 5 sizes. The filename has a nominal size in mm, but the actual size might be different by a small amount. These have been updated on 2022-07-28 to slightly increase the diameter for a better fit in the snug wheel.</li><li>Spool (8 tight fits around at 45 degree angles, and a tight fit in the centre)</li><li>Wheel (loose fit in the centre)</li><li>Coupling (tight fit at the ends, and a loose fit in the centre)</li><li>End cap (tight fit), updated 2022-07-28</li><li>Flag</li></ul><p><strong>New additions (2022-07-28):</strong></p><ul><li>Articulated Coupling (tight fit at the ends)</li><li>Five Hole Connector / Part W (loose fit in the centre, tight fits everywhere else)</li><li>Plastic Small Peg (snug fit—goes on but doesn't rotate freely)</li><li>Plastic Wheel (snug fit—goes on but doesn't rotate freely)</li></ul><p>As a quirk of the design process for 3D printing, I've flattened the rods and couplings along the long axis by a small amount. This provides some surface area for build plate adhesion and <i>should</i> allow you to print them without a brim.</p><p>It's also very important to orient the long pieces (rods and couplings) so the layer lines are along the longest axis. This will ensure the maximum strength for the part and will resist breaking during play.</p><p><strong>Printing tips:</strong></p><ul><li>Rods: Print as oriented in the .stl file. If the rod is too long, print at a 45 degree angle (rotate z-axis in slicer). A brim isn't necessary, but the ends <i>might</i> curl up a bit. This shouldn't affect the functionality of the part.</li><li>Spools, wheels, five hole, and regular coupling: Print as oriented in the .stl file. A brim shouldn't be necessary. Clean up any stringing with a heat gun blast for a (very) few seconds.</li><li>Articulated coupling and plastic small peg: Print as oriented in the .stl file. A brim might be useful because the part has very little bed contact area. The coupling is print-in-place and should move freely as soon as it cools down (and after you remove the brim, of course).</li><li>Plastic small peg: Print as oriented in the .stl file. A brim might be useful, but shouldn't be necessary.</li><li>End caps: Print as oriented in the .stl file. A brim might be very useful here, and should be easy to remove cleanly. Because of the bottom chamfer there really isn't a lot of build plate contact.</li><li>Flags: Print as oriented in the .stl file. A brim shouldn't be necessary.</li></ul><p><strong>Added fun:</strong></p><ul><li>Check out my original half-dome piece that adds a new dimension to Tinkertoy play: <a href="https://www.printables.com/model/289563-tinkertoy-sphere-game-montessori-style">https://www.printables.com/model/289563-tinkertoy-sphere-game-montessori-style</a></li></ul>
With this file you will be able to print Tinkertoy Construction Set - Replacement Parts with your 3D printer. Click on the button and save the file on your computer to work, edit or customize your design. You can also find more 3D designs for printers on Tinkertoy Construction Set - Replacement Parts.