tinkerVortex mk1, DIY vortex mixer for eppendorf tubes
thingiverse
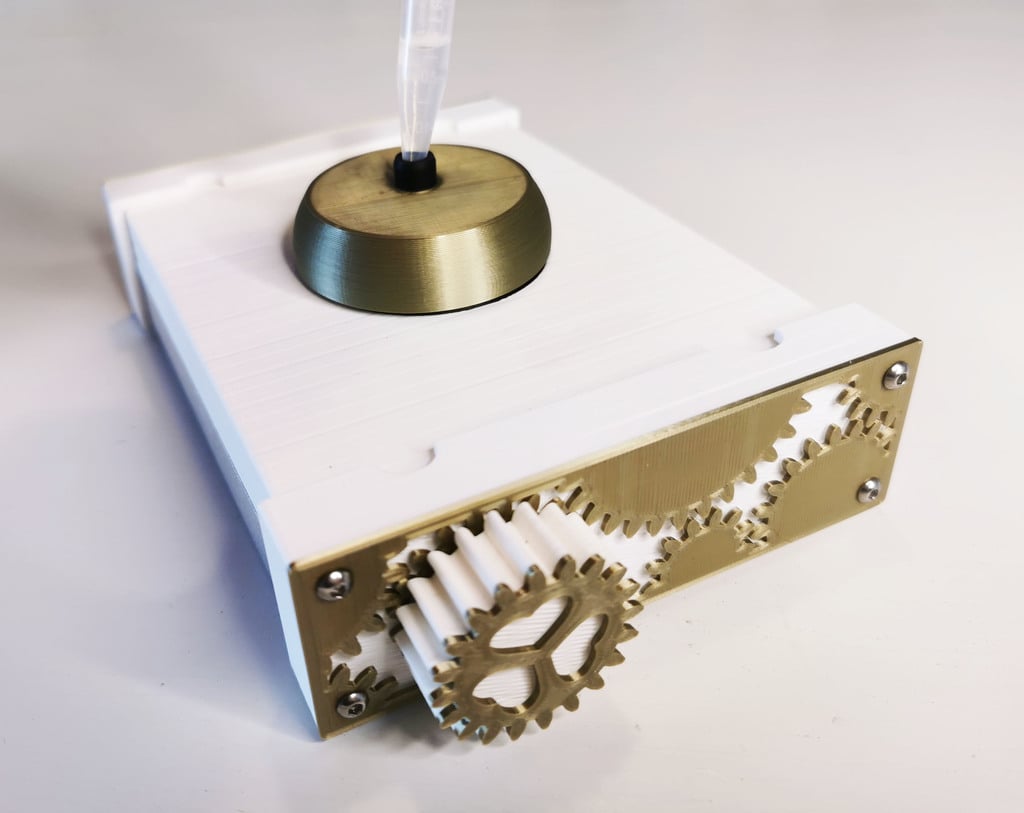
This time around we’ll be building a vortex mixer – I’ve decided on a rugged design which is fairly uncomplicated to put together. Considered making it activated by touching an Eppendorf tube to the vortex head like some commercial models but ended up deciding against it as it would add cost and complexity, without adding much value. A few words about safety: This machine has exposed moving parts and can be dangerous to use, especially if not constructed properly. It is not a toy, not for kids and I recommend that you use it behind a protective shield (such as a laboratory acrylic shield). Always protect your eyes (and other people’s eyes). See my other projects here: http://tinkerheart.eu 3d printing advice I printed my own machine parts using inexpensive PLA on a Prusa MK3S. Threaded parts should be printed at a layer height of 0.2mm or less. 3 perimenters and 10% or more infill works well for me. How to build your very own tinkerVortex Please watch this movie: https://youtu.be/rdctpkiBPlY Printed parts 1 x vortexFront 1 x vortexBack 1 x vortexHead 1 x vortexKnob 1 x vortexPlug 1 x vortexShell Other parts: Please visit http://tinkerheart.eu/tinkervortex-mk1/ for the complete bill of materials.
With this file you will be able to print tinkerVortex mk1, DIY vortex mixer for eppendorf tubes with your 3D printer. Click on the button and save the file on your computer to work, edit or customize your design. You can also find more 3D designs for printers on tinkerVortex mk1, DIY vortex mixer for eppendorf tubes.