Tiny e-Lab Bosch 18V Battery Adapter
thingiverse
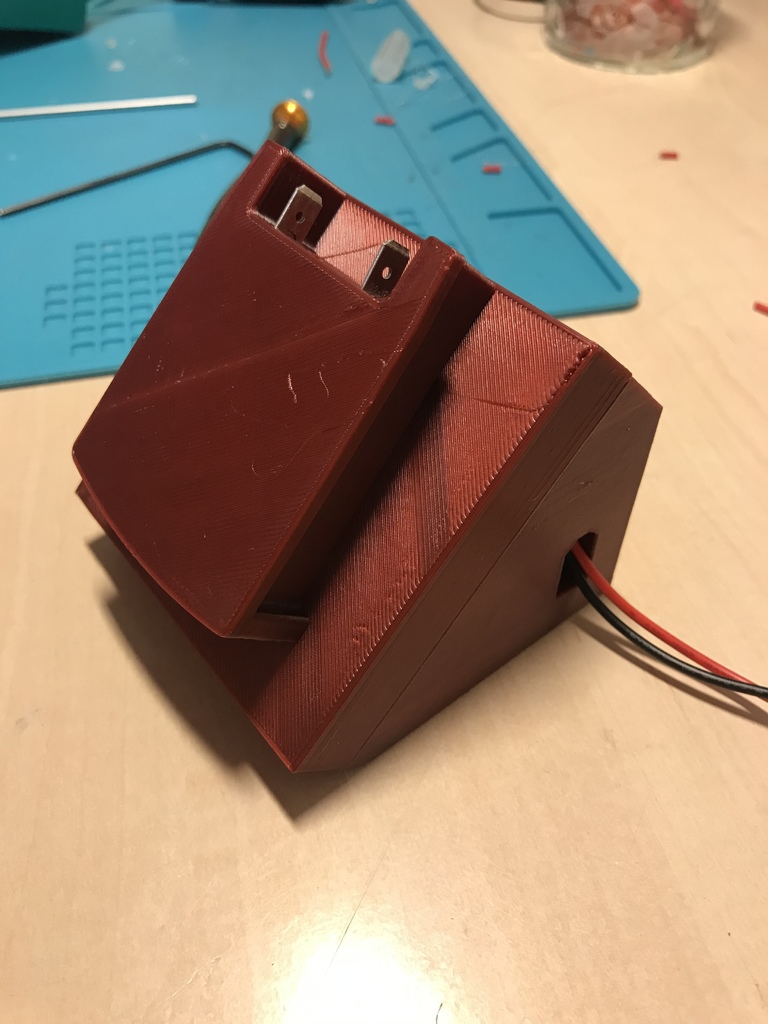
(The module in the photos is missing the two XT60 connectors on the sides. I'm still waiting to receive these in the mail.) This is a module for marcluer's Tiny e-Lab system: [Here](https://www.thingiverse.com/thing:2999383) You plug an 18V Bosch battery into it, and it will power any connected Tiny e-Lab modules with 18-20V from the battery. This will let you power a stack of Tiny e-Lab modules at 18-20V, away from a power outlet. The adapter fits "green Bosch" 18V Power4All batteries, not Bosch Professional 18V batteries. Make sure you don't plug in a power supply into your Tiny e-Lab stack while this is connected! I strongly recommend also printing Mpooh's fuse holder, and wiring in an automotive fuse in series with the battery. The battery probably has protection circuitry, but who knows how much power this battery can supply before protection shuts it down. I use a 3A automotive fuse on my module, and if it blows too quickly i might switch to 5A fuses. [Automotive Fuse Holder](https://www.thingiverse.com/thing:2757801) The part that actually mates with the battery is GreaseMonkey88's Bosch battery to XT30 connector adapter, modified to be slightly taller. [Adapter](https://www.thingiverse.com/thing:4244545) ## BOM - 6x M3 screws, length between 5-18mm - 2x Male 6.2mm spade connectors (battery connection - 2x Female 6.2mm spade connectors (automotive fuse holder) - 3A or 5A automotive fuse (these are dirt cheap!) - A pair of XT60 connectors, male and female. ### Optional You can add two more of the male and female spade connectors, if you want to make it easy to completely separate the front panel from the rear of the module. ## Wiring The battery adapter part needs two male spade connectors, to connect with the battery terminals. Crimp wires to the connectors, then glue them in place with lots of hot glue. The positive wire from the battery should go to a female spade connector in the fuse holder. The male and female XT60 connectors on the sides should be connected together, + to +, - to -. Then, the positive wire from the fusebox goes to + on one of the XT60 connectors, and the negative wire from the battery goes to the - on an XT60 connector. ## Assembly 1. The wiring and gluing of the adapter part must be done first. 2. Then the battery adapter screws onto the Front panel, using 4x M3 screws. - I suggest drilling out the tiny holes in the battery adapter to 2.5mm diameter. This will make it easier to screw in the M3 screws. 3. XT60 connectors should be glued in place, and wiring completed. 4. The Front clicks together with the Rear (start at the top). 5. The front and rear screw together using two M3 screws (from the underside of the module). Fusion 360 archive file is attached, if you want to tweak someting.
With this file you will be able to print Tiny e-Lab Bosch 18V Battery Adapter with your 3D printer. Click on the button and save the file on your computer to work, edit or customize your design. You can also find more 3D designs for printers on Tiny e-Lab Bosch 18V Battery Adapter.